Garage1217's 225G starphire build of pure awesomesauce

Garage1217

Member
The start off, this post is basically a compilation of posts I made on another forum I no longer really attend documenting my progress on my new build to it's current state. Let the fun begin!

My goals for this system....
- High energy efficiency / at or less than .03 cents per hour running cost at .11 cents per KWH
- Large water volume
- Lots of DIY projects

So to kick this off, here is the basic equipment list that is going into this system. Tank is ordered as well as many other items and many I already own
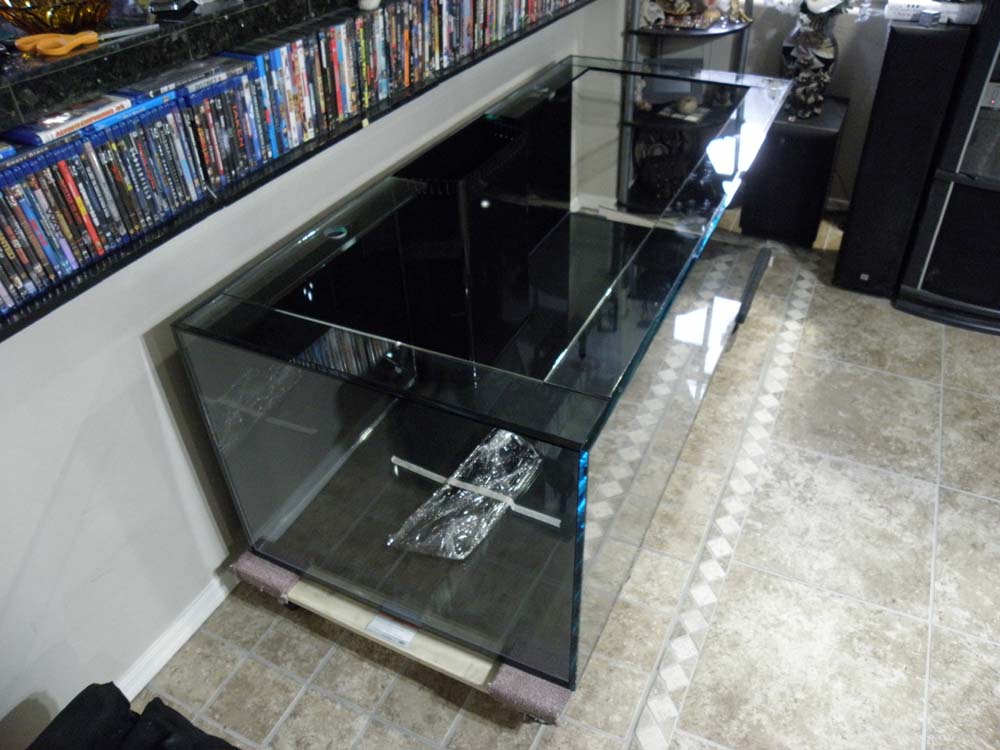
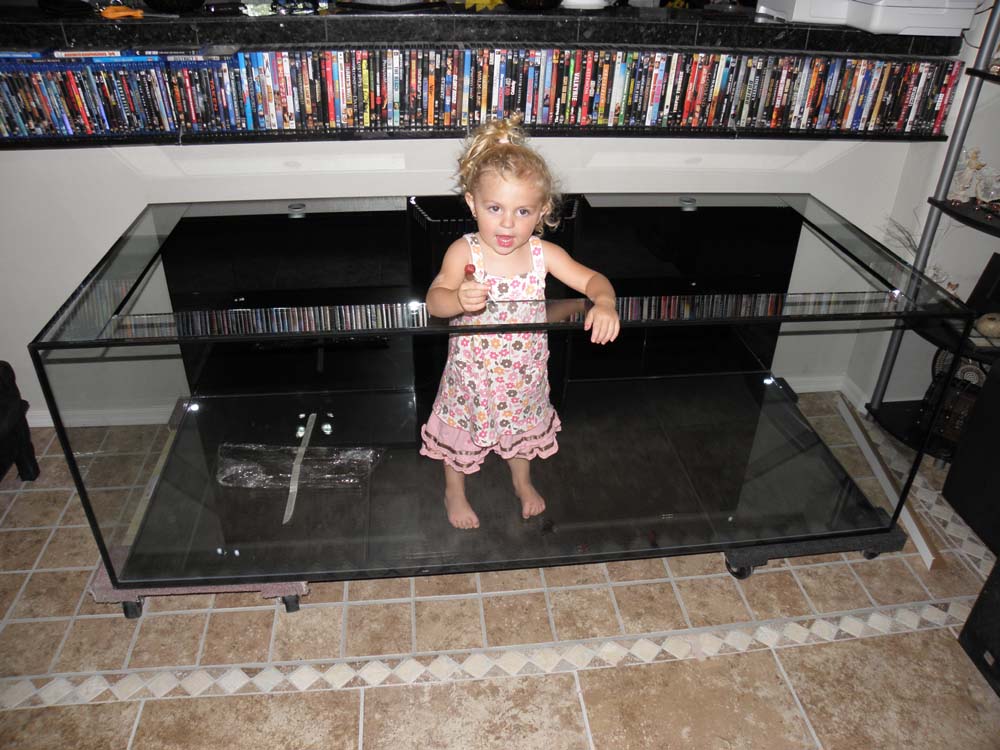
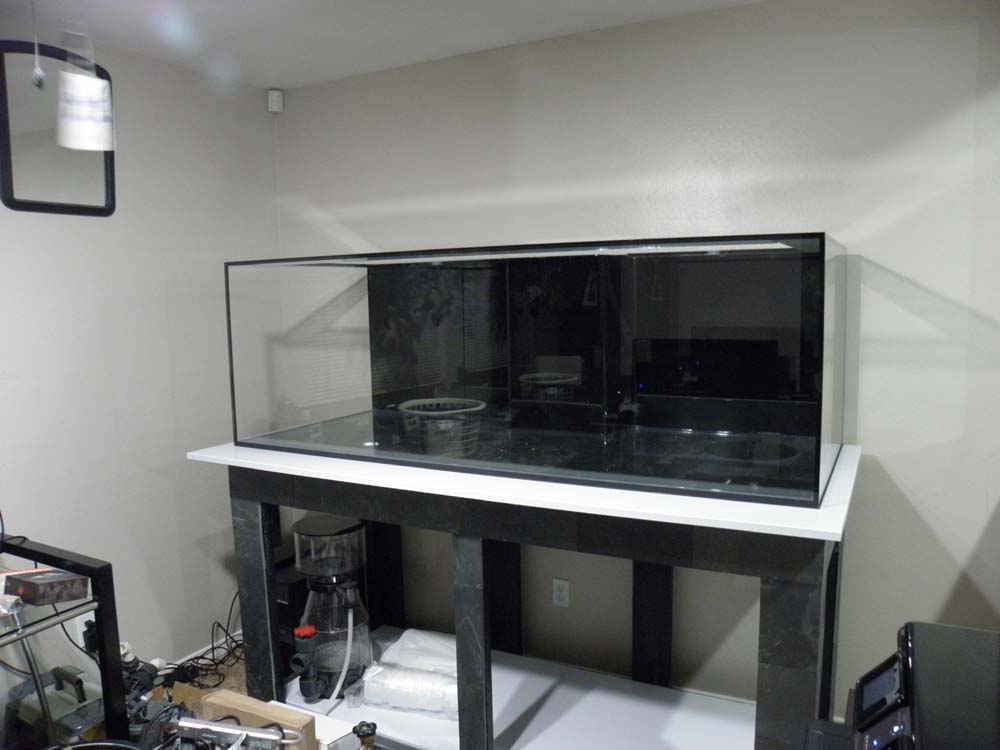
- 225G lee-mar trimless eurobrace tank / front 3 sides in starphire / black silicone / diamon edges, ABS bottom - under glass / epoxied back wall / 1" returns - 1.5" drains / drains will be setup as a partial siphon with emergency dump... basically the works. Even the eurobrace is starphire *LOL*
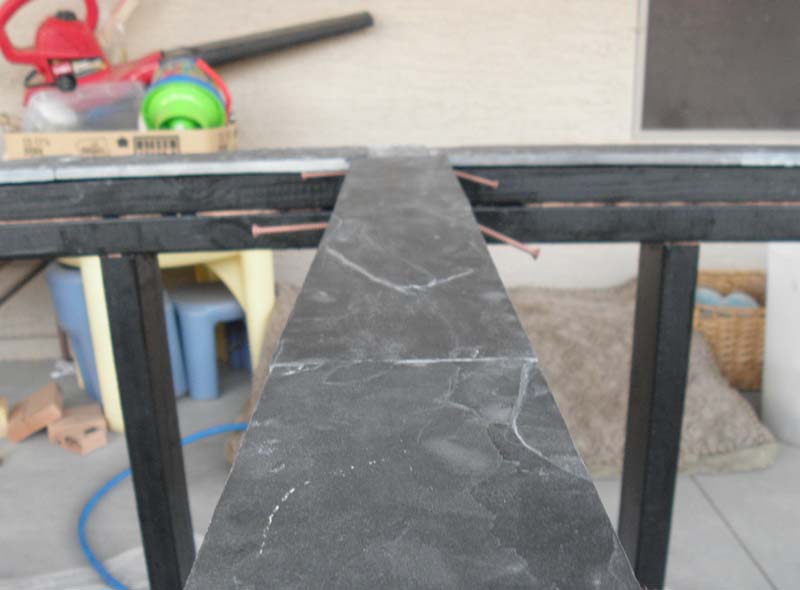
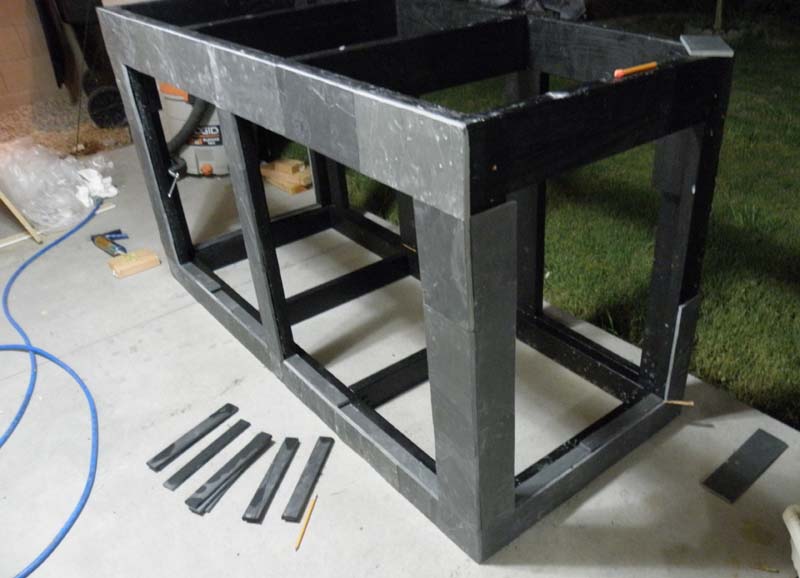
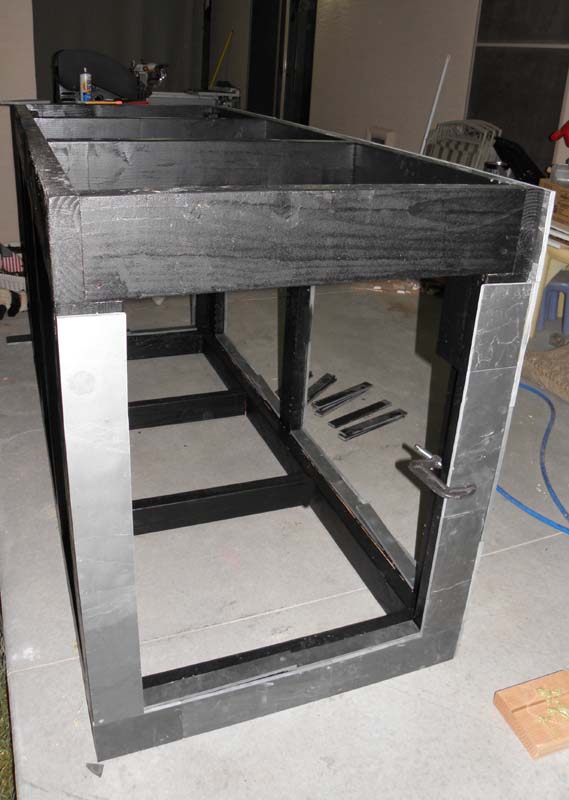
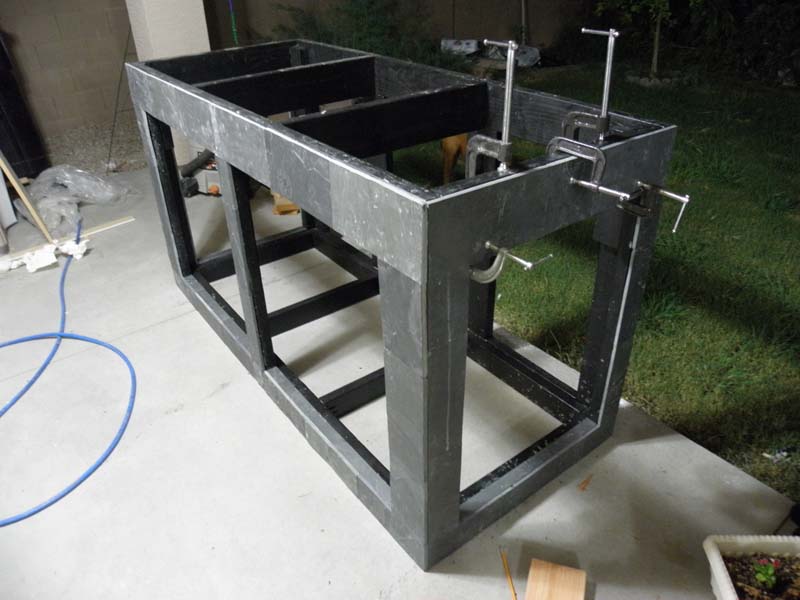
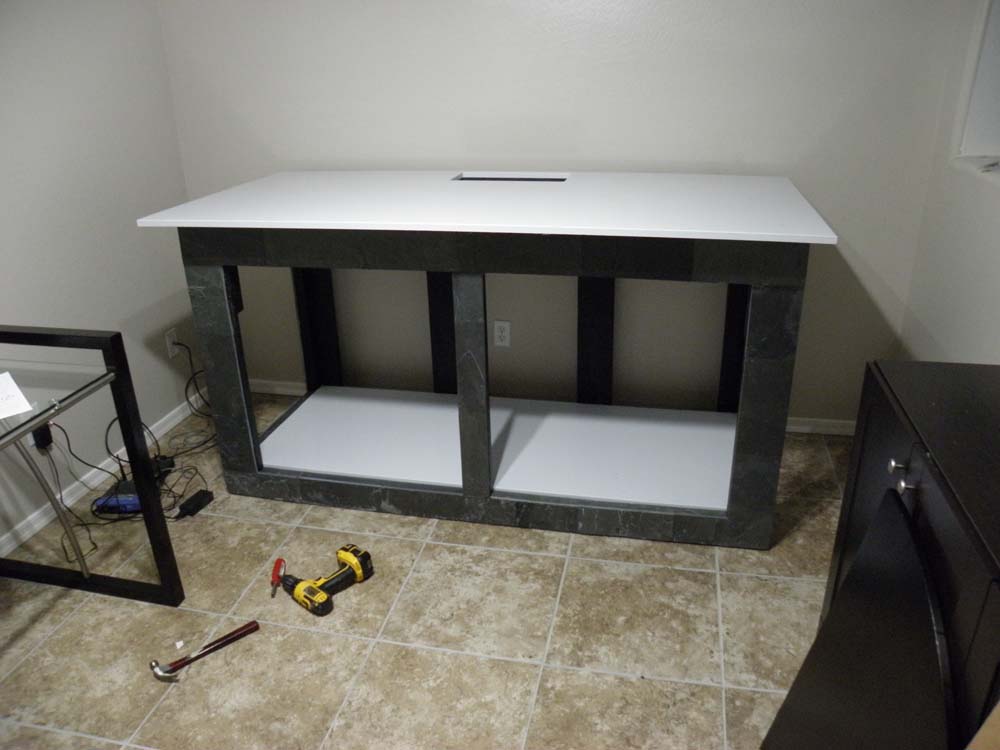
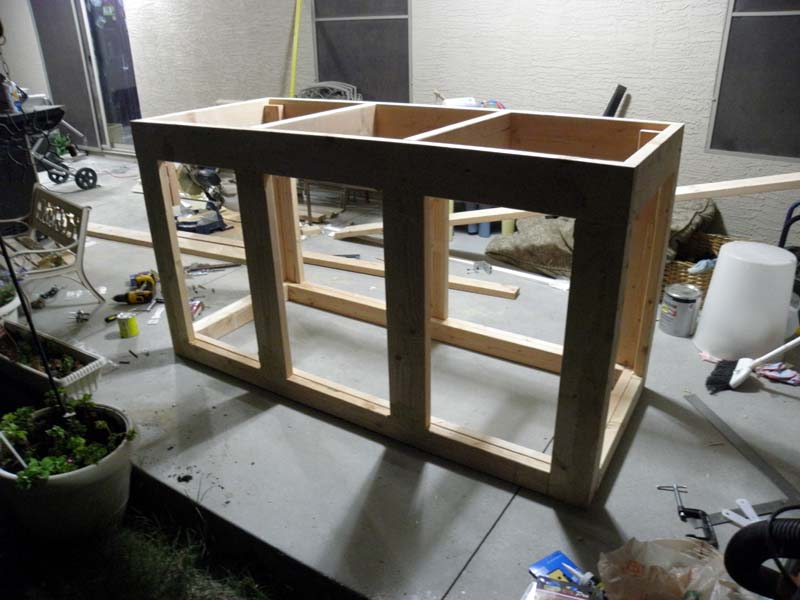
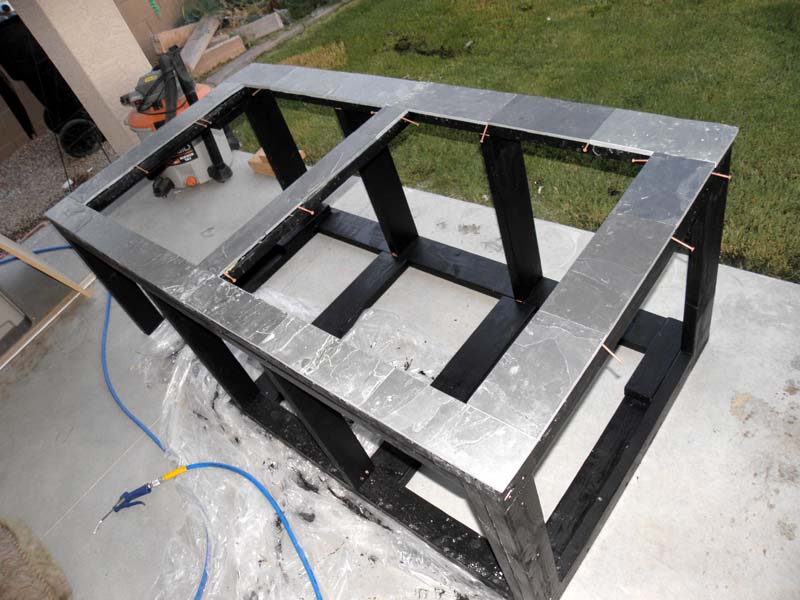
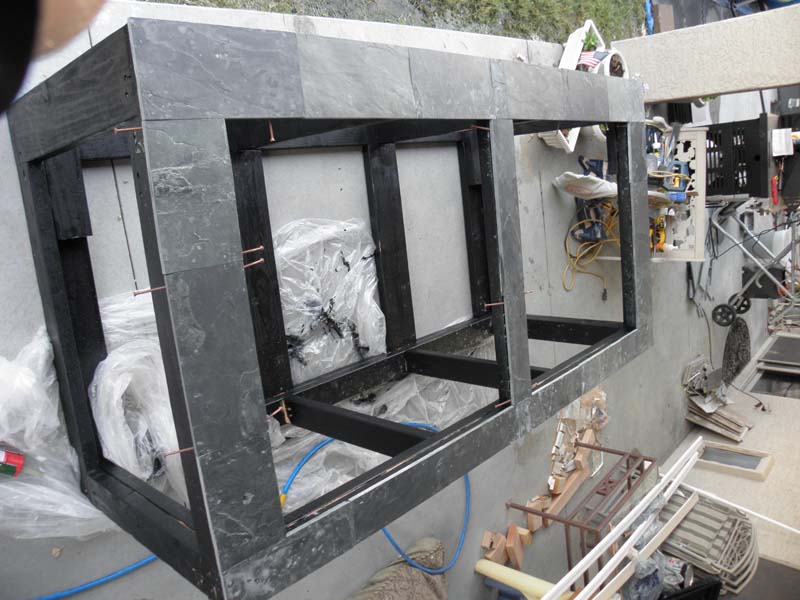
- Building a custom stand for the tank
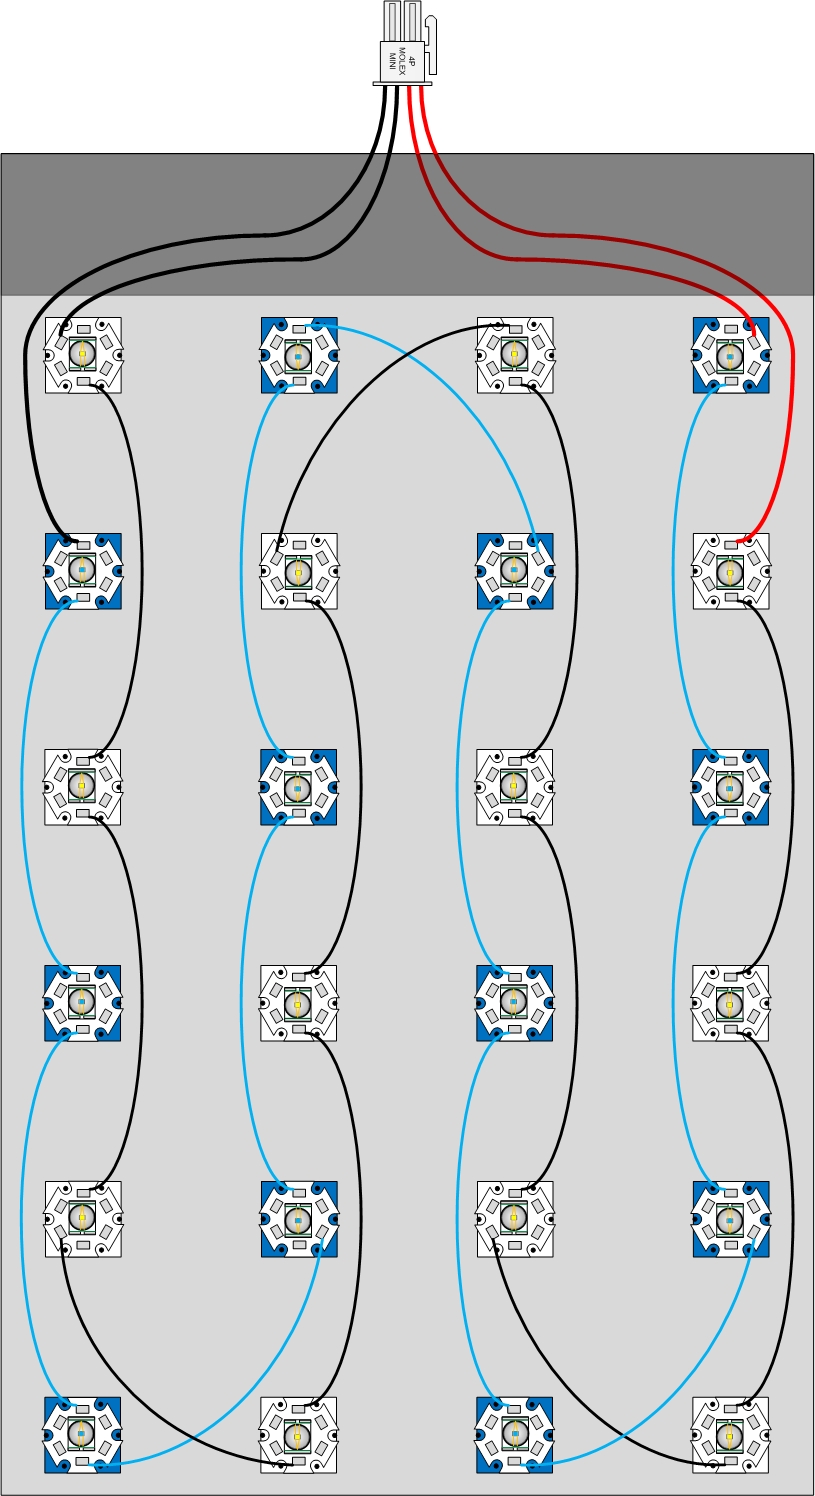
- 5 custom LED lights I am building will cover the tank / 120 leds total / 360w of cree XR-E wickedness w/80 degree optics "more details on this custom light build below" This will feature sunset and sunrise dimming ability!
- 4 koralia K4's "not koralia evos" modified with sureflow props blowing 1600+gph each.
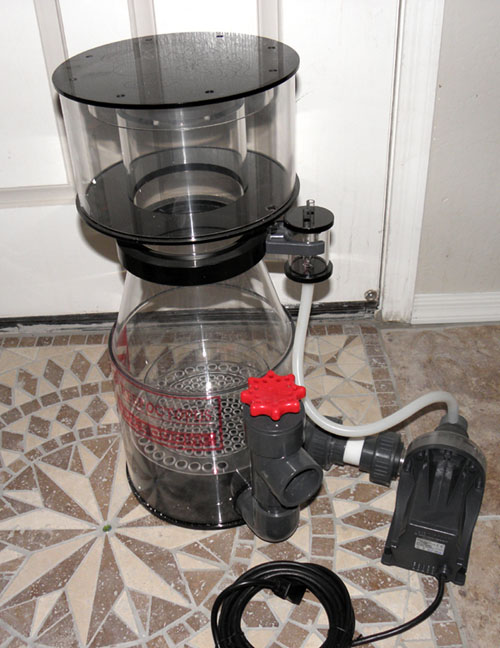
- SRO-5000INT Super Reef Octopus skimmer with bubble blaster 5000 pump
- HY5000 Water blaster return pump
- 4 qty 150W Jager heaters
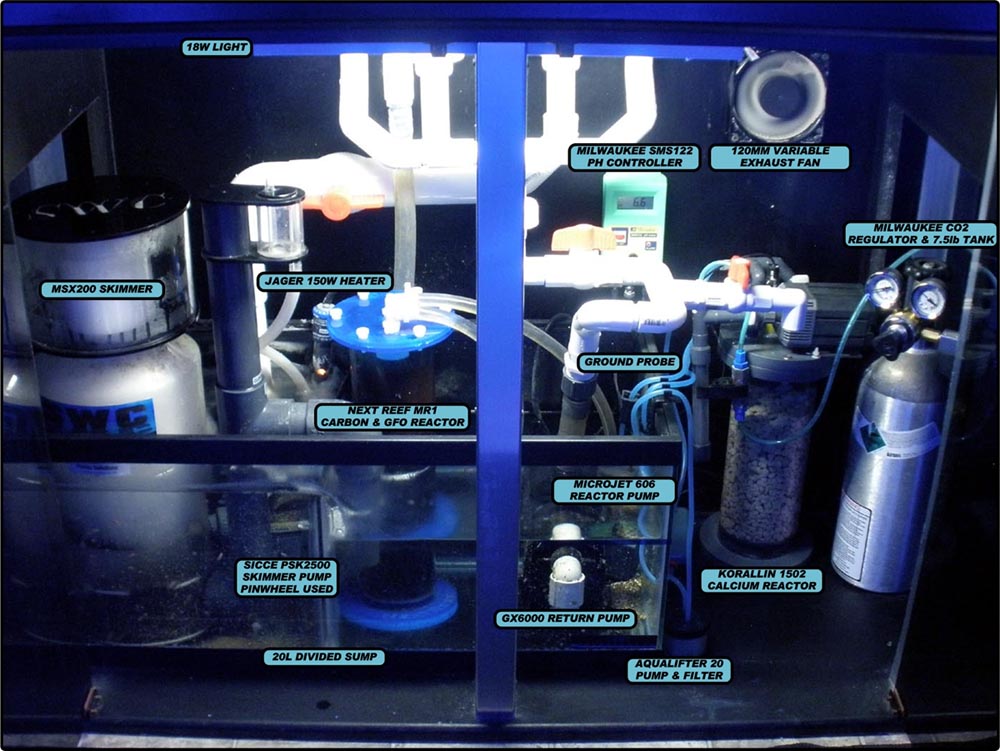
- Korralin 1502 ca reactor / will have to upgrade once I start really stocking this large of a tank
- Apex system controlling temp, ca reactor ph and lighting
- Spectrapure maxcap rodi for purification

I will have a LOT of pics coming soon as stuff is arriving slow, but first up! Some info on the lighting.
The display...

- will use 60 cool white cree XR-E Q5 - WE series leds
- 60 royal blue cree XR-E D3 series leds
- 80 degree optics
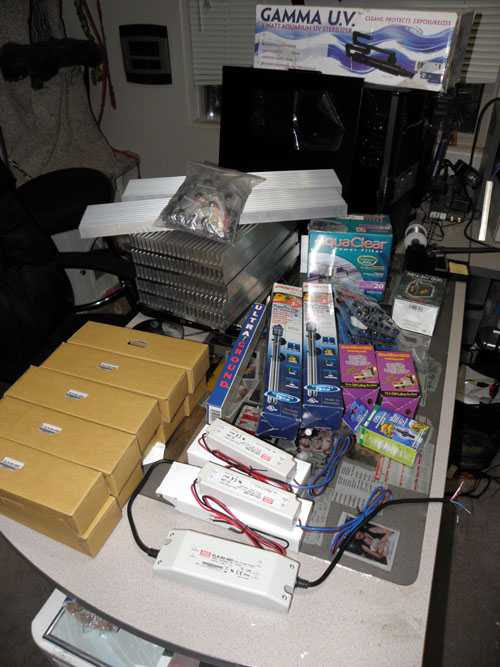
- 10 Meanwell ELN-60-48D
- Neptune systems aquacontroller with 0-10V outputs for sunrise - sunset dimming of the ELN-60-48D's
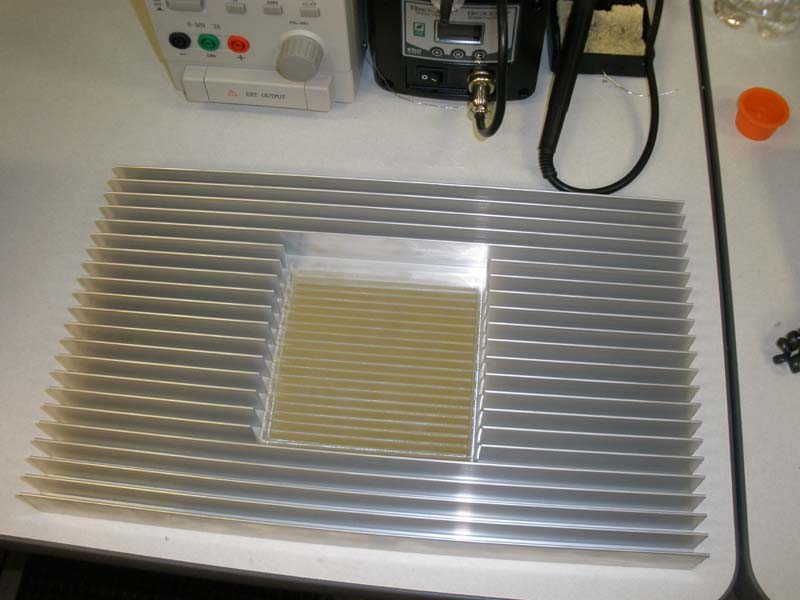
- Heatsinks are from heatsink USA and will be custom anodized black. They will be put together VERY nice & look professional.
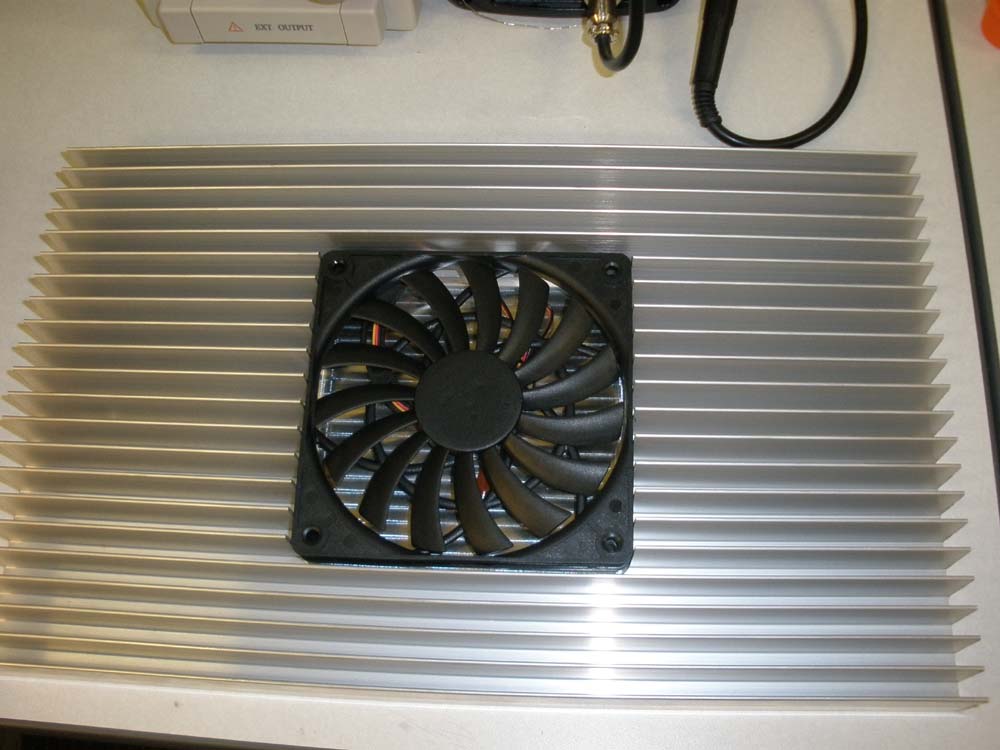
- Airflow through the heatsinks will be provided by a SCYTHE|SY1212SL12H RT 120mm pc fan / 5 total. They are super thin and quiet / flow just the right about of air.
- Thermal control of the 5qty of led pads will be provided by an NZXT Sentry 5 channel fan controller / temp monitor

QT system
- 10G aqueon tank
- 20" t5ho light
- 8W current USA gamma UV
- Microjet 606 pump to feed gamma uv
- Koralia K1 for additional flow
- Aquaclear 20 for filtration
- Quick drain valve to evacuate system with plumbing to fill directly from the display tank

ATO
- 20H tank, painted black on 3 sides.
- Microjet 606 pump with anti siphon plumbing
- Custom built sensor assembly designed by me with no moving parts / no parts in the water. Tested for 90K cycles without a single hitch. May market this in the future as it is light-years beyond what is available for ATO today.
 

Garage1217

Member
Now, rather than the normal electrical cab, I am doing something a little different. I am using an ATX mid tower PC case for the electronics!

I started by purchasing a nice all black PC case "thermal take v3 black edition" which I picked up for dirt cheap. I gutted out the hard drive section of the case as it will house all of the meanwells, fan controller and so forth! Will be a tight fit but the fan cooling will keep temps in check.

Here is the case....
thermaltake-v3.jpg


Here is a side view so you can see what I gutted. Had to cut off the rivet heads to remove this section.


Here is a pic of my case after I gutted the hard drive section for more room.
guttedcase.jpg


The next pics are of the NZXT Sentry 5 channel fan controller / temp monitor. This will allow me to monitor all 5 of the display led heatsinks temp wise and will provide ramping up and down of fans as needed to keep temps in check! It also provides a nice user definable temp alarm in case something goes wrong. You can see it mounted in my case here...
fancontrol1.jpg

nzxt_sentry.jpg


Here is a pic of the new skimmer that arrived a bit ago WOOT! Thing is a MONSTER
skimmer.JPG

Specs...
Item #: SRO-5000INT Super Reef Octopus® 10” In Sump Skimmer RO-PS-5000INT Dimensions: 18”x12”x24” Rated up to 400gal. Features the new Bubble Blaster HY5000S High quality machine welded cast acrylic construction

Should blow the poo right out of the water!!!

A bunch of stuff that has come in for the build WOOT!
misc.JPG
 

Garage1217

Member
Last 2 weeks has kicked my tail. I decided to tile the house before the new tank is in as I would not be able to do it after. Also spent the day building the skeleton of the massive stand to hold this baby! I wanted a taller stand so built this one at 40" from floor to bottom of the tank. Still a metric crapton of work to do on the stand but it is rolling. Some pics of the fun...

Pic is of the rear of the stand, front is just a single 2x4 in the middle. This baby is BEEFCAKE. 2x6 & 2x4 done with pocket screws & deck screws. That and about a bottle of gorilla glue haha. For the sump area I am going to have a 1" thick piece of polypropylene cut & then done in 1/4 round over on the edges. Will do the same for the top as it is cheap and looks fantastic.
stand.jpg


I decided to go a different route than the oh so common wood stands. Lets do it in stone! I have a nice tile saw I have been useing to tile my house so decided to do the stand in black slate. Here are pics of the stand with just the front stone in place, the adhesive drying. The screws under certain stones are to make them level with the next stone. Lines turned out perfect and my micro seams came together nice / super tight. You can see the line, but cannot see any silicone. Just a clean line. Now on the sides where the stones will meet the front stones, there will be spaces, that is not avoidable, in those cases I will use black grout for a filler. Not worried about it as the sides will not be seen that often

The white spots and light spots on the stone are just from the wet saw cuts, did not wash them off enough so they have a gray powdery film on some of them. Once the adhesive is dry, will wipe them all off.

Still lots of work to to do rock wise, not only on the sides but also on the inside lips of the doors.
stand1.jpg

stand2.jpg

Lines are very clean :)
stand3.jpg


I was able to get a LOT more done on the stand! I wish people could understand my vision of the finished product but it is hard to convey so many think it is not so hot right now. However it is coming together just as I had in my mind. Here are some updated photos tonight. Was able to get parts of the sides on and got the inside door area pieces cut, but they are not glued in place. Just sitting on top of one another and some sitting in the front. I hope to finish the stone portion of the stand tomorrow night so I can move on to the other major items. Will post pics of course.
stand4.jpg

stand5.jpg


Rock work is finished on the stand for now. Just have to wait until my hinges & polypropylene comes in so I can finish her up and set the tank on top! Not a whole lot left to do other than wipe off the spots on the slate, some grout & sealing. If I had all the other goodies here, I could wrap it up tomorrow. Top and bottom cannot be CNC'ed until Wednesday so will be a wait
stand6.jpg


Tank has arrived!!! 225G Lee-Mar! 72x30x24 Starphire on 3 sides including the eurobrace *LOL*.... the works. One stunning tank and build quality is TOP NOTCH!!!
T1.jpg


And of course, the customary sticking of the kid in the tank for scale haha This is my youngest, Danica! She is a little over 2 years old. She did not want out of the tank once I put her in *LOL*
T2.jpg
 

Garage1217

Member
Quick update in between the stand work and tank arriving,
- Heatsinsk are finished at the CNC shop. They cut out the fan area so my ultra slim 12mm fans can be recessed into the sink for a nice clean look. I have a top plate to cover them that needs to be cut as well but not ready for that yet. The next step is to prep all the holes, tap them and generally get all that BS done and then they are off to be anodized black for a sleek look. And yes, I have already tested the fans recessed into the heatsink and they provide PLENTY of airflow. Not worried about heat in the least with this setup.

- The stand top & sump area sheets of polypropylene are finished at the plastic shop, they were also cut via CNC *LOL* Gotta love all this precision with my non precision slate stand. Have to pick those up as well today so I can get the top of the stand and sump area finished. Also my hinges for the glass arrived as well so next step is get the doors made for the stand.

For now, some pics of the heatsinks after being machined.
s1.jpg

s2.jpg


Finished my led layout today. Now I have a lot of drilling & tapping ahead of me. Heatsinks are 14x8.460". Leds will be spaced 2.25" / 80 degree optics. Sorry for the large pic, any smaller and the jpg really starts to break up. More is going into the electrical as I still have to connect a fan, thermistor and an extra channel for future additions. LED wire will be 18awg going to a 4 position minifit molex "I know gasp, not using deustch connectors like I should" / 22awg for the other components run via cat5e to an 8 position molex microfit.
LEDLAYOUT.jpg


Woot! Got the stand in the office last night and put the CNC'ed sheets of polypropylene in the sump area and on top. Now just have to seal things up with the siliconized sanded grout that I purchased. May put the tank on top tonight as well! I was SOOO lucky, if the stand was 1/2" wider, it would not have fit through the doors in my house!!!! Also before I got the stand in, I had just finished up the tile after gutting the office. Did that Friday night / Saturday.
sio.JPG


tankonstand.JPG


Now just need to get the hinges mounted so I can measure and order the smoked glass doors
 

seabass

Member
Wow that is a awsome tank.I do tile myself and can imagine the fun time you had putting the tile on lol.And yes that skimmer is a monster lol.Great start keep up the nice work!!!
 

Garage1217

Member
Some pics of my old system I just tore down :( I miss it big time as it was stunning. Also a pic of my old frag tank. Used to grow a metric crapton of SPS in that tank. Just thought I would share since I have nothing new to post at the moment. This new build is going to be so much more awesome... like 20x more awesome on the awesomesauce scale :D

RF.JPG


ft.jpg


SUMP.jpg


ELECTRICAL.jpg


A really old pic when I was just setting up the frag system haha All tanks including the display fuge were tied together with the common sump.
FTS1.jpg
 

Frankie

Well-Known Member
RS STAFF
Very impressive! Keep up the great work on the build. Being a builder I see your vision for this tank and am impressed. I really dig the stone work and quality of the tank.
 

Garage1217

Member
Thanks for the positive posts! Large builds can be very frustrating at times so any positive vibes help keep things rolling haha!
 

crespeto

Active Member
Man it all looks so amazing. Your previous tank was beautiful. Can't wait to see how this one finishes up. Good luck.
 

Uslanja

Active Member
Wow! Your build is looking very nice. Your old tank was fantastic! But, it is your technical abilities and skill that have blown us away! Can't wait to see more!
 

Rhodes19

Active Member
Oh, my.....

This is going to be a beast!!! I can't wait to see what it looks like once its all set up. I like your stand and I like your electrical work from your older set up. I'd love to see how your new energy efficient system works.

Sweet!! :yup:
 
Top