You are using an out of date browser. It may not display this or other websites correctly.
You should upgrade or use an alternative browser.
You should upgrade or use an alternative browser.
Rhodes19's 180 build (slow Build)
- Thread starter Rhodes19
- Start date

kilted celt
Member
Beautiful stand, man. I really like the finished yet open design.
Rhodes19
Active Member
Beautiful stand, man. I really like the finished yet open design.
Thanks kilted. I appreciate that. Are you a tartan man? I wear Charleston Police and The Citadel. :bouncer:
Rhodes19
Active Member
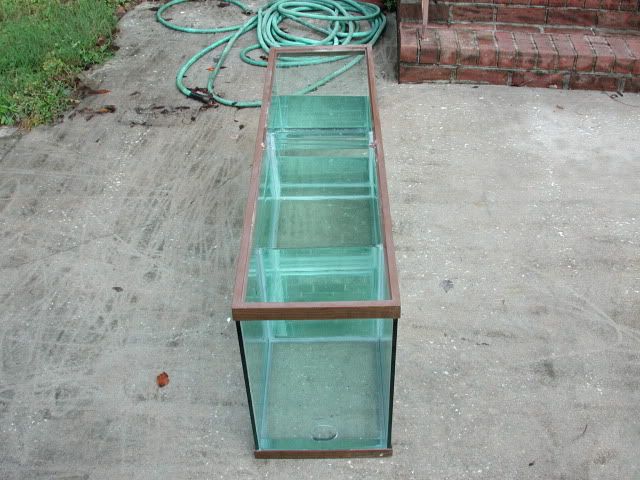
Well, an other step forward. I added the baffles to my sump/fug over yesterday and today. Because of the 1/16" gap to either side of the baffles, silicone was able to squeese through the back side so I may not need to mess with putting in silicone into the 1" gaps. We'll see.
The first 2 baffles in.
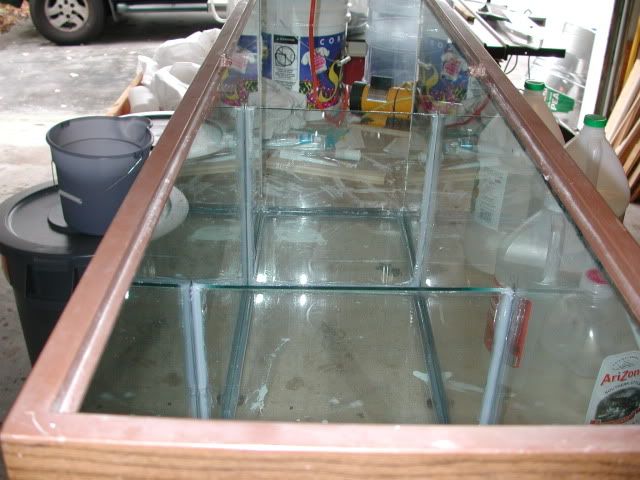
Now the bubble trap. 1" gap and 1" off the bottom for the middle baffle.
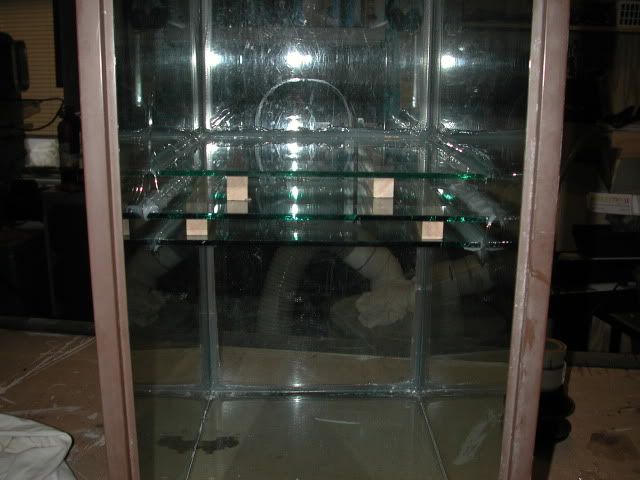
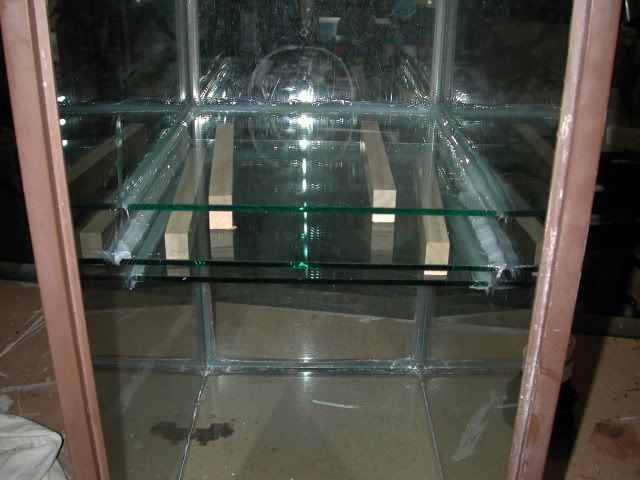
Next stop, plumbing.")
The first 2 baffles in.
Now the bubble trap. 1" gap and 1" off the bottom for the middle baffle.
Next stop, plumbing.
SiNiStEr NaTiOn
Member
hey rhodes the 1/16 gap on your baffles, don't worry, My baffles on my 55 sump/fuge had about 1/16" gap or little less.
I made the mistake of putting the wall between the sump and return reversed. I strip the silicone out for it but that wall gave me allot of problems removing, because the silicone did went in between the baffle wall and the front and back glass.To remove it I had to use a string and using a saw motion down the height of the wall to finally free it to put it where it needs to go. Trust me it's in there solid and a extreme pain in the arse to reomve, and during this time i was worry about breaking the 1/4" glass plate.
I made the mistake of putting the wall between the sump and return reversed. I strip the silicone out for it but that wall gave me allot of problems removing, because the silicone did went in between the baffle wall and the front and back glass.To remove it I had to use a string and using a saw motion down the height of the wall to finally free it to put it where it needs to go. Trust me it's in there solid and a extreme pain in the arse to reomve, and during this time i was worry about breaking the 1/4" glass plate.
Rhodes19
Active Member
Hi Bobby,
Yeah, its in there good. Its not going to move. Speaking of moving, I am going to have to pull the tank out and flip it around. I was looking at it this morning and realized it would be easier to get to the return chamber if it was on the right vs left. Its easier to get to the right side of the tank because of where the kitchen table is.
Yeah, its in there good. Its not going to move. Speaking of moving, I am going to have to pull the tank out and flip it around. I was looking at it this morning and realized it would be easier to get to the return chamber if it was on the right vs left. Its easier to get to the right side of the tank because of where the kitchen table is.
Rhodes19
Active Member
Yea!!! I finally got the plumbing done and is now time to start putting water in. :bigbounce
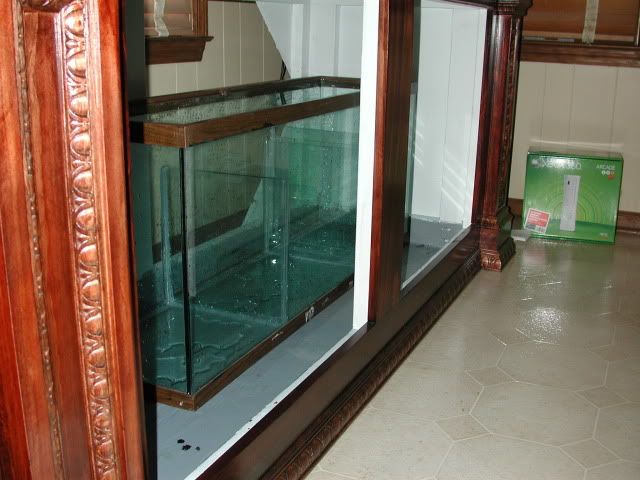
Here is the sump/fuge
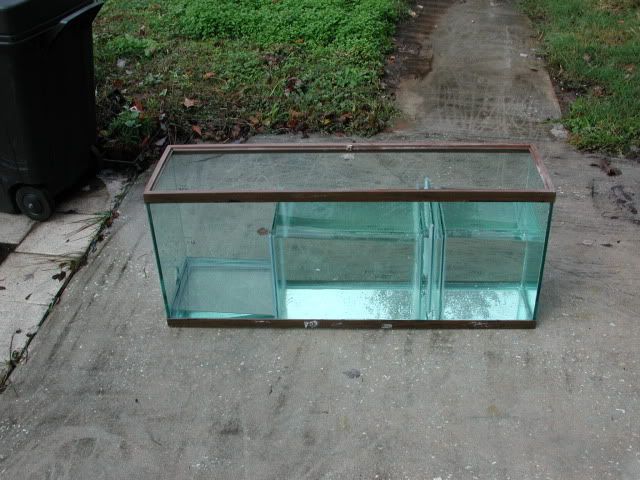
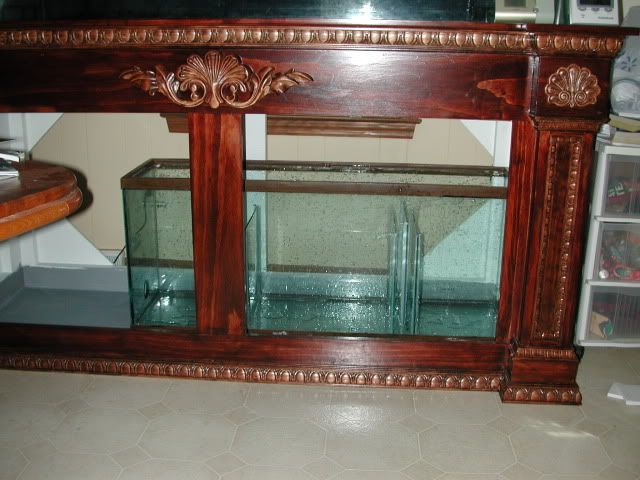
Here it is in the stand!!!
The return pump and lines. I had to turn the pump 90 deg because I ran out of space in the stand.
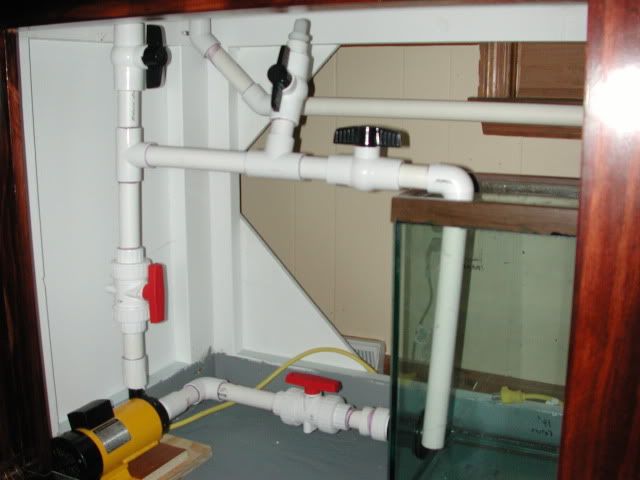
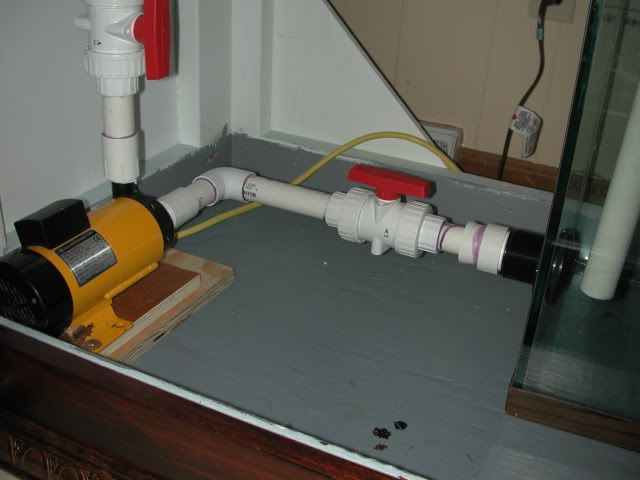
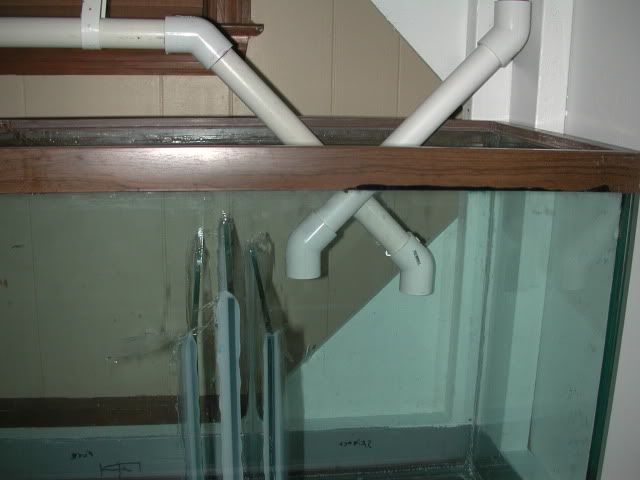
One of the corners with overflow and return. Overflow is 1" and the return is 1" except for the last 4-5" which coverts to 3/4".

Overflow into chamber 1.
Here is a take off for an ATS I'll be making.
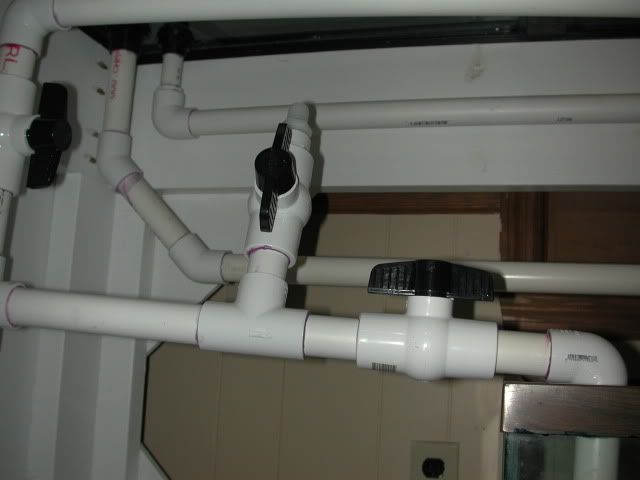
The plumbing did not turn out like I was planning but its going to work. My original plan included using an internal pump but when this external pump became available I couldn't resist. There are a few 90 deg elbow turns in the return and a T but I could not avoid it with the limited space under the tank.
Now, time to fill, add salt, rock and substrate.
Here is the sump/fuge
Here it is in the stand!!!
The return pump and lines. I had to turn the pump 90 deg because I ran out of space in the stand.
One of the corners with overflow and return. Overflow is 1" and the return is 1" except for the last 4-5" which coverts to 3/4".
Overflow into chamber 1.
Here is a take off for an ATS I'll be making.
The plumbing did not turn out like I was planning but its going to work. My original plan included using an internal pump but when this external pump became available I couldn't resist. There are a few 90 deg elbow turns in the return and a T but I could not avoid it with the limited space under the tank.
Now, time to fill, add salt, rock and substrate.
Rhodes19
Active Member
Thanks Frankie. Sunday would probably be the best day. I'll be helping my karate instructor with some construction work at his new school, see some folks for care in the afternoon, then get ready for a friend's Christmas party. He has a RSM 130 and I'll be giving him a frag from one of my zoas for a Christmas present.
SiNiStEr NaTiOn
Member
It looks good Rhodes. nice job on the sump/fuge project.
That's a nice build!
How was it drilling the holes in the 55 gallon? Did you use a diamond bit with a shank or just held it steady till you got a good start? Any special tools other than the drill, putty, and duct tape? Sorry for so many questions, I am about to order a glass hole saw and give this a try very curious about the details and any advice you may have to offer.
Thanks
Eric
SiNiStEr NaTiOn
Member
here's a video Eric from glass-holes.com Video on cutting a hole in a tank
Yeah I'll have to get on a Pc to check that out my phone doesn't cut it.
I just ordered the bit from that company and read their instructions, it's pretty cut and dry/wet. I have to drill a 20L so if I crack it I am not out major $$$ live and learn. I have a bit here I ordered a while back for 1/2 bulk heads maybe I will give it a try tomorrow on a junk 40 gallon I have lying around. It has a diamond shank that you start first to hold it in place, I was thinking that may double the chances for error Vs the one I just ordered.
I am sorry to take away from your build thread, just a little curious.
Eric
SiNiStEr NaTiOn
Member
just remeber Eric when you cut glass, DON'T PUT PRESSURE ON THE DRILL. LET IT DO THE WORK UNDER IT'S OWN WEIGHT! If you want to give a little pressure then make very very light pressure. Because the key is letting the drill cut the glass and not you.
Thats why cutting glass, it takes a little bit of time. so don't rush it, take your time, no matter how long it takes. Then you'll see that it's actually easy to cut a hole in glass.
Thats why cutting glass, it takes a little bit of time. so don't rush it, take your time, no matter how long it takes. Then you'll see that it's actually easy to cut a hole in glass.
Rhodes19
Active Member
That's a nice build!
How was it drilling the holes in the 55 gallon? Did you use a diamond bit with a shank or just held it steady till you got a good start? Any special tools other than the drill, putty, and duct tape? Sorry for so many questions, I am about to order a glass hole saw and give this a try very curious about the details and any advice you may have to offer.
Thanks
Eric
Hi Eric, no worries.
The drilling was actually pretty easy. Make sure the glass is not tempered. Hold a piece of polarized glass to it and look for some crazy wavie lines or hold a white screen from a lap top behind the glass and look for a the waves. It they aren't there then it is probably not tempered. I used a damond bit from glassholes.com and a corded drill. I went real slow at first because it would skip around other wise. After a few minutes I had a nice semi circular groove, I increased the rpm and flattened out the bit so all of it was sitting on the glass. I didn't apply any pressure but rather let the weight of the drill do the work. The tape worked well to help hold in the water and glass hole. I would suggest using some sand paper or emory cloth to smooth off the edges of the cut hole. 80-100 grit should be fine. Let me know how it goes.
Rhodes19
Active Member
I am sorry to take away from your build thread, just a little curious.
Eric
No appologies necessary. I am glad I can help. The folks here at RS have helped me immensely. I'm glad I can finally do the same for others.