Rhodes19's 180 build (slow Build)

Rhodes19

Active Member
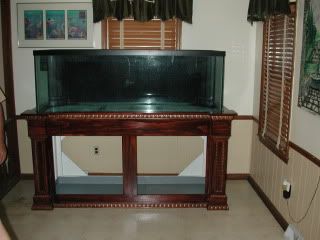
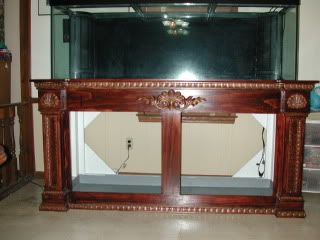
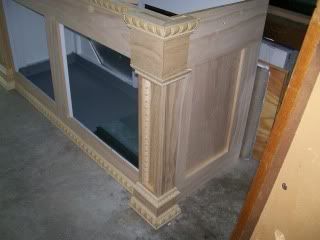
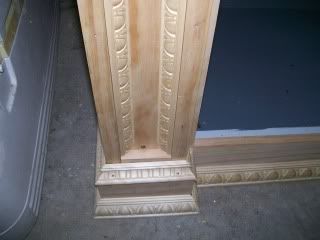
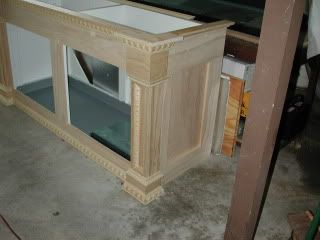
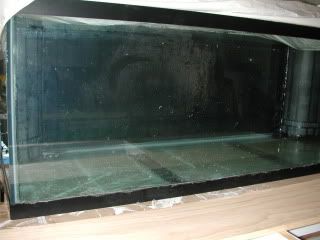
Well, I have been on RS for a while now and I have some pictures of my 180 build I can share. This is going to be a slow build because of money, time, and knowledge/experience (not always in that order). It started when a friend of mine started to live vicariously through me and got me interested in reefs (he had to take his down) so I started my 29g reef. That went well so I converted my BC 14 at my office from WF to reef and that went well. Next think I know, my friend is telling me about a 125 at a LFS. My wife caught wind of this and my friend’s response was that I would be getting it for her! As he explained it, a bigger tank would have the equipment stored underneath it and would be quiet (my 29 sits near the couch and TV and the HOB skimmer interferes with her listening pleasure). So next thing I knew, I had permission to get a big tank!!! :woohoo: I found my 180 in Jan/Feb time frame and brought it home and have been trying to make a stand for it and collect the needed equipment. Here is where I am at the moment.

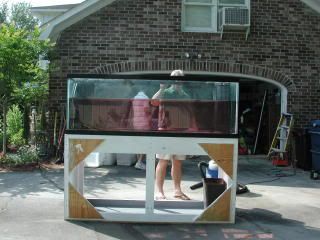
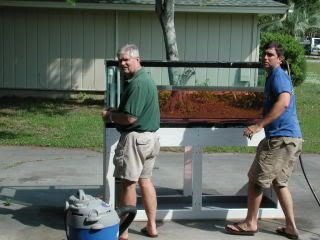
Home and in the garage
1801.jpg


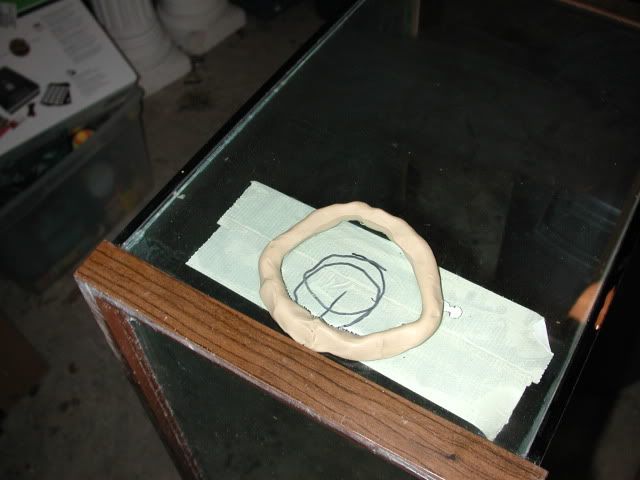
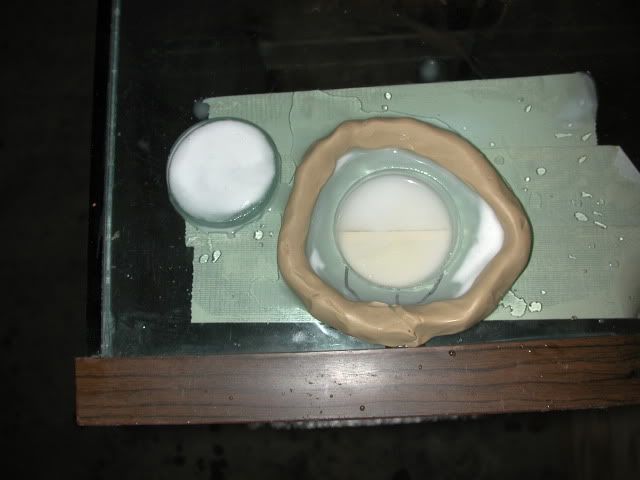
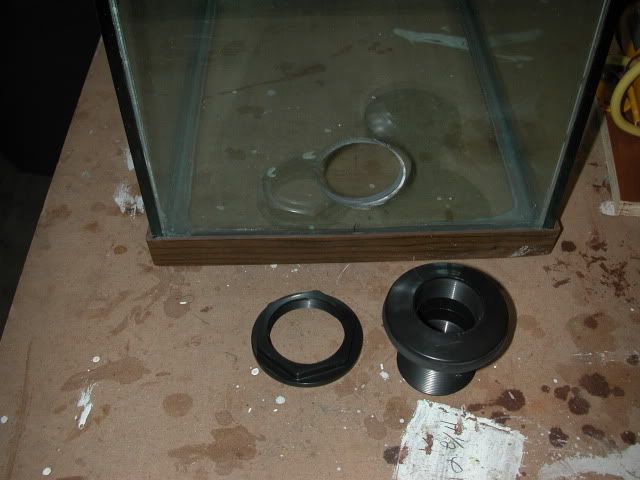
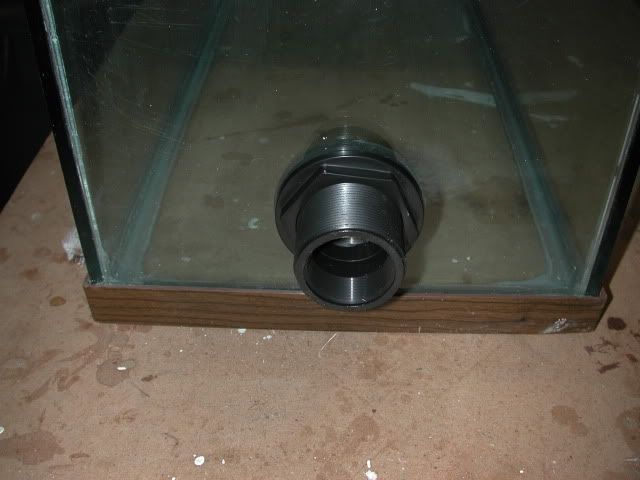
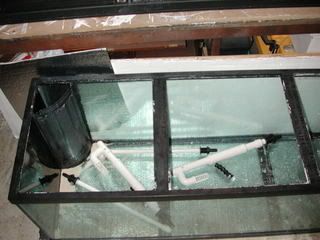
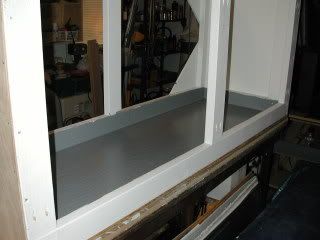
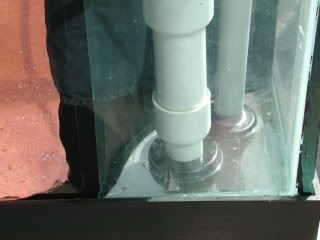
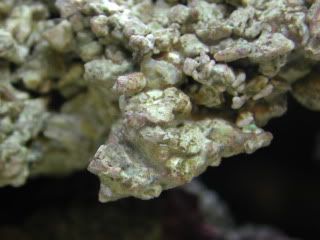
Came with Durso and returns
1803.jpg


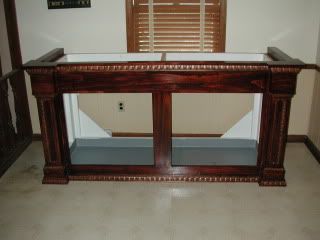
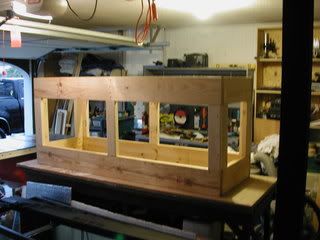
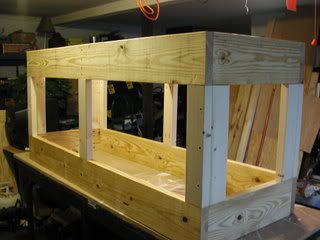
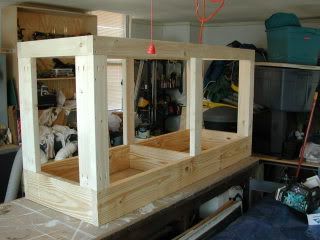
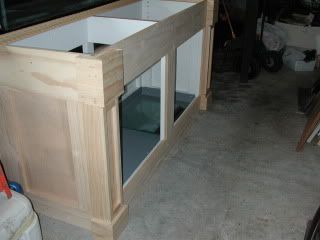
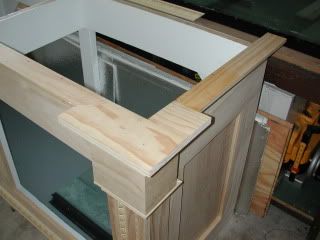
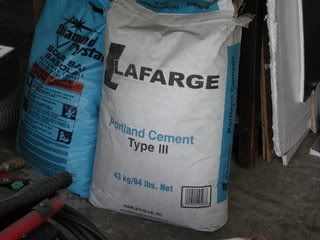
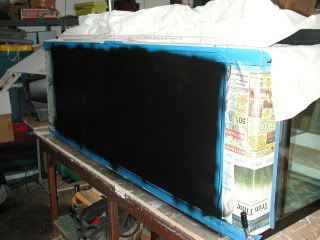
Next I started building my stand. I used 2x8s for the top and bottom frames and 2x4s for the legs. After I finished the framing itself, I realized that I made the opening in the front too small to squeeze in my 55 for a sump/fuge. SO, now I have a new work bench!! :)

stand.jpg


profile.jpg
 

Rhodes19

Active Member
This is my second try to make a stand for my 180. This time I used 2x8 top frame, and 2x4s for the bottom frame and for the legs. I used a Kreg jig to make pocket holes to assemble the frame and then used some drywall screws to back up the pocket hole screws. I attached a piece of 1/2 “ plywood to the underside of the frame and painted it with 2 part paint for waterproofing. I figure if I have a small leak or spillage, then this could work as a catch basin. Big spills or leaks… ah, never mind.

Its upside down because it was easier to fit the 2x4s last instesd of the 2x8s.
DSCN0753.jpg


I put 2 coats of Kils primer on the rest of the wood and 2 coats of white latex on top of the primer.
DSCN0762.jpg


DSCN0760.jpg


Next it was time to test the frame to make sure it would hold and to check the tank for leaks.
waterandloadtest.jpg


My "friend" is on the left :)
JerryandRyan2.jpg


If the water looks red it is because of the red food dye we used to try to find a small leak between the tank and the plastic corner overflow. I think I have it fixed now.
Overflowcorner.jpg


I used luan for the ends and pine 1xs for wrapping the frames.
finishedcorner3.jpg


All the trim is finally on and all I need to do is sand it, stain it, then poly it.
cornerfinished2.jpg


cornertrim1.jpg


cornertrim.jpg


cornerfinished.jpg


The trim joints are not profession looking but they will do. At least my wife likes it. :) I still need to make the doors and a canopy for the 180 but I can work on that later. I want to get the tank up and running as soon as possible and get it cycling. I know, patience.
 

Rhodes19

Active Member
In between working on the stand I started to make my own DIY rock using crushed oyster shell and type III Portland cement. My first batch was with aragonite but at $32+ for 15 lbs oyster shell was looking pretty good ($8 per 50 lbs). The other benifit is less rock taken from reefs. But that is another story. :eek:h: I have had the rocks curing in fresh water for several months now and the ph has come down some. The problem we have here in Charleston, SC, is the water company keeps the ph up around 9 or so becasue of all the old, old, old, old, lead pipes still in use. I figure by the time I get the 180 and water in it the rock will be ready. I'll use some LR, LS, or GARF Grunge to seed the tank and get the DIY rock inoculated. I know it will take a while but I am in no hurry. :bouncebox

Oyster shell
50crushedoystershell.jpg


Cement and large crystal salt for making forms
PortlandIII.jpg


Various forms
3rdbatch2.jpg


rocks.jpg


rocks2.jpg


Gloverock.jpg


Mold box with salt
salt.jpg


The rocks are curing in my DIY green house (I am starting to see a patern here :) )
First batch
DSCN0778.jpg


Following batches. 18 g plastic container and 32 g trash can.
DSCN0776.jpg


DSCN0777.jpg


DSCN0772.jpg


DSCN0775.jpg


Here is a piece I put in my BC 14 about a month ago. It looks like it may have some coralline algae growing on it.
diyrock1.jpg


I have about 200 lbs of rock made and can make more if I need to. I figure the remaining LR I'll need can come from the LFS.
 

Rhodes19

Active Member
When I got the tank, the sides were paint black because it was an in the wall set up. I scraped of the paint on the sides and painted the back black because I thought that would make the color of the fish and corals pop. I have since read a threat about painting aquariums or putting back grounds on them and how that effects reflective light. Apparently, the paint or back ground cover reduces the amount of light reflecting back into the tank. More light is good but I like the asthics of the black back ground. Plus, there is a window behind where the tank is going and I really don't want to look at it through the tank. Placing a back ground off of the tank and behind it might work but I'm not sure how it would look of if my wife will go for it. Well, I have time to think about it for a while, so no rush.

Back of tank painted black
tankpainedback.jpg


tankpainted.jpg


The only other thing that needs to be done before filling the tank with water is to support the flooring. We have a crawl space and I am sure the floor will hold but I'd rather be safe than sorry. That should not require too much work. Then I can get my "friend" and his sons to come over and help me move the tank, stand and what ever else needs to be done. I would hate for him to miss that vicarious moment!!! :yup: The funny part is now he is thinking about getting back into reefing and is not sure how to explain it to his wife!! :LOL: He even almost picked up a used tank the other day. I can't wait until he does. My wife even offered to help him spend HIS money! :)
 

Frankie

Well-Known Member
RS STAFF
Looks great Chris! It's about time you started a tank journal here on RS! :D Keep up the good work. I am looking forward to seeing this bad boy this weekend.
 

Rhodes19

Active Member
Its in the house!!!!!!! :D

Well, my 180 is finally in the house and its final position. Its against the out side wall in the eating area off the kitchen. I put on 2 coats of red oak min wax oil stain and 6 coats of hand rub on satin poly. Not professional but it does look nice. Once we got it in the house I think my wife went into shock. Even though she saw it in the garage every day for the past 7 months, I don’t think she thought it would be this big and take up this much room! Here are some pictures.

Front view.
frontpoly.jpg


Dixie wants to help too.
frontpolydixie.jpg


The tank on the stand.
frontwithtank.jpg


The muscle.
moversmuscle.jpg


The muscle and support team.
moverssupport.jpg


Now that its in, I need to support the floor with support beams in the crawl space, get a sump/fug, install the plumbing, and make the doors for the cabinet. Once the floor support is in and the plumbing done, I'll fill it and get my diy rock in and start cycling it. I was thinking about making a canopy but I'm now thinking of an open top and suspend the lighting (once I get them) from some kind of bracket over the tank. I'll have plenty of time to think and plan for that as it cycles. Oh, I also want to run 2 15 or 20 amp lines to the tank to make sure I have enough power to run what ever I may need.
 

molsen187

Member
that is a sweet setup. one thing i would mention is that window might cause some algae problems if it allows a lot of sunlight into the tank. just thought i'd mention it. everything is looking awesome though.
 

Rhodes19

Active Member
Hi ngocturnal and molsen187,

Thanks, I appreciate it. It's been a slow build, but I have been enjoying it. I am going to try to place floor jacks in this weekend in the crawl space and then start working on the sump/fug. Also need to shim the front of the stand. It was off by about 3/8" (its the floor, not the stand). I have a 55g I can use but I am looking for something bigger. I thought about a Rubbermaid stock tank, but it is wider than the inside of my stand (22") and a remote sump isn't an option at the moment.

Molsen, yea, I had the same thought. Fortunately, when the blinds are pointing up (from the inside of the house) not much light comes in. I actually, thought of trying to place solar tubes there to light the tank but I don't think that will fly with my wife!! :eek:
 

Frankie

Well-Known Member
RS STAFF
Looks awesome Chris!
I am sorry to not have been over yet. Work picked up and I had to take the bull by the horns while the opportunity was there. I will give you a call over the weekend and bring my camera!
 

Rhodes19

Active Member
Looks awesome Chris!
I am sorry to not have been over yet. Work picked up and I had to take the bull by the horns while the opportunity was there. I will give you a call over the weekend and bring my camera!

Cool Beans!!! Thanks Frankie. I can't wait to show it to you.
 

Frankie

Well-Known Member
RS STAFF
Hey Chris!
I enjoyed the visit today. Wondering if you and your friend got down and dirty and dug that hole for the post?
The stand was awesome. I was very impressed. Keep the updates coming and I will see you during the week.
 

Rhodes19

Active Member
Hi Frankie,

Thanks, and thanks again for coming by. We didn't start digging yet. He heard his wife calling him! LOL. We went to Lowes to pick up the stuff we needed and by the time we got back he had to leave. He'll be back tomorrow around 8 am to help. It shouldn't take too long. After Jerry left, I found a 3/8" piece of plywood, so I cut a 6' x 2" strip to use it as a shim for the front of the tank. We'll get that in as well. It's getting closer! :D
 

Rhodes19

Active Member
Well, over the weekend with Frankie's advice and recommendations and the labor of my friend who got me into reefing (vicariously) we reinforced the floor under the tank. It didn't need it put but it will give me peace of mind. We went into the crawl space (about 24" of height, fun :( ) and added some support to the floor joists then crawled out . I haven't had to low crawl since I was in the Army! Also, over the weekend, I finished putting on the poly on the wooden medallions my wife picked out for the stand and put them on. Next project, the sump/fug. I have a 55 g tank that I will use and once that project is done, I can start on the plumbing!!! Then add the water!! :woohoo:

Medallions
medallion1.jpg


medallion2.jpg


Oh, almost forgot. I wound up cutting a long strip of 1/4" plywood and shimmed the front of the tank and then used regular shims to shim the side of the tank to level it out. The tank was 1/4" shorter in the front and if I had shimmed the stand there would have been a big gap between the stand and the floor.
 

Frankie

Well-Known Member
RS STAFF
Good deal Chris! I am impressed that you got all that done. That crawl space was tight for even me.
 

Rhodes19

Active Member
Thanks Jason, it was fun to build. Even learned more about wood working!!:D You have a sweet looking tank. I was looking at it the other day. Your Hawk fish seems like a ham. He must be fun to watch!
 

Rhodes19

Active Member
I worked on the sump over the weekend. I received my glass hole cutter and 1 1/2" bulkhead from glass-holes.com and cut a hole in the end of my 55g I'm using for a sump.

55gsump1.jpg


I made a dam with plumber's puddy and duct taped the inside to hold the glass and water.
55gsump3.jpg


Here is the hole partially cut.
55gsump4.jpg


Hole is cut!!!
55gsumpdrilled.jpg

55gsumpdrilledwbulk.jpg


Bulkhead installed
55gsumpbulk.jpg


Next, order 1/4" glass baffles and install them to make 3 chambers. :D
 
Top