You are using an out of date browser. It may not display this or other websites correctly.
You should upgrade or use an alternative browser.
You should upgrade or use an alternative browser.
Reefer Addict's Reef
- Thread starter addict
- Start date
addict
Well-Known Member
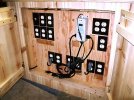
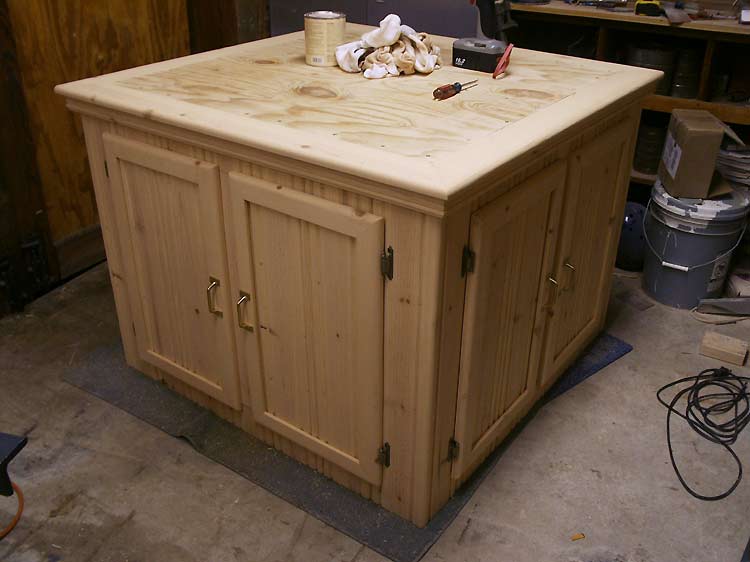
And here's the beginnings of my control panel. The outlets across the bottom are going to be my timer bank. The outlets on the left in each group will be 'hot', the timers will plug into them, and the gray cords (that are currently plugged into the outlets) will plug into the timers. The cords are then wired to the outlet on the right, so that I get two timed outlets for each timer.
Timer 1 will control the actinics and canopy fan, timer 2 will control the halides, and timer 3 will switch the refugium lighting and moonlight on and off.
Outlets on the upper right are for the skimmer and return pump (switched with 2-pole switch on the left), and the outlet below that will be hooked into the heat/chill sides of the aqualogic temp controller. That way I just plug the heater and chiller into the appropriate outlet and away I go...")
Outlets on the upper left will be 'hot' and will power the kalk reactor mixing timer, topoff pump, temp controller, wavemaker, and stand ventilation fan. This leaves a couple of outlets open should I add any more equipment... hopefully it will be enough... I even have lucky number 13 outlets installed.
[edit] Thanks Clint!
[edit 2] Oh... and the switch all the way to the upper left is the 'panic button'... which cuts power to the whole tank should some natural disaster be occurring...
Timer 1 will control the actinics and canopy fan, timer 2 will control the halides, and timer 3 will switch the refugium lighting and moonlight on and off.
Outlets on the upper right are for the skimmer and return pump (switched with 2-pole switch on the left), and the outlet below that will be hooked into the heat/chill sides of the aqualogic temp controller. That way I just plug the heater and chiller into the appropriate outlet and away I go...
Outlets on the upper left will be 'hot' and will power the kalk reactor mixing timer, topoff pump, temp controller, wavemaker, and stand ventilation fan. This leaves a couple of outlets open should I add any more equipment... hopefully it will be enough... I even have lucky number 13 outlets installed.
[edit] Thanks Clint!
[edit 2] Oh... and the switch all the way to the upper left is the 'panic button'... which cuts power to the whole tank should some natural disaster be occurring...
Attachments
Last edited:
Craig Manoukian
Well-Known Member
Holy cow! What a real craftsman! Totally awesome!
:smirk:
:smirk:Montanareefer
Has been struck by the ban stick
Dave your going to have something to be really proud of and to show off to all your friends!
sw_addicted
Member
Great job on the stand and really great idea with the control panel.
addict
Well-Known Member
Thanks everybody... (is there a *blush* emoticon?)
The stand will have it's own 20A circuit which will probably go in sometime next week. That part of the wiring will be handled by my dad though, since he's a licensed electrician (plus I still have plenty to keep me busy).
I've already got a 20A breaker and a 20A GFCI outlet for the wall. The tank will probably only draw about 5A continuous, and around 10A when the chiller kicks in.
I'll post some more pix this evening once I get the stand stained... which is something I've been waiting for. So far I've spent about 2-1/2 weeks on this puppy... I'm ready to get onto the next phase of the project.
Thanks again.
addict
Well-Known Member
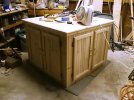
And here it is, finally done.
Isn't the color just 'peachy'...
Also was able to get the control panel all wired up today and everything appears to be working. Got the stand ventilation fan (a 110cfm axial) installed, hooked through a tempstat so that it only runs when the temperature in the stand gets over a certain set point (to cool the 'fuge lights).
All in all it was a productive weekend.
Next project... the sump.
Craig Manoukian
Well-Known Member
You da wood craftsman bomb!
:smirk:
:smirk:Montanareefer
Has been struck by the ban stick
Very nice Dave! You should be proud of your work as we all here are!