GregT's RSM250

GregT

Active Member
WOW your hood mod is awesome, well done. Is it only controlled by the stock timer?

Looking forward to seeing your sump upgrade hope all goes well.

Tok
Thanks Tok,
Yes the stock timer controls the LEDs and moonlights with the new LED drivers hooked up to 2 of the 3 stock relays after ditching the T5 ballasts.

Re the sump, just looking for inspiration before I start really - and a weekend of free time
 

DianaKay

Princess Diana
RS STAFF
WOW GregT, just now saw that you are adding a sump!
Did you get the cabinet modification done? I'll be watching close for an UPdate.
(So be sure and UPDATE :yup:) :D
I Think my sump will be here this week or early next week.
 

GregT

Active Member
WOW GregT, just now saw that you are adding a sump!
Did you get the cabinet modification done? I'll be watching close for an UPdate.
(So be sure and UPDATE :yup:) :D
I Think my sump will be here this week or early next week.

Hi Diana
I've been busy trying to finish a full bathroom reno, so been pinched for time.
Think I'll have to wait til the Xmas break (we have a 2 week compulsory holiday break over the Xmas/New Years period) and could do it on one of those days.

Been following your thread and the pending LifeReef conversion with a lot of interest at look forward to seeing this installed in your tank.

Got a wandering anemone so moving corals out of its path again!

Can't wait to see your install pics...
 

GregT

Active Member
INSTALL THE SUMP - Part One, the Plan
I had originally planned on cutting a side access door to slide the sump in and then also cut a portal in the centre panel.
After researching it appears (to me) that the RSM 250 has a very strong cabinet.
In the interests of aesthetics though I've changed the plan.
I'm going to support the front with two temporary supports and instead cut the centre panel from the front so I can slide the sump in from the front! I'll add some permanent support to the middle once the sump is installed.
I think the main reason it has taken me so long is coming up with the nerve to do this!

The sump I'm using is from an Aqua one 300 that I got free from a fellow reefer who changed his sump.
The approximate additional water volume this will give is 62 litres.
I'm guessing around 50 litres nett once I have moved some of my DT rock into the sump - another excuse to aqua scape :)

I've decided to paint the inside of the cabinet white while I'm doing this - I like the inside of the white RSM's and this should make it easier to see what I'm doing inside the cabinet!
I'm aiming to complete the install tomorrow now.
I'll take lots of pics as I think this is a mod many with the RSM250 may want to do.

Cheers
Greg
 
Last edited:

GregT

Active Member
Very happy with the white interior of my cabinet now. Took a lot of coats of paints though.
My 2yo daughter also gave me the thumbs up.

Waiting for the topcoats to harden before I get the saw out.

b72391adcdbb1c2939c5273f9c9898a8.jpg
 

GregT

Active Member
Thanks Glen
Zoe's grown up with this tank (used to put her in front of it when she was a newborn to settle her) and has her favourite fish she calls 'yellow pink' (the Royal Dottyback)

I'm very nervous about cutting the cabinet and over thinking the process!
Can't wait to have a sump though.
 

DianaKay

Princess Diana
RS STAFF
The white inside looks AWESOME....it is so dark in there with it painted black like it is, I have to keep a small flashlight so see the skimmer output level. I like the idea but I was afraid of paint fumes.
Was just dreading the "cutting the cabinet" for you, it made me nervous just drilling the 2 holes.
I think Greg (goma) has a good set up with the sump housed in it's own custom built cabinet sitting beside the RSM 250 stand. If you have room beside the tank, You might want to consider doing that.
However you do it, I think you will enjoy having the refugium :thumbup:
Excited to see it working for you. :chair::lurk:
 

GregT

Active Member
The white inside looks AWESOME....it is so dark in there with it painted black like it is, I have to keep a small flashlight so see the skimmer output level. I like the idea but I was afraid of paint fumes.
Was just dreading the "cutting the cabinet" for you, it made me nervous just drilling the 2 holes.
I think Greg (goma) has a good set up with the sump housed in it's own custom built cabinet sitting beside the RSM 250 stand. If you have room beside the tank, You might want to consider doing that.
However you do it, I think you will enjoy having the refugium :thumbup:
Excited to see it working for you. :chair::lurk:

Thanks Diana
I kept a light in mine as well - couldn't see a thing in there!
Will keep one shelf but will purchase a white melamine coated one that'll be more durable than paint.
I used a no fumes sealer/primer and top coat when I painted.
GOMA's setup was an option but at the moment my kids use the second lounge as their TV/playroom so the space is used.

Maybe complete the sump today if the paint is hard.
Cheers
Greg
 

GregT

Active Member
INSTALL THE SUMP -Part 2 Measure, Cut and Sweat
SUCCESS!!!

How I did this?

First, I made a cardboard template of the sump tank.
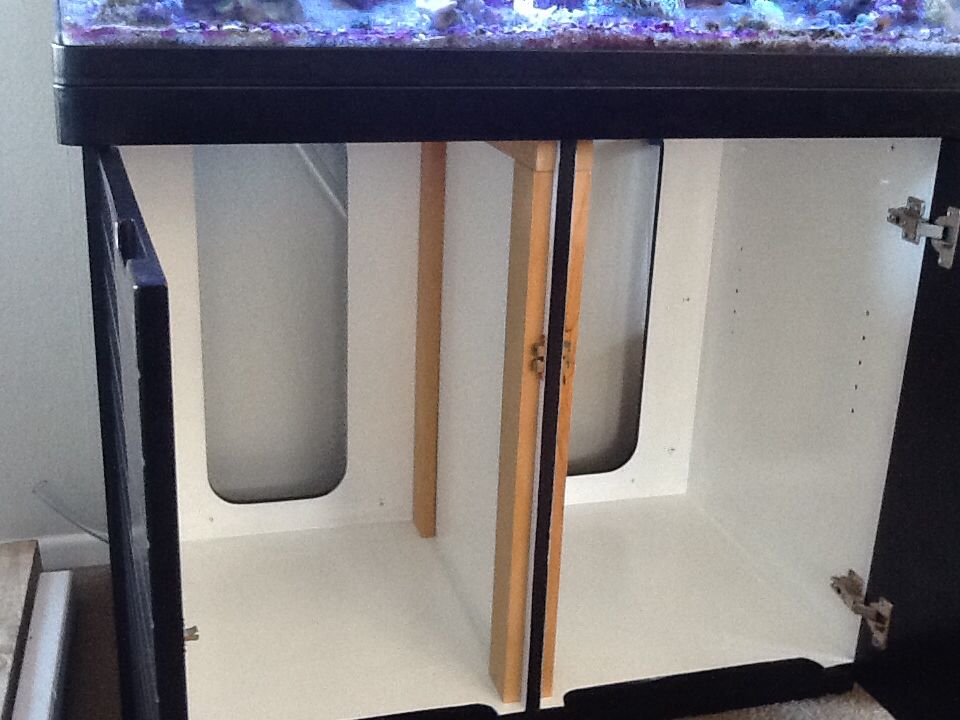
Transferred the measurements to the centre panel, marked the cut lines and realised I needed to cut more than first thought.
87c9144391778aafeb022e1442764527.jpg


I made two permanent U braces to go ether side of the centre panel (making sure the sides were a perfect fit and didn't 'push up' into the bottom of the tank) and some temporary front supports before I cut the cabinet.

Using my Renovator tool I cut most of the centre panel. Before I made the final cut I had the permanent braces sitting in place and emptied about 40 litres from the DT and a lot of live rock and corals, placed these in two bins.
I also had more NSW heating in the garage.
6a55756342330e4914caa2a1a914acdc.jpg


I cut some of my wife's yoga mat for under the sump. No, she didn't know I was going to do this when I asked where it was.

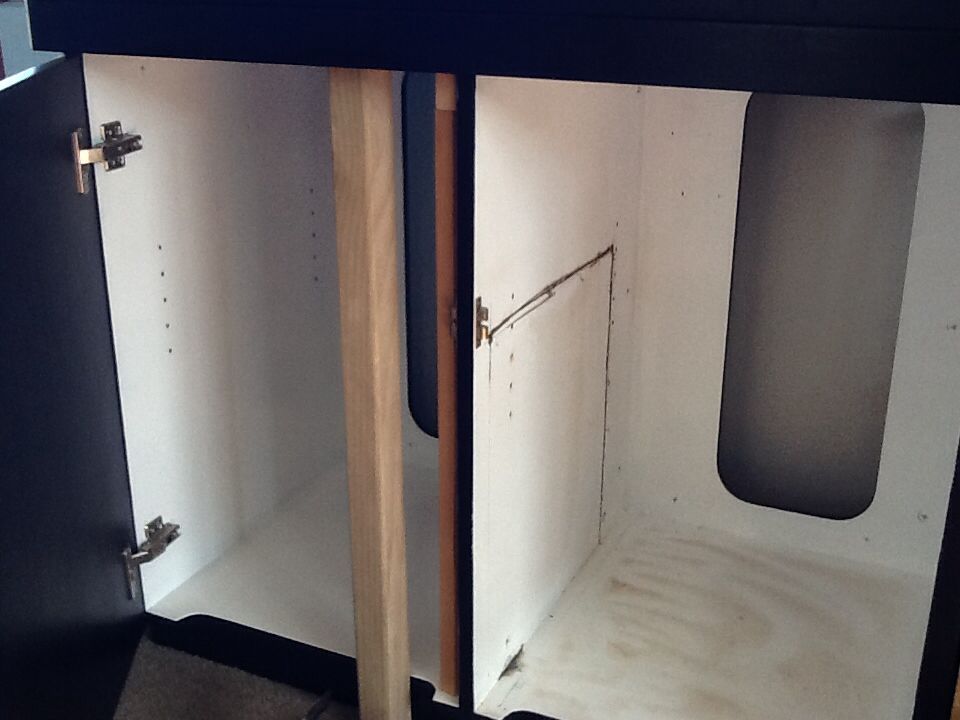
I made the final cut and when the centre panel didn't trap my Renovator's blade my confidence went above 50%.
Removed the centre panel. (There was a wooden leg and a metal screw I had to cut)

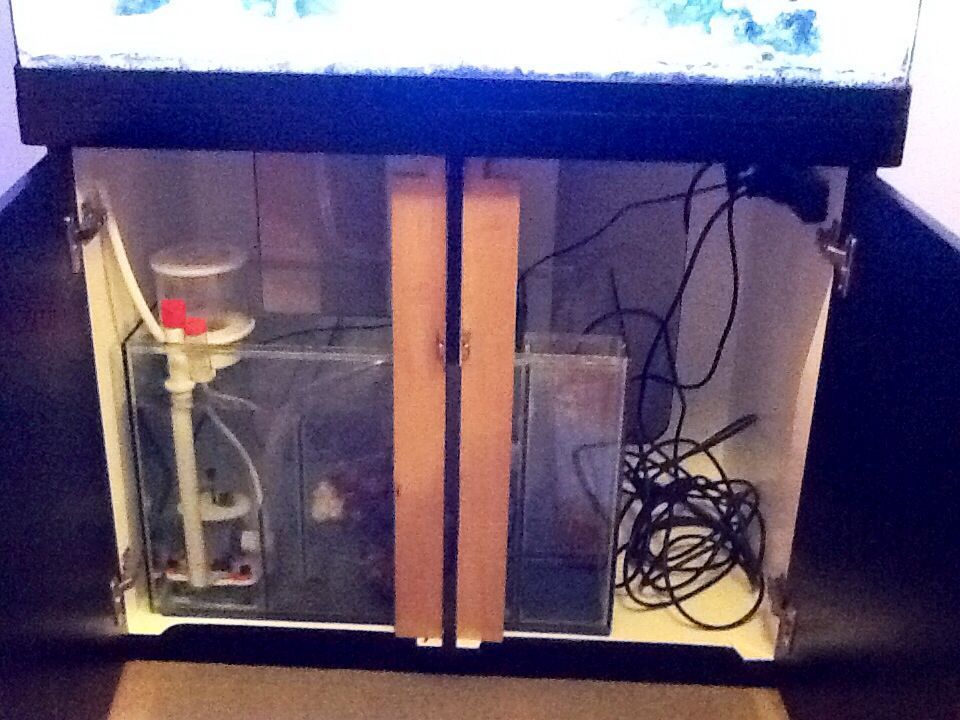
Positioned the sump half in the tank and enlisted my wife to assist (and share the blame if it went topsy-turvy).
Realised I needed to swivel the permanent front braces to fit the tank and manoeuvred the sump into position.

Filled the sump, added the skimmer and return pump. Replaced the two cabinet doors.
b8683afdd13060e7d420f41a13424367.jpg


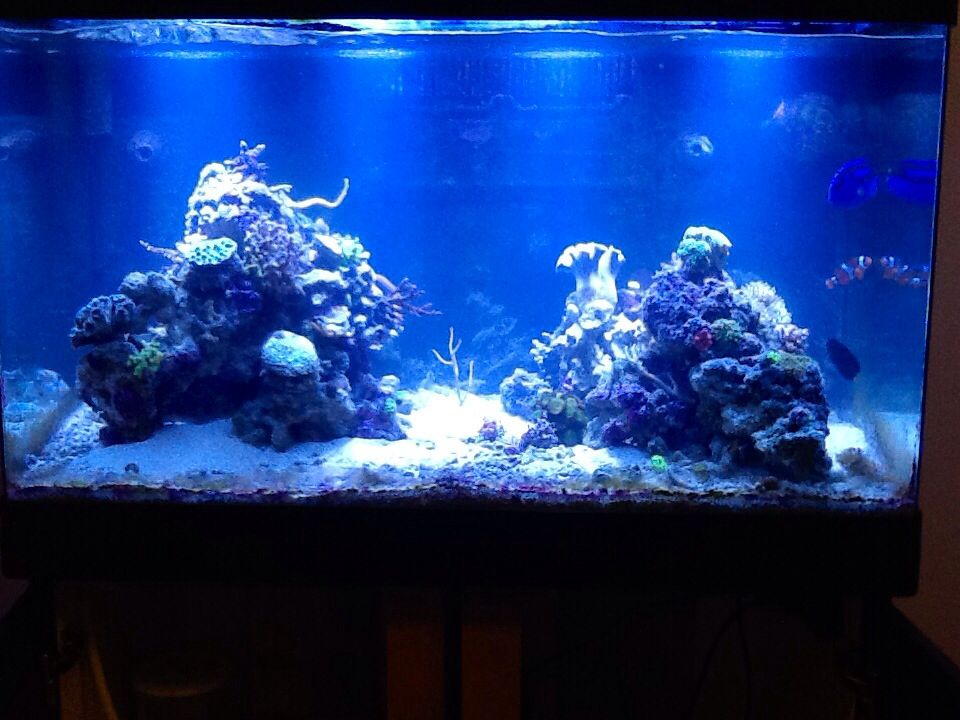
Added the LR and corals and made two islands, one for mainly softies and my anemones (yes discovered I had a baby) and one for mainly sps.
db15b3d0587b0d6a3a31b9e107a10b6c.jpg

I had been getting sick of trying to keep my anemone away from my sps so figured this was a good solution.

Still got some fine tuning to do to setup the skimmer correctly.
No noticeable extra noise apart from a faint gurgle.

Assumed the position with a beer and I'm feeling pretty satisfied with the install.
Cheers
Greg
 
Last edited:

GregT

Active Member
Great pics well done !

Here hoping your nem starts on his island - looks great !

Thanks Glenn,
This morning both Nem's moved but still on their island!
No leaks, worked out the gurgle so all good now.
Plus I now have somewhere I can mount a fan if the temperatures get hit again ( last xmas lost 90% of my corals when the tank overheated)
 

GregT

Active Member
Decided to get rid of the wandering anemone so stuck it in my sump until I could take it to The Pet Centre, my favourite LFS.
After 5 days went to get it out and it had split, so got double my money!
 

GregT

Active Member
How's it going Greg? :fishy:
Need a thread update ;)

Hi Di,
Didn't realise how long ago the last update was!
SPS are growing really well, but so are the Green Hairy Mushrooms! Every now and then I take to them with a knife. I don't know any other way to get rid of them.
LPS so so, but restarting the Zeovit regime again and seem to be improving.
I haven't had a problem with overheating since I converted to LEDs, best decision ever to do the mod.
Really happy with the sump, bonus is water changes are now a breeze.
I like your monti plates Di

Cheers
Greg
 

GregT

Active Member
Update.
Made more changes to my system now I've got a sump.
Added a Jebao DP4 dosing pump and an AutoAqua Smart ATO.
Got my water parameters in line with the Red Sea Reef Colours programme and will start this over the next week.
Also added a mandarin fish, although it's now residing in my sump after getting stuck in a hole in my rock work and I had to cut the rock away to free it, and keeping company with one of my clownfish after the other decided it wanted a divorce after a couple of years and kept attacking it!
 
Top