Project 58!! (Image intense)

Maxx

Well-Known Member
Next I mounted up the Power Centers and hung up my Sunlight Supply BlueWave IV E ballasts. You can see the back of my new light weight lightbox in the image. I have not mounted the trim on the lightbox, but it will match the stand. The lightbox is just sitting on two 2x4's to keep it off the top of the tank. The 2x4's also give me a good frame of reference for the lowest I want my lightbox to hang.

Powercenter_and_ballast.JPG


Here is a close up of the Power Center mounted to the upright...I have two and they are mounted in the same place on both sides. The other ballast is in the same place on the other side as well.

93closeup_of_powercenter.JPG


Nick
 
Last edited:

Maxx

Well-Known Member
Still need to:

Stain lightbox support arms, and dowel.
Drill hole for light box cables to mount from the dowel.
Glue trim to the lightbox, (hide them gaps).
drill holes through the sides of the dorm fridge, run the ends of the tubing through the holes, and seal them with insulating foam.
Buy a smaller square-ish shaped bucket or something that will hold 100 feet of tubing and water, (Tubing sits in water inside the bucket for more efficient heat transfer).
Buy a top off resevoir somehwere in the neighborhood of 15-20 gallons.
Add salt mix and aquascape.....
sigh...I'm getting to the finish line!

Nick
 

cheeks69

Wannabe Guru
RS STAFF
Lookin awesome Nick :thumbup:

I have the same problem with heat especially in the summertime it got up to about 87* degrees I had to open the canopy and run a large fan to keep it about 84*definitely a problem for oxygen levels in the tank. Right now I'm not concerned since it's cold up here now but once it starts warming up I'm going to buy one of those air condition units you can move around instead of the chiller hope it works.

At MACNA I was talking to Mike aka Mojoreef and he said his Sequence pump was increasing his tank temp by I believe 7* degrees so I thought that was odd for an external pump but Alberto was running into the same problem, so now I'm not surprised the Iwaki is doing the same thing.
 

Maxx

Well-Known Member
Have made some progress over the last couple of days, which is kinda surprising since Ive been sick as a dog, (if snot were gold, I'd own Fiji right now), and I've been working. Anyway...here we go:

First up was finishing up the lift mechanism for the lightbox. This was kinda kicking my butt for a bit. I'm still not wildly happy with it, but this will do until I come up with a better method.

I was concerned about the handwheel rotating, but not turning the dowel it was connected to, (kinda like when you turn a bolt and it rotates the nut also, so nothing changes...hope that makes sense), I initially thought about connecting the handwheel to the dowel with more than one screw, so it wouldnt spin uselessly. I didnt like that idea, since I was worried about the stress placed on all those screws from the rotational torque. Screws with the head twisted off are a ROYAL PITA to remove.
So I figured I'd build a collar that goes around the dowel rod, and connect it with screws to even out the stress placed on them. This is the collar. I had to go out and buy a 1 1/4 hole saw drill bit to get this right.

110dowel_collar.JPG


Even then I screwed it up a couple of times. I initially tried to use some leftover plywood since it was available and stained and sealed.....long story short, the screws inserted through the sides split the wood. I wound up using leftover 2x6 which was stained and sealed and cut it to fit.

You can see the screw on top running through the end grain of the wood here. I used one large screw per side to anchor this to the dowel. I'm sure if I tried hard enough I could rip the collar free of the dowel, but I'd have to work really hard to do that, and in any event that would be more stress than the collar will deal with while over my tank.

110collar_mounted.JPG


Here is a front shot of the handwheel attahed to the collar and dowel.
Again, I just used some scrap wood left over from the super heavy lightbox and cut it down to the shape it is now.

110front_of_handwheel.JPG


Here's a shot of the rear of the handwheel mounted to the collar and dowel.

110rear_of_handwheel.JPG


Nick
 
Last edited:

Maxx

Well-Known Member
Here is a pic of the handwheel and everything mounted over the tank. I added this little knob planning on using it to raise and lower the lightbox.....doesnt work to well for that though. The knob is too small, ( I couldnt find a long straight handled knob/handle to use for this). So I wind up grabbing the sides of the handwheel and raising/lowering the lightbox that way. Rocio makes fun of the little knob....I dont care, I'm secure enough in my manhood have a little knob on my handwheel. I'm not compensating for anything...

110handcrank_and_goofy_little_knob.JPG


Here are two photos of the cotter pins I bought to keep the dowel from sliding out of the brackets and causing my lightbox to come crashing down.
Found em at Home Depot for 3 bucks each. I use two, one on either end so the dowel cant move very far.

Here is the cotter pin with the safety clip closed.

110Cotter_pin_closed_clip.JPG


Here it is with the safety clip open. You just pull it over the end of the pin...kinda tough, so it wont happen accidently.

110cotter_pin_open_clip.JPG


Nick
 
Last edited:

Maxx

Well-Known Member
This part kept me thinking for a bit.....
I had difficulty finding an appropriate method of keeping the lightbox raised at whatever height I wanted. Basically I needed to keep the dowel from moving after I raised/lowered the lightbox to the desired height. This is what I settled on:

These are two hook and eye latches with spring clips that keep them from accidently slipping of the eye bolt. I use one on each side. There are 4 eyebolts circling the dowel, so I can raise/lower the lightbox and lock it into almost any height. I have two sets of eyebolts shown here in these pics cause I screwed up the first placement and had to redo it....some people who have read this thread actually have the crazy impression that I'm some DIY super genius and get all this right on the first try...I WISH THAT WAS TRUE!!! This is just one more way of showing I'm human and make mistakes. So anyione who thinks this sort of thing is too difficult, thats crap. Cause if I can do this, anyone (except maybe my dad.....) can do it. Ya just gotta be willing to try.

110dowel_lock.JPG


Top down shot of the locking mechanism, (LOL...Its not really a mechanism, just makes me sound smarter...anybody impressed?????? Hello.....Hello...is this thing on????)

110Overhead_view_of_Dowel_Lock.JPG


Nick
 
Last edited:

Maxx

Well-Known Member
The lightbox is suspended with 3/32" diameter vinyl wrapped cable which actually increases the outer diamter of the cable to 1/8". I bought it at Home Depot along with the aluminum cable ferrules and stops. Basically you run the cable through one side of the ferrule, make a loop, and run the other end through the other side of the ferrule. Then you use a swaging tool to crimp the ferrule down and secure the cable. After this is done, the cable will not move. Its important to beg, borrow, or buy a swaging tool to do this. I almost gave myself the world's first simultaneous hernia and brain aneurysm trying to crimp the ferrules and stops with a pair of pliers. As soon as my camera battery is charged up again, I will take pics of the swaging tool so people can see what it looks like.
The stops are exactly what they sound like. They stop the cable from pulling though whatever they are run through. I need to take a close up pic of the stops.....

Here is a general view of the cables connected to the lightbox and the dowel.

110Dowel_cables_and_clips.JPG


Here is a close up of the cables and the quick disconnect clips I'm using.

110close_up_cable_and_quick_disconnect_clips.JPG


Starting at the top of the above pic....
You can see the cable looped through the ferrule, (after being swaged...much smaller beforehand) and connecting to the quick disconnect clamp. The top cable is running through the dowel. The quick disconnect clip is basically a D rig type clip...that uh, isnt shaped like a D....so I guess its really a snap clip. But its purpose is to allow me to be able to separate the lightbox from the dowel for any sort of reason.
The snap clip is connected to the second cable. This cable is connected to two larger eye screws connected directly to the lightbox frame. There are two locking links that connect the cable to the eye screws. Locking links is not the correct term for them, but I cant remember the right one...sorry.

You can see the cables from my Reef Optix 3 reflectors coiled on top of the lightbox in this photo. They will not be like that when this is all said and done.
They will run up and around the lightbox support arms when I finally get off the computer and stain and seal them.
Nick
 
Last edited:

Maxx

Well-Known Member
Here is a top down photo of the lightbox. This shows the spaces between the top braces. The middle brace has a 4 inch space, the two side spaces are 3 1/2 inches wide. This allows for alot of natural heat venting so I dont need fans to move air into the box. The back of the box is very open as well.

110Overhead_view_of_lightbox.JPG


Nick
 
Last edited:

Maxx

Well-Known Member
Here is a whole tank shot with the lightbox in a lowered position. The lightbox can actually rest on the top the tank. Here it is raised about 3 inches off the top of the tank. Please excuse the appearance of the lightbox....this is the crappy front panel for test purposes. The good one is finishing up the final coat of water seal, and trim will be put on the corners of the lightbox to match the stand.

110suspended_lightbox_low_level.JPG


Please excuse the box o plumbing parts in the right hand corner. Its sitting on my new chiller.

Here is a photo of the lightbox raised to its max height. This places the bottom of the lightbox at about 11.5 inches above the surface of the water, and puts the bottom of the reflectors at a little more 13 inches above the surface of the water.

110Lightbox_max_height.JPG


Here is a photo of the lightbox as seen from a worms eye view. I actually had to lie on the floor under the dining room table, (dodging dogs who desperately wanted to lick my face and the camera...sigh....), to take this picture. I'm glad Rocio didnt see me doing that. She already thinks I'm a nutjob, no need to confirm it for her.

110Lightbox_under_view.JPG


I only have the MH's in place right now. I still need to wire up the VHO's...

Nick
 
Last edited:

Maxx

Well-Known Member
Finally here are photo's of my new chiller. I bought it used from a reefer who was getting out of the hobby. Its a Pacific Coast CL-650 1/4 HP Inline Chiller. Its very quiet, and very capable for what I need. It was bought in May of this year, along with a Mag 950 which the guy threw in all for $400.00. The chiller has 5/8" ports and the same size heat exchanger coil inside, which really chokes down the Mag 9.5...down to about 350 gph. I'm thinking of using an Iwaki MD-40RLT I have lying around. I originally bought the Iwaki 40 MD-RLT to power the ETSS skimmer I bought and didnt use. I think the pressure pump would do better in this application.

110Chiller3.JPG


110Chiller_1.JPG


Nick
 
Last edited:

Gina

Moderator
RS STAFF
Good find on that chiller! $400 taint bad at all. We looked at a few earlier this summer and $1,000 is alittle more than we can afford right now. Well, not a little....alot!
 

strat

Member
wow, looking great nick. nice find with the chiller. and thanks for all the details and tips, they will come in handy. :D

strat
 

Maxx

Well-Known Member
Strat,
Thats the whole point of this thread...Work smarter, not harder. SO if you can figure stuff out from my mistakes...then I was successful!
Nick
 

strat

Member
right on nick. as i was reading thru the thread i was going to mention a tip but by the end you had already gotten a chiller. doh :D if anyone else reads this that is thinking of doing the small fridger chiller thing, then if theres any spare room in it put containers of water in to freeze or at least be chilled as they will help cut down in electricity costs (so i hear) ie if one was to run an empty freezer and compare it to a freezer full of water bottles the second would maintain its temp far longer than the first........... anyways, just my two cents if that... :)

strat
 

Maxx

Well-Known Member
Good point Strat!
The idea behind the fridge was this:
I was going to use a Maxi-jet 1200 to push water through 100 feet of 1/2" ID tubing. Most of this tubing was going to be coiled up and placed inside a bucket, (the largest one I could find that would still fit in the fridge) filled with water. Hopefully with the fridge turned up as high (cold) as possible, the water would eventually freeze (or get real close to freezing) and the tank water would flow through the coiled up tubing, into the bucket (still in the tubing) and the cold/frozen water would suck as much heat from the tank water as possible, before the tank water got returned to the sump.
Does this make sense?
Heat transfer is all your really looking for here. On a bigger tank, the fridge idea wont work...just not enough heat transfer action able to go on....
You wouldnt be worried about the tank water frezzing since the fridge is unable to cool the saltwater down enough to make it freeze.
Thanks for bring this up though Strat!

Nick
 

Maxx

Well-Known Member
12-30-2004

The holidays have kept me pretty busy. I've still been trying to get things done though. Our local reef club, (SEASL www.seasl.org) is going to Inland Aquatics (www.inlandaquatics.com) on Jan 8th and I'd love to be able to buy something for the tank then. Its gonna be a few months before I can really put any corals or anemones in the tank, so I'm looking at fish. Inland breeds clowns so this would be a grerat time to pic some up....We'll see if they have anything I can bring home.

I did manage to finish the aquascaping though. I'm not real happy with the left side, but I LOVE the rock work on the right. The pics dont look too good IMO, but I definately got what I was looking for, open rockwork with lots of room for fish to swim.

Here is the right side. I took the pic with out flash since it really made the image tough to see properly through my crappy digi cam. The tower is actually 4 seperate rocks that were drilled and are held together with about 5 or 6 acrylic dowels (3/8" diameter). I just used a standard 3/8' wood drill bit, but it was 12 inches long. Cut the acrylic rod to fir and shoved it in the hole. works good. The little rock to the right of the tower is actually homemade by a guy from the reef club, Darren.

110right_side.JPG
 
Last edited:

Maxx

Well-Known Member
Here are 3 pics of the left side. The main rock is a Lava rock I've had since I was 12 years old and keeping marine fish in Hawaii. It weighs about 35 lbs and has lots of crazy holes and caves. I tried drilling it.......friggin nightmare!
Drilling Lava Rock requires:
1....Patience, (It doesnt happen fast)
2....Time (see #1)
3... good masonry drill bits
4... a good drill, preferably not a cordless...sucks to change batteries out every 10 minutes, ( I was using a cordelss 18 volt dewalt. I had plenty of drill for the job, a corded drill would have been better

It actually didnt work very well and I wound up removing all but one dowel on top used to hold another Darren special homemmade rock on top.
I really dont like how this looks and will probably play with it some in the intervening months. As it is now, the rock is just balanced on top of the two legs....

this one shows the underhang...I have absolutely no idea how the camera flash made those crazy white squiggly squares in that pattern....obviously, the tank doesnt really have those in it.

110left_1.JPG


different angle...shows that the arm from the twoer doesnt actually reach over that far.

110left2.JPG


Here is the final one... I think it looks better than this in person, but I'm still not real wild about it.

110left3.JPG
 
Last edited:

Maxx

Well-Known Member
Finally a full tank shot of the aquascaping.

110full_tank_shot.JPG


Things left to do:

Hook up calcium reactor
hook up chiller and new sump return. This will involve a whole new sump return manifold. I want to use Loc-Line on the return in order to alleviate some dead spots in front of the overflow box. I may just order some eductors for better flow....
Set up Liter Meter 3 for top off stability.
Nick
 
Last edited:

Maxx

Well-Known Member
One of the guys on a different board pointed out some things about my aquascaping:

with the current state of your aquascape, how do you plan to place corals there??? It seems all the rocks are very vertical and you have not left much of any horizontal areas to put them on. The aquascape does look very open, but besides also looking very delicate (like it would all come down with just a snail moving over it) it doesn't have a lot of "shelving" for things to be attached to.

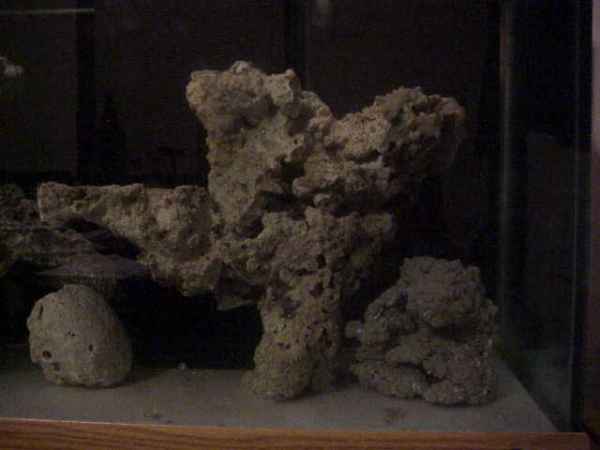
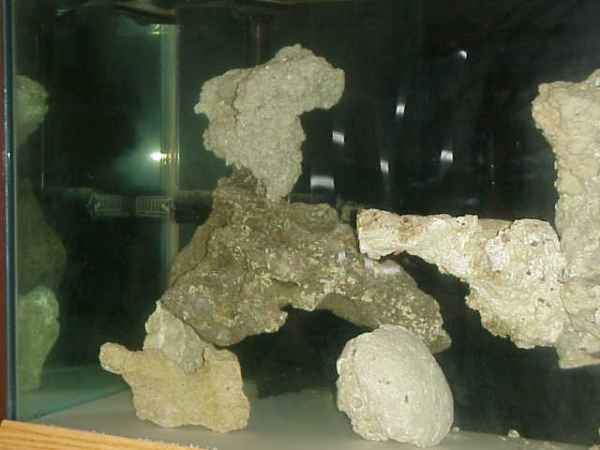
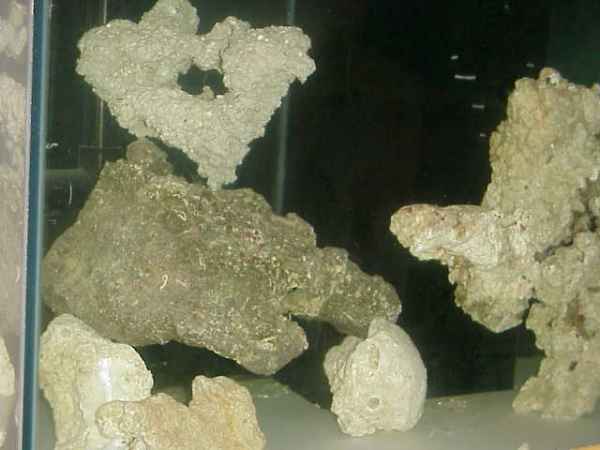
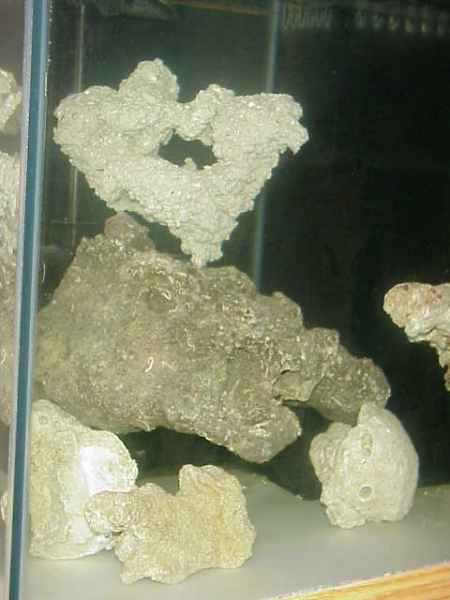
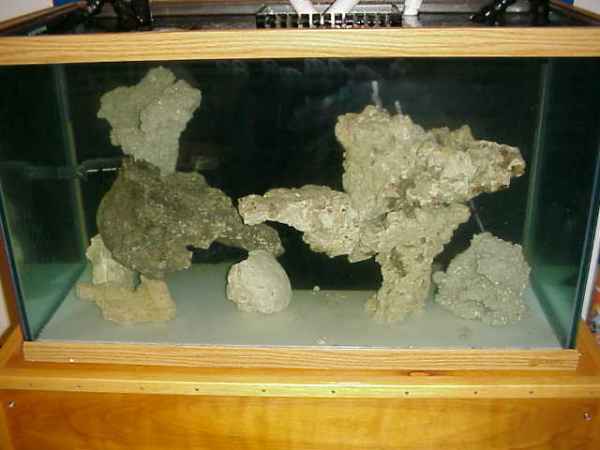
I can certainly see how that might seem to be the case with the crappy pics I posted up previously. Fortunately, I took some all new crappy pics to (hopefully) show how much horizontal space I really do have. The saguarro/tower looking rock structure on the right is actually 4 rocks connected together and has alot of horizontal space with several levels and ridges to place corals. I dont plan on stocking this incredibly full of corals anyway, as I want the reef to grow in as opposed to be crammed full of corals....(thats about all I can afford anyway so thats convienant).
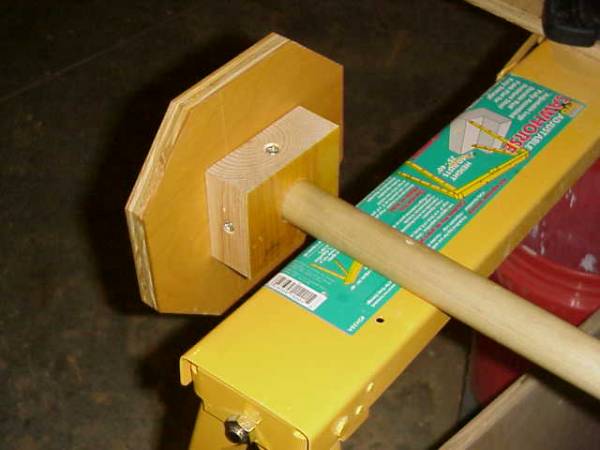
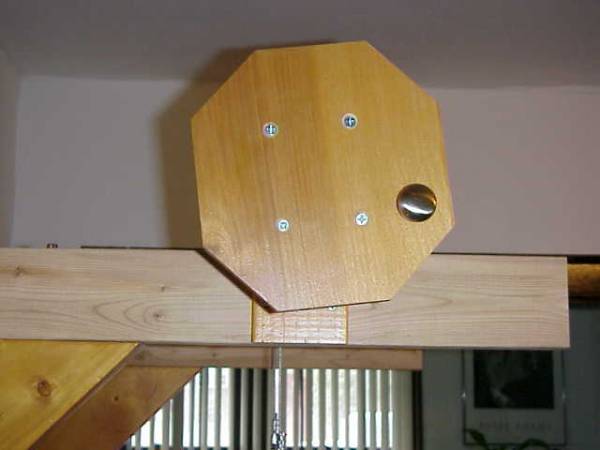
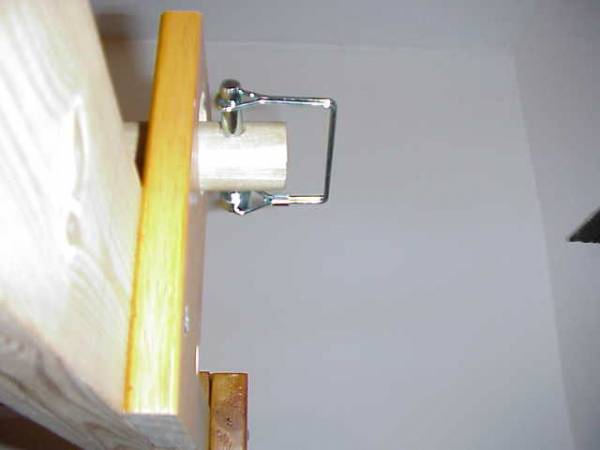
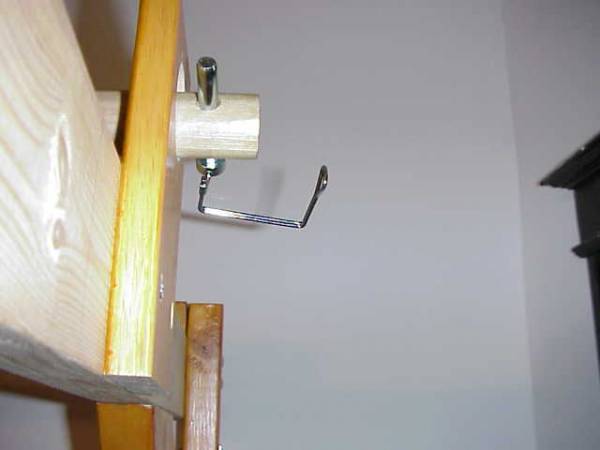
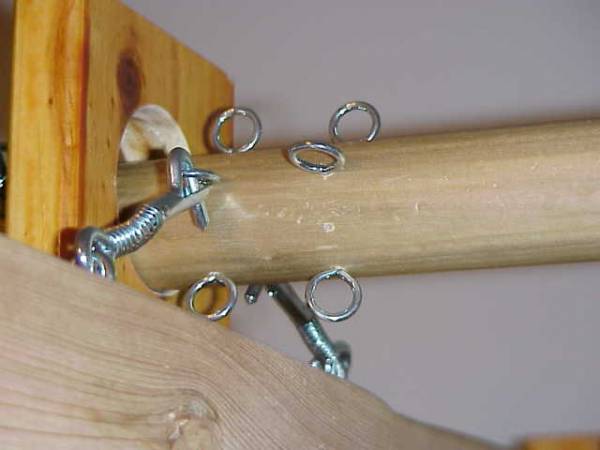
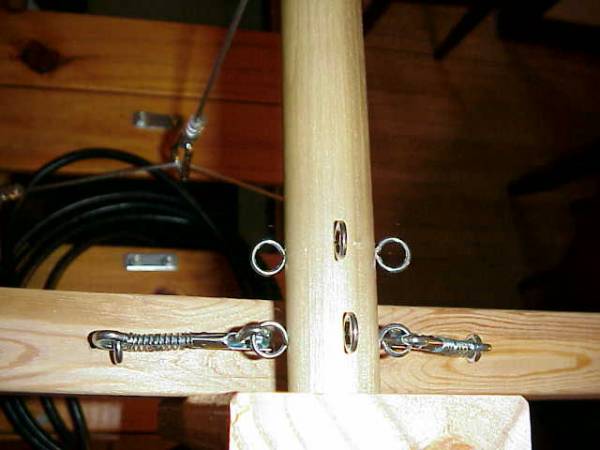
I went pretty heavy on the acrylic rods holding the saguarro/tower, 6 in all. Anything that will cause that to fall apart will just about destroy the tank too. Its supported by a nice flat base. I used my power compound miter saw (not a fine wood 80 tooth finishing blade, just the regular old 40 tooth one that came with it) and cut the base of the rock smooth. No problems, no issues, it actually went ALOT easier than I thought it would after Mojoreef suggested it to me.
The lava rock structure on the left is balanced on top of those two rocks, but its really secure. An over zealous eel might pull that apart or an octo...but neither of those are going in here. I deliberately pushed, pulled, poked and messed with all of the rock to make sure it was stable and wouldnt come apart or fall easily. I even tried tipping both structures, and wasnt able to do it without using more force and strength than anything in the tank is going to possess.
I had a large turbo snail tear up my old 20 gallon because it was clumsy and some of my corals were just "stacked" on the rock as opposed to fixed. I made sure this wasnt going to happen this time.

Again these are just crappy pics the two "greenish" looking ones are when the MH's were kicking on....

Left side shot. This shows a side profile of the lava rock. I still dont like this side very much, but it does have room for at least two decent sized coral pieces on top.

110left_side_with_flash.JPG


Slightly angled down shot of the tower showing the different levels and platforms.

110right_frontal_angled_down_lights_kicking_on.JPG


Side shot of right "arm" of the tower. The angle on this is kinda funny, cause it looks like its almost touching the front pane of glass on the tank when its really a good 2.5 inches away from it. But this shot does show the length of that arm...

110Right_side_tower_lights_fully_on.JPG


Here is a top down shot of the tower with lightbox moved out of the way. Lots of room for frags and later decent sized corals there.

110topdown_tower_w-o_lights.JPG


Finally, a top down shot of the lava rock again with the lightbox removed.

110topdown_lava_w-o_lights.JPG


I was standing on a small step ladder when I took the top down shots....makes my 58 gallon look like a nano.... LOL
Again these are crappy shots, but the idea is to convey (a little better) the different shelves and platforms I have available for coral placement. I also plan on putting one or two LPS right down under the two "arms" of the tower. These are lower flow areas and the corals can expand to get more light or retract to get less if they desire. Thats just a tentative plan right now to be honest, I'll have to see how things develop later on.

I keep saying it, but its true....I'm just not wild about the lava rock side of the tank. I will be playing around with it abit, especially since I have some 50-60 lbs of live rock left over. I'm sure I can make something really cool out of that. But I do really like the tower side of the tank.

I do really appreciate the comments and constructive criticism from all, please continue. Your continued input and influence only help me improve my tank and make it a better environment for the critters I want to keep in it.

Nick
 
Last edited:
Top