MrPex's 120 AGA build

MrPex

Member
Well, last November, I had to take down my 60 to move from California to Washington State. For Christmas, I got a used 240, but the house we're in right now just doesn't have the room for it. :tears:

After 7 months jonesing for the earthy smell of clean saltwater to wake up to every morning, I caved in and got a brand new AGA 120 last week to last me until the bigger house for the bigger tank! :bigbounce

All I've done is put in my LR and existing Catalina light fixture on top (2x150 14k MH and 4 actinics, but I don't use the actinics, just the MH), no plumbing or sand yet.

2011-07-20_09-59-34_532.jpg


2011-07-20_10-00-58_105.jpg


2011-07-20_10-00-42_308.jpg


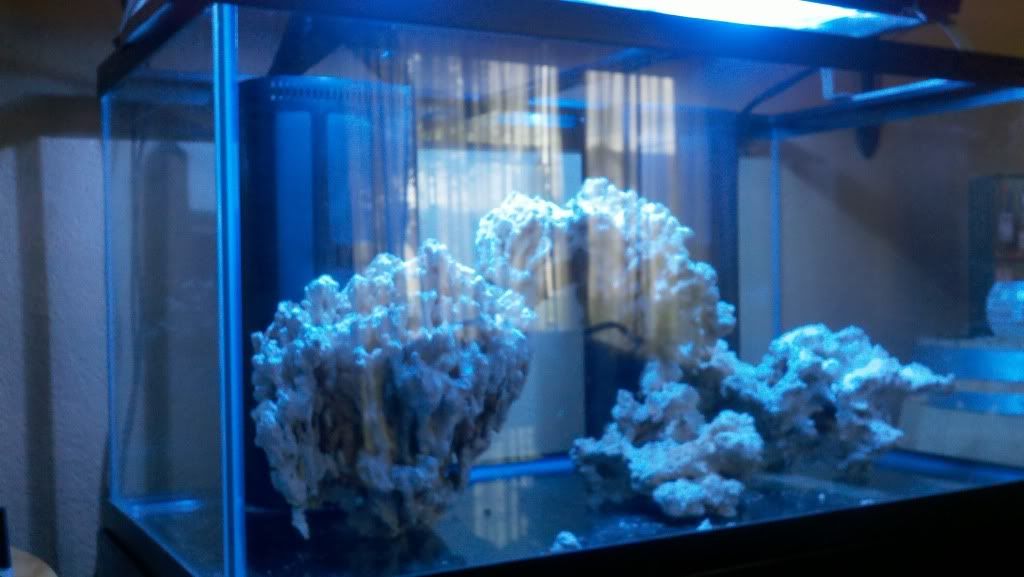
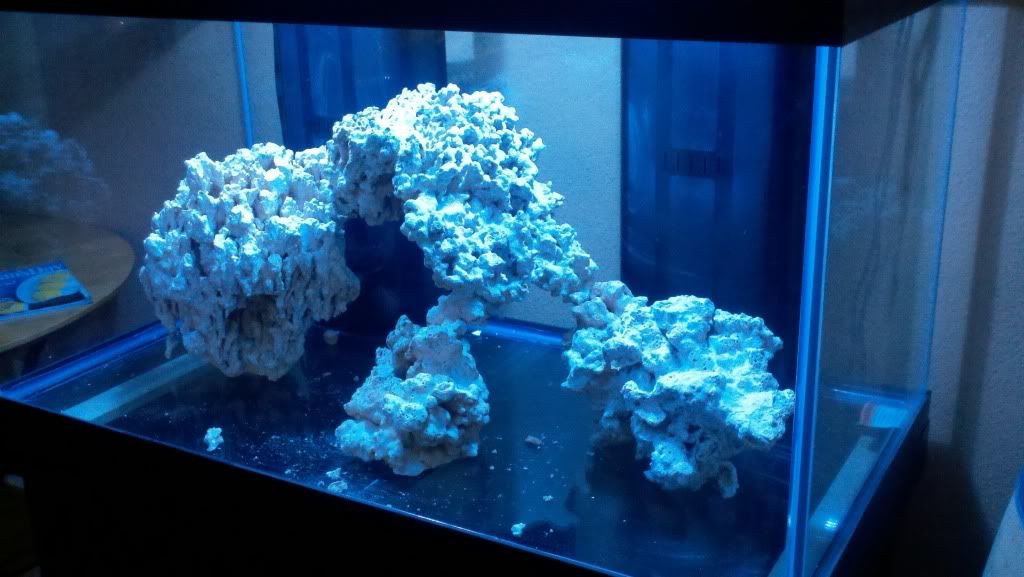
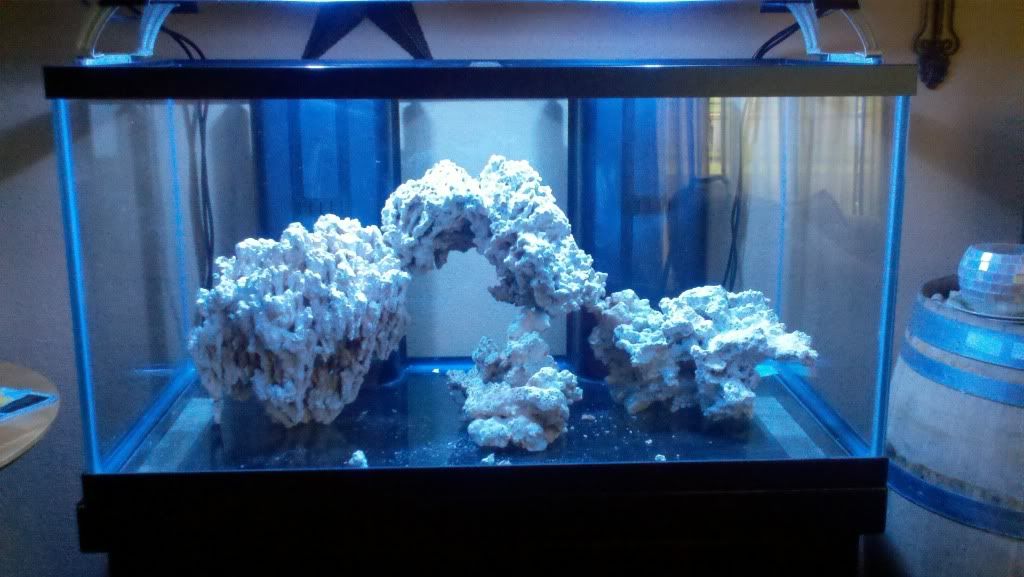
Whatcha' think of the Pukani LR? It actually extends further back and closer to the front than you can tel in the pics, so there's a lot more "top surface area" to put stuff on that as appears.

So here's where I'm going with this... everyone's expert opinions and advice is certainly appreciated!

The "hardware":
Keeping the Catalina 2 x 150W 14K MH fixture- no hood (Maybe go to 20K)
60lbs Pukani (Pukani is so porous that generally, you can use half the weight of what you would of other, more dense, LR)
2"-3" Oolite (the white stuff)
2 x Koralia 8 (Maybe the 8v version with the Koralia 4 controller if the pocketbook says ok) for up to 58x turnover
~30 gallon baffled sump/'fuge with DSB
Reef Octopus Super Reef 3000 Internal Skimmer
Mag Drive 18 (1375gph @ 4' head for an additional ~10x turnover for nearly 70x turnover total)
2 x Eheim Jager TruTemp 200 watt heaters

The "software":
Trochus, Margaritas, Ceriths and a couple of Zebra Striped Turbos
1 Electric Blue Hermit
1 Halloween (red and black) Hermit
1 Cleaner Shrimp (Probably Blood)
1 Black Longspine Urchin
1 Spider Conch (had one before and he was my favorite inhabitant!)
3 or 4 Coco Worms (had them before with much success)
1 Yellow Tang
1 Yellow Watchman Goby (or similar- haven't decided exactly which yet)
1 Pseudochromis (Haven't decided which one yet)
School of about 10 Blackmouth Bicolor Chromis (Yellow)
2 or 3 colonies of Zoos on the lower rock on the right
4 or 5 Ric Florida on the lower rock in the middle (the Blue/Orange ones)
And some type of LPS on the big rock on the left when I get comfortable enough...

Lots of inverts and lots of smaller fish with only one big one. It seems like a lot of livestock, but going (very loosely) by the "guideline" of an inch per gallon of fish, I'm only at no more than 40 inches for a 120 (150 with sump)... Does anyone disagree with this?

Again, I value any input and opinions! Like everyone here, I want to have a very successful and healthy tank...

Pex
 

deaclauderdale

Well-Known Member
Great scaping and I love how the AGA's look. This is going to be one sweet puppy-subscribed. As far as the inch per gallon rule, I personally don't follow it to a T, but I do monitor how many animals I place in the tank and the water quality very closely. Good luck with your build!!


Sent from my iPhone using Tapatalk
 

BigAl07

Administrator
RS STAFF
I think you have the beginning of a VERY nice tank. IMHO my two favorite size/shape of tanks are the 120 and 240. They just have the right "proportions" and are very eye pleasing.. at least to Allen... and really that's what it's ALL about anyway :)

That rock looks SWEET! I'm so envious (insert green envy smiley here) of you! So here are my "random" thoughts:

A) Be sure to install/allow for a way to throttle back your Mag18. That's what I ran on my 90g and I had to keep it throttled back.

B) Can you go bigger on the sump/fuge? That's what I had (29g) under my 90 and it just could have been bigger and that's considering I had a 18g Fuge in addition to the 29g sump.

C) Enjoy :)
 

MrPex

Member
Thanks for the feedback...

BA- I have the standard AGA black pine stand for the 120 so I have a bit less than 46x22x22 to play with (and am a little unhappy with the quality of the stand for what I paid for it...) What size sump would you recommend?

And to anyone- here's a pic of one of my drilled holes. Because of perspective they appear smaller, but the actual diameter is 1 3/4" for the drains AND returns.
2011-07-21_11-06-21_573.jpg

So what size bulkheads do I need to get? I was under the impression that the tank had 1 1/4" overflows and 1" returns, but they're all the 1 3/4" in measurement.

And one question regarding the stand. The tank rests entirely on the perimeter of the stand- basically 1 x 3s bradded (not screwed or nailed) to the stand and the entire bottom of the tank has absolutely no support from the stand- the top of the stand is completely open and I'm a little worried to fill it with the H20 until someone here tells me the bottom of the tank will support that much weight with nothing underneath it!

TIA!

Pex
 

MrPex

Member
So the big day comes... salt, sand, sumps, pumps, bulkheads, beer, heaters and hookers :)oh:) arrived via FedEx and UPS... cardboard boxes and styro peanuts EVERYWHERE on the living room floor :snowski:!!! It was even better than getting my Red Ryder Range Model 200 Shot Air Rifle with the real wooden stock and the thing which tells time! This weekend is going to be beer :apint:and tank building fun... ALL - WEEKEND - LONG!!!!

But wha... what's this 25' feet of 1" vinyl tubing that I DIDN'T order??? And.... ohhhhh fuuuuuuudddddggggggggggeeeeee......... where's the 500w True Temp Titanium Heater and Controller that I DID order...???

Well, I contacted the shipper (since it seems to me mentioning non-sponsor companies is faux pas here, I'll just call them DRSFAS) about the errant item and the missing merchandise. "Bill" said that he could ship me the missing heater FedEx Next Day Air and he'd split the cost with me- 24.99 split between us. I told him I'd pay 10 bucks and he's got a deal. He agreed and the heater should be here sometime tomorrow. I would have preferred they shipped it free Next Day Air since it was their fault, but the original shipment that I got today actually arrived 2 days early, so all in all, a good deal.

Just thought I'd add an update here... gettin'g REALLY antsy to get wet!!!!

Pex
 

MrPex

Member
SON of a BEACH!

WE have SAND!!!

This is two bags of 30 lbs of Aragamax White Oolite 00930- I may add a third bag, I'm still undecided yet though.

When I opened the box, my heart sank a bit because it looks tan, not white, and I was set on having stark white sand. But under the 14k lights, I don't think I can really tell the difference. And once the bacteria start growing in it, it would darken a bit anyway, so no biggy.
263255_2182713602343_1082040429_32603080_43798_n.jpg


Here's a quarter angle view showing some of the hiding spots and swim-throughs that the tang will enjoy...
262553_2182715882400_1082040429_32603083_2486451_n.jpg


And here's the same area from above, just for a different perspective...
285132_2182722882575_1082040429_32603088_2232895_n.jpg


Just a few more days and we'll have the official "Pex can make it wet!" celebration and actually add some water!

Ciao for niao briaon kiao...

Pex
 

1Reefer

Active Member
great thread, looks like its gonna be a beautiful tank.. im looking forward to seeing this one progress!!.. and as always more pics!!!!
 

MrPex

Member
Almost done with the plumbing. Man, one lesson learned this time is: Build your own stand. The AGA tank is great, but the stand leaves almost no room to plumb and run electrical in, especially when you're using all 1" pipe with unions and ball valves.

Anyway, here's a shot from back a few feet:
291870_2185039140480_1082040429_32606278_1471070_n.jpg


And here's a panoramic taken from inside the stand:
294405_2185038300459_1082040429_32606275_2342695_n.jpg


The outside lines are the overflows. (The pipe on the left that looks askew is just holding up the one long overflow pipe that runs all the way from right to left while it cures.) The inside lines are the returns. The return pump is on the right and will go into that union you see hanging free about half way up the sump, then splits at a "T" to the left and the other keeps going straight up. I will have to throttle the line that goes straight up with the ball valve to keep the flow the same as the left return line that has 3 90s in it.

I have to run back to the hardware store to get a threaded 1" coupling to screw onto the pump and add the last horizontal pipe on the return line down into the sump and it'll be done.

Then the stress of the big leak test! :-o If it leaks all over the living room floor, well, it's 1930s Russian Elm and the girlfriend gets really touchy about it.

Keep your fingers crossed for me!
 

MrPex

Member
Well, today is leak test day! I'm going to fill the dump about half way with fresh water anleave the stovepipes out of the overflows and have the returns dump right back into the overflows.... if all runs well for about 2 hours, I think I'll make the leap and start filling up with.saltwater...

Updates to come!
 

MrPex

Member
Stage 1 leak test- closed the valves under the bulkheads and filled the overflows to test the bulkheads and wet side of the valves under no pressure. The return bulkhead on the right side (third from left in pics) leaking where I glued it to the PVC for the valve. Of course it's leaking from the backside where it's hardest to reach and see!

I slathered a bunch of PVC cement around the pesky area and rubbed it in really good with my finger. If that doesn't work, I need to figure out a way to draw a vacuum on the line and see if I can get the cement to suck into the hole. If THAT doesn't work, I have to order a new bulkhead and ball valve union.

Heading to Lowe's to get some more superglue gel for my LR- had the top arch shift on me.

Will leak test again when I het back. Keeping the fingers crossed!
 

MrPex

Member
Ok... we're circulating fresh water through the system... i've got a serious case of the gurgles! Lol... been reading about Dursos and the like and I think ill be building a couple in the next couple of days.

Also I think i'll be getting rid if the hard connection between the return pump and the piping and looking into a flex hose solution to eliminate some of the hum.

Movin

A couple of minor bumps, nothing major, and a LOT of learning. I'm really glad I spent a lot of time reading before I did this because as I progressed andran into certain things, I'd remember reading about them here and on wetwebmedia.org and knew what was going on and how to handle it.

More to come and I've got a few pics to put up too.
 
Top