RedSea Max/ Euroreef Skimmer Page

redseareef

RS Sponsor
Hi guys,
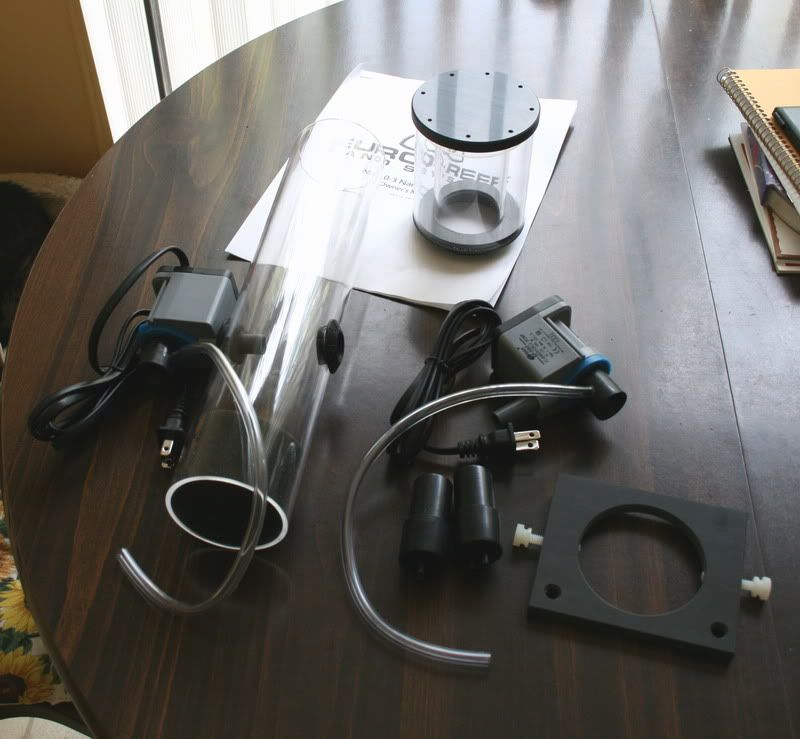
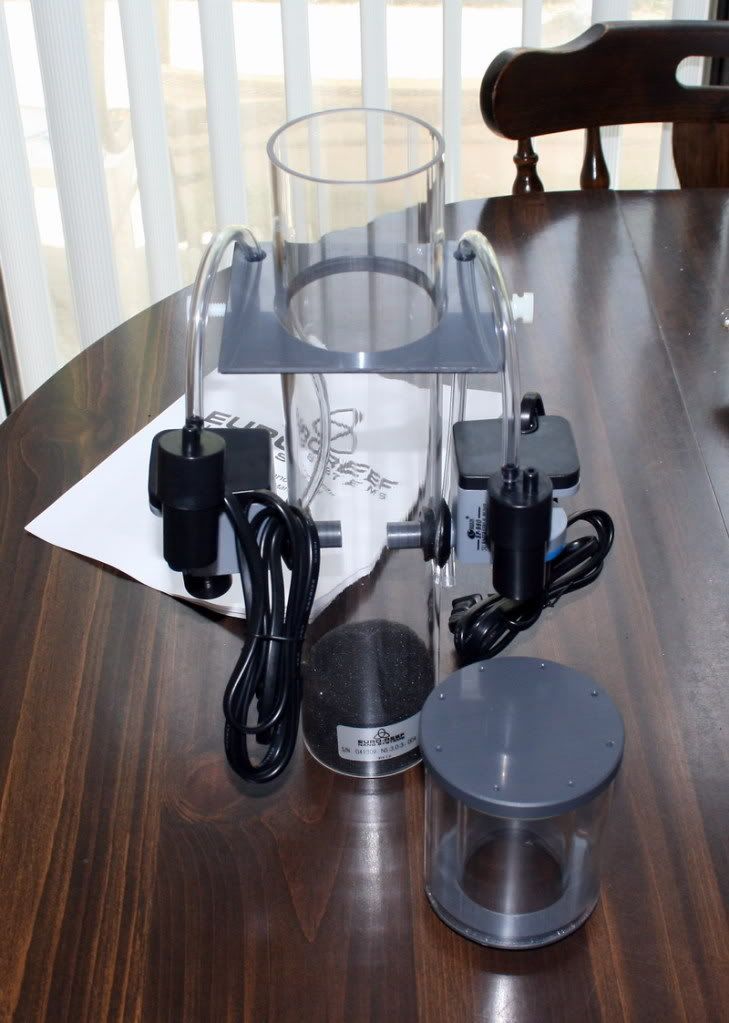
Well, what the heck. I figured we can all post our pics and information here and learn from each other on the Euroreef Alloy meshwheel skimmers for the Max tanks!
So, far I am THRILLED with mine. This page should prove to be a great information/resource page for everyone interested in the Euroreef Nano skimmers.
I will frequent it often to help out anyone with questions about THE MOST EFFICENT NANO SKIMMERS ON THE MARKET TODAY!!!
So post it all up here and get them pics on here of your skimmers in action!
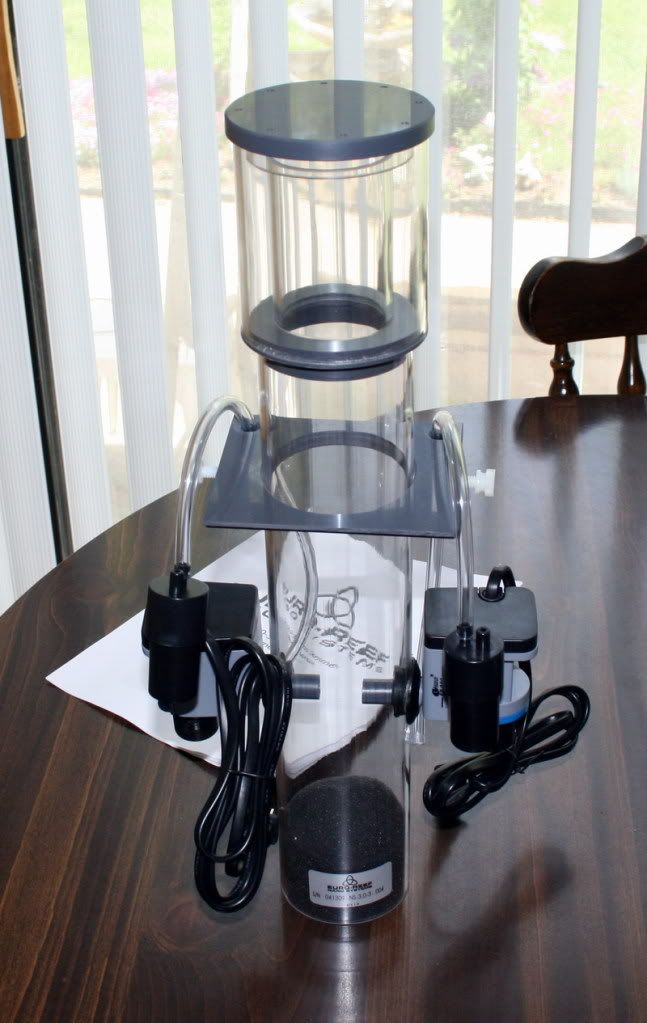
Here's one of the beast in action! This is the way it will mount in your Max tank back! Plenty of room left too!
IMG_2295.jpg

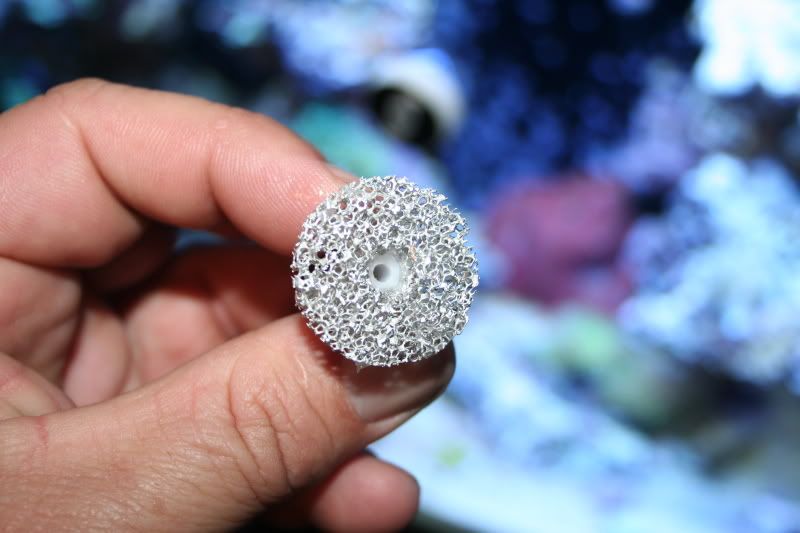
Here's a picture of the Alloy Magnesium Mesh Wheel! Nothing else like it out there!
IMG_2268.jpg

More pictures and info to come! :bouncer: PS feel free to post your reviews here to if you wish to do so!
 

redseareef

RS Sponsor
Hi Chad,
Yes, you can cut the lid or even drill a hole in it with a hole saw for the cup to fit through!
Take the cup off, close the lid and put the cup back on. Very nice!
 

Reefmack

NaClH2O Addicted
PREMIUM
Got my RSM Euro-Reef today!

First of all - Todd - glad to see you as a Reef Sanctuary sponsor now!

FedEx delivered my RSM Euro-Reef today. I'm going to do my best to get it installed tomorrow. Too many hours on yard work today, and I'd rather start on it fresh tomorrow.

I did take some pictures and measurements though. I thought it would be helpful to do this (and a lot easier) before it goes in the tank.

The unit was packed extremely well - lots of bubblewrap around each component (I hate that styrofoam packing that flies all over & sticks to everything!).

Each main piece and 2 pumps are wrapped separately, and it's a no brainer to put together.

My measurements:

8.25" wide at the widest (pump to pump)
18.25" high with the cup on
0.5" extra clearance needed to remove the cup
Bracket width - 6.25" (end of one screw to the end of the other screw)

Here's a picture of the parts (one pump inserted):

EuroReef1.jpg


And completely assembled, with the cup & cup lid off:

EuroReef2a.jpg


And the final unit:

EuroReef2.jpg


Very well made, with heavy walled acrylic on the skimmer & cup. Nothing shabby about the quality with this unit!

Now I can't wait to get it in the back tomorrow! Before I "sink it" I plan to mark some graduations on the skimmer body with a permanent magic marker - that will allow me to help with any adjustments in the bracket till I get it tuned in for the type of skimmate I want.

Thanks Todd for working with Euro-Reef to design this monster for the RSM!
 

jdmevo9

Member
Very nice reefmack, wish I thought of taking pics of the unit before installing it. I'll get some pics of it later today, but I already have some skimmate collecting in the cup. This skimmer is definitely worth the extra money over the tunze because the amount of bubbles the pumps push out. I'm very happy with this skimmer. Thanks Todd for setting me up with one!
 

redseareef

RS Sponsor
Thank you Terry,
Yea, the guys around here are VERY cool! Wish I would have advertised sooner! Money is tight right now I think for everyone! So, I have to really watch it.
Nice photos and great write up on the unit. This thread should supply ALOT of info on these units. Tips, tricks, "the whole enchilada" as they say.
The skimmers are no shabby molded pvc. They are built like tanks to last.
Built here in the USA out of quality cell cast acrylic. The pumps are warranteed for 1 year.
You will be shocked at how quiet this skimmer is. Once is starts skimming, it just keeps skimming and skimming and skimming!!!
The alloy mesh wheel not only cuts the air into extremely fine bubble, it pulls in massive amounts of air.
Alot of R&D went into the development of these skimmers. Great pics Terry!
Chris,
You have not seen anything yet! Wait till that thing breaks in! The alloy mesh wheels are really a superb design!!!!!

These
 

redseareef

RS Sponsor
Terry,
I have never ran mine with the foam in the bottom. I know you can run it without. Once mine broke in no bubbles at all in my tank!

Chris, this may be a adjustment for you as well with your custom sump model! Pull the foam and you should be able to lower the model down more or raise your water level. The foam actually adds resistance to the output, raising the "Suds" in the body. Less restriction, the lower the water level will sit in the body..........................
 

Reefmack

NaClH2O Addicted
PREMIUM
Thanks Todd. I figured getting some pics before would make it a lot easier, and the dimensions should help others too. I think I read in another thread that we should run them with the bubble level at 1/2 - 3/4 for a while to break it in?

jdmevo9 - good question as I was wondering the same thing. I'm not quite sure of the purpose of the sponge, if it's really needed based on Todd's comment, or if cleaning it would be necessary if it was used. I think it's a bubble trap?
 

jdmevo9

Member
I see some bubbles being released from the bottom of the cylinder is this normal Todd? I guess we'll find out when Todd chimes in.
 

redseareef

RS Sponsor
Terry,
Yes, I ran mine 2/3-3/4 from the top of the skimmer body. This way, if I was not around and it broke in while i was gone no big deal. Just start lowering it and getting familiar with it.
Once it breaks in, it starts getting predictable production wise. You will get in sync with it rather quick.
I think next tiime I pull mine out for cleaning I will install the sponge, just to see how it reacts and what kind of height differences there are. You are correct, it is just a bubble trap "If" needed!
You should have to raise the body, as it will add more back pressure.

Chris, I am curious as to how yours is going to level out on break in.
 

redseareef

RS Sponsor
Chris,
Yes, it normal during break in. Mine did the same thing. It even did it a few hours after I took my skimmer out to clean and inspect it.
 

redseareef

RS Sponsor
Chris,
I have been told that the sponge should be cleaned out from time to time. How much, I do not know.
I really do not htink you will need it once the unit breaks in. We will see!
You and Terry are the first ones. So , I look forward to your suggestions, praises and complaints if there are any.
Keep us all posted! Terry, get that thing put in tonight! It's a piece of cake to install!
 
Top