Raymo's ~120 Gallon Tank Build 2011

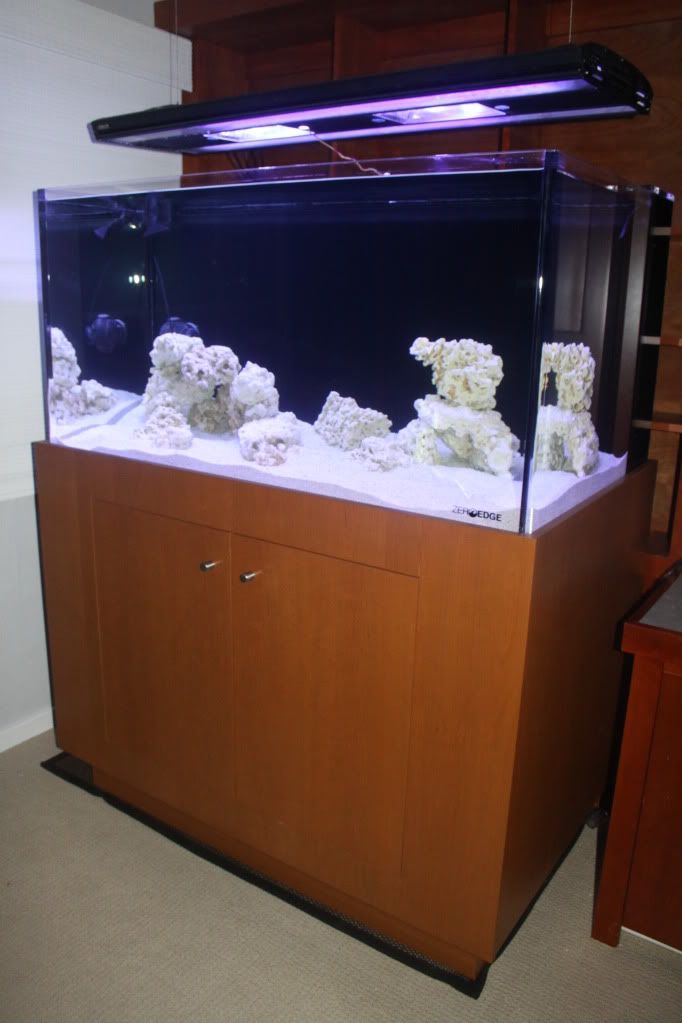
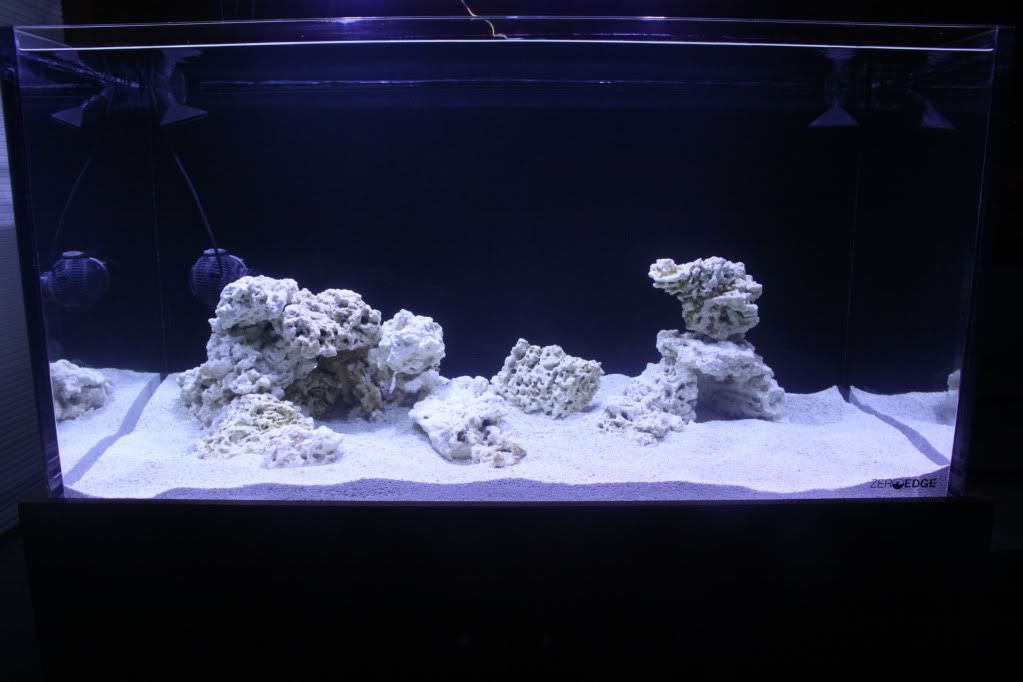
Wow Raymo this is a fantastic setup/journal love the depth you gone into with everything and the 3D vids are awesome. The idea to terrace the tank is fantastic! Original (well I've never seen anything like it lol) plus it'll give the tank an extra dimension

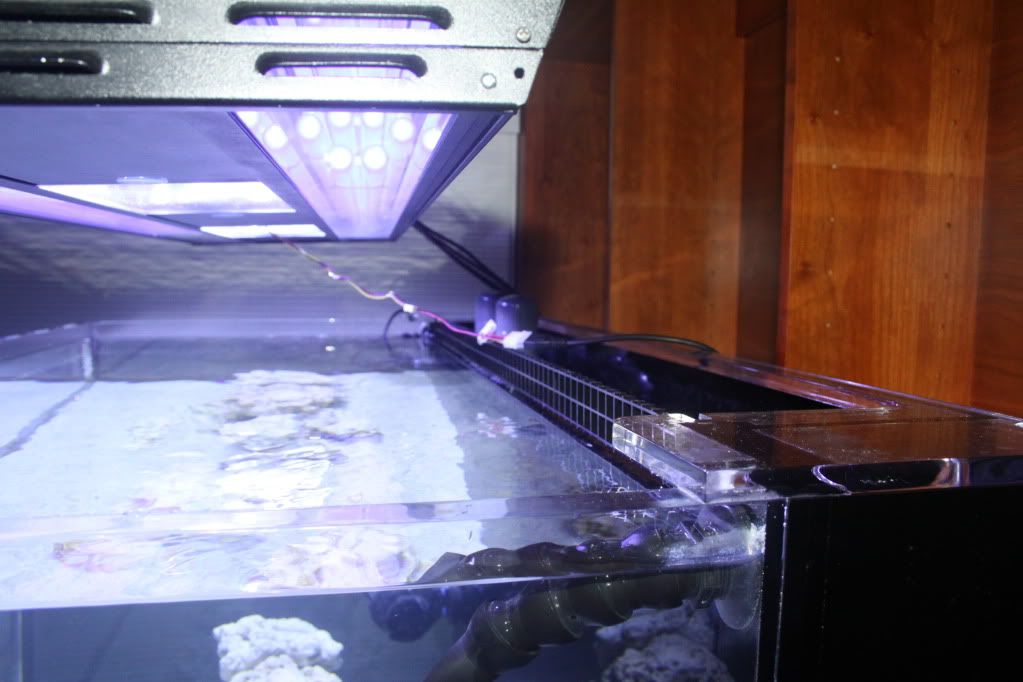
Sump build looks great, real clean and very professional and the idea to cut the groove into the edge of the overflow for the eggcrate is great too

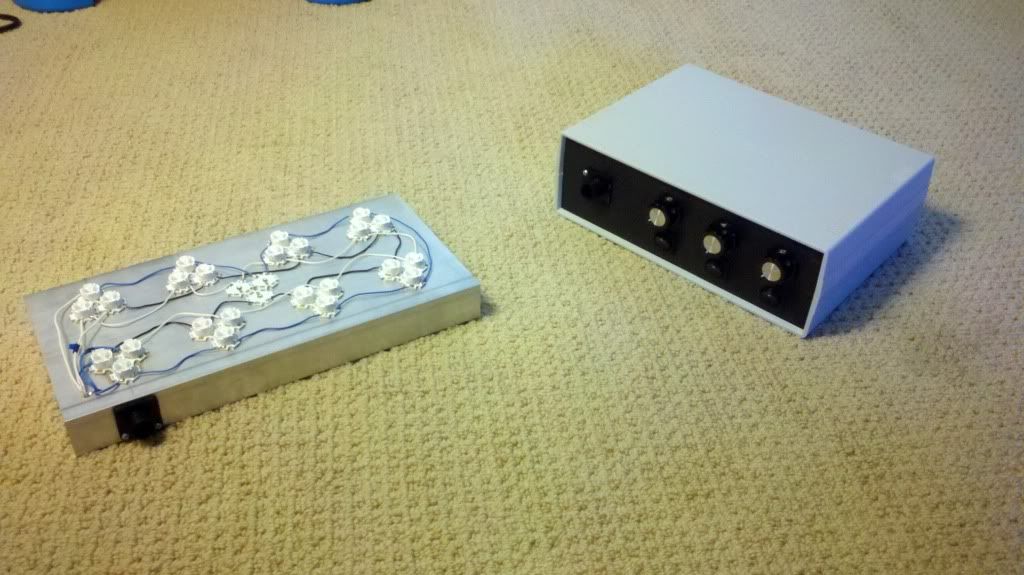
On a scale of 1-10 how difficult was your LED build? I'm looking to do something like that in the future but I'm only playing with the idea of it. I solder well and am not afraid of wiring or technical details (studying to be Electrical Engineer lol) so the technical parts of the job wouldn't be too hard I don't think but as far as acquiring the materials and all how was that?

Can't wait to see you fill up the tank!

Cheers
 

magnetar68

Member
The LED build was a 7, but this is because I decided to make custom CPC cables and put everything into a project box. I think for the other two fixtures I have planned I will do something simpler. In the end, I it probably cost about $1500 for the three fixtures plus my time. But I can get away with 3 since I can run them a little hotter than the AI fixtures, where I think I would need 4, so an off the shelf arrangement for this tank would be ~$2200. $700 in savings is a lot of money.

2011-07-14_17-53-38_602.jpg
 
Gotcha very nice... I'd love to do an LED build but just don't have the cash right now... congrats on your first module though! Looks very professional!
 

magnetar68

Member
Finally, some water in the thing. This summer has been crazy busy, so not a lot of time to work on this project, but here is a video of how quiet the plumbing is.

[video]http://youtu.be/FTFV7LYH15M[/video]
 

magnetar68

Member
Update: after running my tank and plumbing setup with freshwater fora couple weeks, I noticed that the water had gotten a little milky white. I figured it could be one to two things: (1) there was some paper dissolving from a tags on the filter socks or (2) the joint compound I used for the plumbing. In regards to (2), I used Oatey PVC joint compound instead of teflon tape on the advice of an experienced reefer who said he had better long term results with the paste.

In the hope it was (1), I drained the system, removed the socks, and filled it again. After a week, however, it was milky white. I probably did not do the paste correctly, but it was clearly getting into the water.

I therefore dismantled the entire plumbing system. I decided to try 1" instead of 1.5" this time since it was only about $60 of extra plumping parts. One the things that did not survive the tear-down, however, were the 1"x3/4" reducing nipples I use on the returns at the back of the bulkheads. I went to the plumbing supply and got two more. After I filled the system, however, both of the reducing nipples were leaking. And they were leaking from the point where the reduction happens which I though was impossible since this is a solid piece of plastic.

Well, it turns out the plumbing guy did not give me the reducing nipples, instead he fashioned a 3/4" nipple and a 3/4"x1" FPT MPT adpater but did not tell me and I did not notice so there was no tape at that joint. Anyway, I had to tear-down the returns again. This time I found a 3/4"x1" elbow hose barb, so I needed only the 3/4" nipple.

It's filled again and hopefully this won't leak. The plan is to add the saltwater and sand next weekend if this test goes well.

BTW, the 1" durso siphon plenty of flow for my Flowstar 1800 return pump. I am now using a more standard setup with 1" drains and 1.25" dursos. Although I kept the emergency drain at 1.5". I don't think I have this setup perfectly tuned, but the 1.5" setup was quieter, but that's because i could drain the whole tank with the 1.5" drain dialed way back. We will see if this is any noisier after I get it tuned.
 

magnetar68

Member
I am finally cycling this tank. Yes, I know, took me forever, but I am cycling with Dr. Tim's One and Only so I should be able to move my livestock over in a couple of weeks. It's all dry rock and sand, so I won't go through the typical Live Rock cycle with the algae blooms from the die off. I am using a temporary lighting as I have not finished all three of my DIY LED fixtures. I may just punt and my the sweet new EcoTech Radion ights. I would not have gone DIY if those were available when I started this build (nor did I think this whole thing was going to take so long).

Pics:

IMG_3168.jpg


IMG_3163.jpg


IMG_3172.jpg
 

Robzilla

Active Member
Awesome! Glad to finally see this thing come together after all your work!

Get the Radion LEDs.....I really want to see them over a tank. Especially a 120 since that is what I will be upgrading to :)
 

PSU4ME

JoePa lives on!!!
Staff member
PREMIUM
Really nice! I love the actual tank. Will you run 2 or 4 LED setups?
 

magnetar68

Member
Really nice! I love the actual tank. Will you run 2 or 4 LED setups?

I am thinking two of the XR30w fixtures which is really 4 light units. But these are expensive ($749), so I may need to buy one fixture and then add another later. This just means putting my initial corals under the one fixture and then adding corals to the other side of the tank when I get the other fixture.
 

PSU4ME

JoePa lives on!!!
Staff member
PREMIUM
I've been reading about the Sol's and the XR30's.....the control is ridiculous and people are really able to create a sunrise/sunset and make the corals pop by dialign up the right concoction........I really wanna see this in person and not the dilluted view through pics and videos.
 

magnetar68

Member
This is my first attempt at a dry rock, dry sand, Ammonia Chloride dosed cycle. I am using Dr. Tim's One-and-Only. Things were going well but then my Ammonia concentration stabilized at 1.5ppm. Apparently this is a common problem with this method. The addition of Ammonia Chloride is mildly acid so is uses up the Alkalinity buffer. Once the pH and Alkalinity drop to a certain level, the bacteria hibernate and the cycle shuts down. One solution is a water change, another is to use Baking Soda to increase Alk and pH. I went the latter route. I had not done it before, but I made Randy's two part using Arm & Hammer cooked in the over for 1 hour at 300 degrees. Well, I messed up my calculations and added twice the amount I should have. Arggg. This precipitated a bunch of Ca and some Mg.

The good news is that it looks like the bacteria started working again, but now I need to get everything back in balance. I am going to do a big water change after the cycle, so I am not too worried, but cleaning up all that precipitate was a pain in the you-know-what.
 

magnetar68

Member
The bacteria had stalled or died, not sure which, and after waiting nearly two full weeks, the Ammonia level was not coming down from about 1.5ppm. So last night I added some FritzZyme 9 and this morning my Ammonia had dropped to 0.5ppm. So things seem to be back on track. I will monitor this for another couple of weeks adding some ammonia chloride until I feel good about the bacteria population and then add my fish from the smaller tank.
 

magnetar68

Member
i recently added pods and critters from indo pacific sea farm, setup the refugium with cheato, and i upgrade to a Reef Keeper Elite last weekend. but i did almost cook the tank before the upgrade ..i am travelling this week, so cannot take a pic to post. starting in the new year, i plan to start adding a fair amount of livestock each month. so far, however, the tank has been great: very quiet and very stable and no blooms, although i do expect them at some point . I may take some time off during the hliday from work so I can finally finish my led lights.
 
Top