ChrisOaty
Member
Well, since I moved into my apartment I have had my 40 breeder out of commission and have since kept a little 10 gallon nano with a little DIY cree led fixture, about 15 lbs of liverock, a black and white clown, and a scroll coral. Started itching again and so I asked the front office if a fish tank would be okay on the 3rd story of my apartment building. They said it should be fine and others have kept much larger tanks (hope I won't need to ever use my renter's insurance). Anyway, my grandfather-in-law is a retired master carpenter and wanted to help me build a stand. I drew up a bunch of plans on Sketch-up and settled on a 3/4" plywood stand with a little interior bracing made of 1x2s. Reason for this is because I have a 29 gallon sump that I really like and wanted ample room inside to fit it as well as get it in and out if I need. I decided to widen the front-to-back dimension in order to be able to fit the sump in through a side door. Anyway, enough blabbing. Here's what I've got so far.
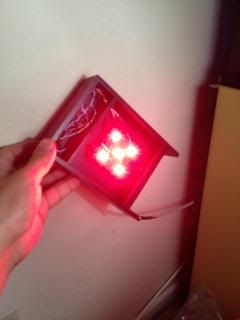
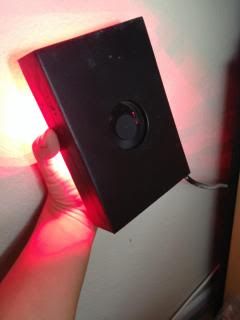


So now I'm stuck on the color of the doors and molding. The furniture in the room is mostly dark brown/cherry wood. So I was thinking of just painting the doors black as well and the moulding a dark brown to match a cherry wood color. I'd love to be able to get some hard wood molding and stain it, but that is much more expensive. The doors will sit inside the openings, flush with the faces of the stand. Molding will hang 1/4" over the doors to hide the gap between the doors and the opening. The top is missing because I'm working on an LED setup that will be mounted to it (I have the power supplies, just need the LEDs and optics). I want to incorporate a simple switch that will turn off the main tank LEDs so they won't blind me when I need to open the hood, and turn on a couple task lights fixed to the sides of the hood aimed down. If anyone has any suggestions/comments/concerns, I'm all ears.
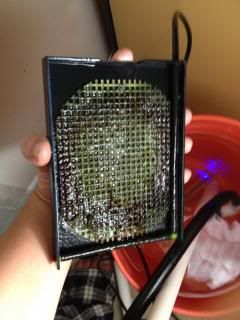
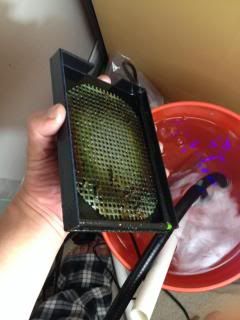
As for my plans for this tank; filtration will be covered within the 29 gallon sump by an ATS and moving bed filter with K1 media (if anyone knows of better/cheaper/stateside products like this please chime in). I'll employ a filter sock and run Purigen as well as a DSB of about 4.5 inches. The return pump for now is just a cheap-o rio 1700 but I'll likely be grabbing a mag 9.5 before this tank is ready for livestock. I already have about 40lbs of very good/porous rock that's been curing for about a week. I suspect it'll be another 2 before I'll be adding it to this tank. I'd like to achieve a color temperature in the 14k range which I think can be had with a 3:2 ratio of royal blue:cool white LEDs.
My black and white clown will get a mate as soon as he's ready to be introduced to the 40B. Other inhabitants that I plan on getting are a BSJ, Mandarin, Blue tang, 6 line wrasse. I know the list is very generic, but it's a list I put together with my family, and the colors vary well. I'd love to have a dwarf flame angel but I'm not quite sure if he'll play nicely with the coral I plan to have. I have my scroll, I'd like the middle and top sections to be dominated by sps, a clam and some lps and softies on the bottom, and perhaps a few zoa colonies. I've had varying success with sps in the past so I'll start with the stuff that's hard to kill like the zoas. One day I'd like to get a RBTA for the clowns, but I know I'll need to wait a while for that. I've had one in the past with success (admittedly I jumped into it prematurely), but had to give it up when I moved. I just wasn't comfortable keeping it in a 10 gallon nano.
Anyway, I'll be keeping this updated as I progress. My next step is throwing the tank and sump on/in the stand and getting the rock cycling with some new water. It should be an exciting few days next weekend!
So now I'm stuck on the color of the doors and molding. The furniture in the room is mostly dark brown/cherry wood. So I was thinking of just painting the doors black as well and the moulding a dark brown to match a cherry wood color. I'd love to be able to get some hard wood molding and stain it, but that is much more expensive. The doors will sit inside the openings, flush with the faces of the stand. Molding will hang 1/4" over the doors to hide the gap between the doors and the opening. The top is missing because I'm working on an LED setup that will be mounted to it (I have the power supplies, just need the LEDs and optics). I want to incorporate a simple switch that will turn off the main tank LEDs so they won't blind me when I need to open the hood, and turn on a couple task lights fixed to the sides of the hood aimed down. If anyone has any suggestions/comments/concerns, I'm all ears.
As for my plans for this tank; filtration will be covered within the 29 gallon sump by an ATS and moving bed filter with K1 media (if anyone knows of better/cheaper/stateside products like this please chime in). I'll employ a filter sock and run Purigen as well as a DSB of about 4.5 inches. The return pump for now is just a cheap-o rio 1700 but I'll likely be grabbing a mag 9.5 before this tank is ready for livestock. I already have about 40lbs of very good/porous rock that's been curing for about a week. I suspect it'll be another 2 before I'll be adding it to this tank. I'd like to achieve a color temperature in the 14k range which I think can be had with a 3:2 ratio of royal blue:cool white LEDs.
My black and white clown will get a mate as soon as he's ready to be introduced to the 40B. Other inhabitants that I plan on getting are a BSJ, Mandarin, Blue tang, 6 line wrasse. I know the list is very generic, but it's a list I put together with my family, and the colors vary well. I'd love to have a dwarf flame angel but I'm not quite sure if he'll play nicely with the coral I plan to have. I have my scroll, I'd like the middle and top sections to be dominated by sps, a clam and some lps and softies on the bottom, and perhaps a few zoa colonies. I've had varying success with sps in the past so I'll start with the stuff that's hard to kill like the zoas. One day I'd like to get a RBTA for the clowns, but I know I'll need to wait a while for that. I've had one in the past with success (admittedly I jumped into it prematurely), but had to give it up when I moved. I just wasn't comfortable keeping it in a 10 gallon nano.
Anyway, I'll be keeping this updated as I progress. My next step is throwing the tank and sump on/in the stand and getting the rock cycling with some new water. It should be an exciting few days next weekend!


") And you're right. It will look nicer with hardwood molding. Looks like you're cycling so it won't be long now until we get some pics of the new livestock. Any ideas?
And you're right. It will look nicer with hardwood molding. Looks like you're cycling so it won't be long now until we get some pics of the new livestock. Any ideas? 
