Hi all, how are things?
I wanted to document my 150 build thread for my records and your reviews. Feel free to make comments and suggestion. Here is a link to my intro should you wish to have a little background.
Tank Type: LPS, Softies and SPS
Current Livestock (to be transferred): Hippo Tang, Tomato Clown, Algae Blenny, Flame Angel, purple lobster, tiger tail sea cucumber.
Frogspawn, green hairy mushrooms (two different types), blue mushrooms, Xenia Poms, a torch, a lord, an acan and a brain.
Status:
3/3/16
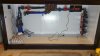
Almost all equipment has been purchased, plumbing is complete (except for final bulkhead gluing). Sump interior has been painted (Appliance Epoxy White). Sump fans have been installed. Waiting for pressure testing (will do after the final bulkhead assembly which will occur when I move the system to the final placement). Im wiating for final testing on my rock to aquascape.
To Do:
Display: 150 Gallon Starfire, 60 x 24 x 24 - Center Overflow - Euro Braced (perimeter only) - Herbie Drain
Sump: 68 Gallon - 5 chamber - glass
Base & Canopy: Wood w/ dark cherry finish
Return Pump: Ecotech Vectra M1
Protein Skimmer: Nyos Quantum 160
Heater: Finnex 800 watt
Heater Controller: (Apex)
Lights: (2) Reefbreaders Photon - V2 - 24"
Refugium Light: Beamswork 400 LED
Sump Light: Supernight waterproof flex LED
Reef Controller: Neptune Apex w/ Lab Grade PH
Wavemaker: Maxpect Gyre 150
Gyre Interface (Battery / Apex): Icecap interface module
GFO Reactor: BRS Deluxe (Fed from Manifold)
Carbon Reactor: BRS Deluxe (Fed from manifold)
Chiller: AquaEuro USA Max Chill 1/10
Mechanical Filtration: Homebrew design
Biological Filtration: (1) Marinepure 4" Ceramic Block, 2 quarts of 1 1/2" Spheres
Buffering / Nitrate Control: Remote Deep Sand Bed (Homebrew Cooler Based)
Sand: Caribsea Arag-Alive Hawaiian Black
Rock: Existing live rock (transferred), Pukani, Reefcleaners
Reef Cement: Nyos Reef Cement
Salt: Red Sea Reef
Glass Cleaner: Tunze Care Magnet
Probe Holder: Innovative Marine Aqua Gadget XL
Sump Fan: Ac Infinity Airplate
ATO: Current Tunze 3155 or Kore Doser
I intend on running Kalkwasser initially then supplementing with 2 part or a calc reactor.
Still to purchase:
ATO Container: (Building an Obsession)
Doser: Kore 5th Intelligient
Battery: Icecap Battery Backup
Mulit - Meter: Seneye
...More to come.
Thanks
Jason
I wanted to document my 150 build thread for my records and your reviews. Feel free to make comments and suggestion. Here is a link to my intro should you wish to have a little background.
Tank Type: LPS, Softies and SPS
Current Livestock (to be transferred): Hippo Tang, Tomato Clown, Algae Blenny, Flame Angel, purple lobster, tiger tail sea cucumber.
Frogspawn, green hairy mushrooms (two different types), blue mushrooms, Xenia Poms, a torch, a lord, an acan and a brain.
Status:
3/3/16
Almost all equipment has been purchased, plumbing is complete (except for final bulkhead gluing). Sump interior has been painted (Appliance Epoxy White). Sump fans have been installed. Waiting for pressure testing (will do after the final bulkhead assembly which will occur when I move the system to the final placement). Im wiating for final testing on my rock to aquascape.
To Do:
- Aquascaping
- Final Placement
- Final Plumbing Connections
- Pressure Test & Clean
- Determine how to cycle (and transfer current tank inhabitants)
- Electrical Organization
- Controller & Lights Programming
Display: 150 Gallon Starfire, 60 x 24 x 24 - Center Overflow - Euro Braced (perimeter only) - Herbie Drain
Sump: 68 Gallon - 5 chamber - glass
Base & Canopy: Wood w/ dark cherry finish
Return Pump: Ecotech Vectra M1
Protein Skimmer: Nyos Quantum 160
Heater: Finnex 800 watt
Heater Controller: (Apex)
Lights: (2) Reefbreaders Photon - V2 - 24"
Refugium Light: Beamswork 400 LED
Sump Light: Supernight waterproof flex LED
Reef Controller: Neptune Apex w/ Lab Grade PH
Wavemaker: Maxpect Gyre 150
Gyre Interface (Battery / Apex): Icecap interface module
GFO Reactor: BRS Deluxe (Fed from Manifold)
Carbon Reactor: BRS Deluxe (Fed from manifold)
Chiller: AquaEuro USA Max Chill 1/10
Mechanical Filtration: Homebrew design
Biological Filtration: (1) Marinepure 4" Ceramic Block, 2 quarts of 1 1/2" Spheres
Buffering / Nitrate Control: Remote Deep Sand Bed (Homebrew Cooler Based)
Sand: Caribsea Arag-Alive Hawaiian Black
Rock: Existing live rock (transferred), Pukani, Reefcleaners
Reef Cement: Nyos Reef Cement
Salt: Red Sea Reef
Glass Cleaner: Tunze Care Magnet
Probe Holder: Innovative Marine Aqua Gadget XL
Sump Fan: Ac Infinity Airplate
ATO: Current Tunze 3155 or Kore Doser
I intend on running Kalkwasser initially then supplementing with 2 part or a calc reactor.
Still to purchase:
ATO Container: (Building an Obsession)
Doser: Kore 5th Intelligient
Battery: Icecap Battery Backup
Mulit - Meter: Seneye
...More to come.
Thanks
Jason
Last edited:


.jpg")
.jpg")
.jpg")
.jpg")
.jpg")
.jpg")
.jpg")
.jpg")