Are these...??

CazK

Member
Looking over my tank the other day and found what appears to be eggs from my tomato clowns? Can anyone help me confirm if thats what they are and any idea how to get them out of the tank once the eggs hatch? BTW these "eggs" are attached to the side of a rock piece that is at the center of the tank...not easy to remove at all.

e2151ea6dd0b71da896461833397e2d95g.jpg

The "eggs"?

d6cbfd8e08591c47bde67c31a254ce705g.jpg

The "parents"
 

1Reefer

Active Member
After watching "life" those deffinatly look like eggs..... other than that I have no useful info lol. I would imagine the only/easiest way to get em out would be to remove the rock to a seperate tank before the eggs hatch. Idk for sure though
 

CazK

Member
yep seems the WERE eggs. They must have hatched last night because they are no longer there. Oh well just means I need to be prepared for next time. Which got me to thinking about setting up an "egg hatchery" tank. I was thinking something simple like a 10g with half an undergravel filter with sand on top, air stone with carbon and floss filter and some live rock. Maybe a heater if the eggs hatch better in higher temps.

Would this work to hatch the eggs? And how close to hatching day would I need to move them to not drive the poor "parents" crazy?

Any info would be great.
 

CazK

Member
Thanks for the advice on the book. Wife has restricted my budget to $0 for any new things so I'll have to look at a used book store to get it. In the mean time I found a site called breedmyfish.com which seems to give, with pictures, the basics.

So for the first "stage" of the eggs life I made a hatchery out of 2 buckets. Drilled 4x 1" holes on the edges and one at the bottom. I then attached 1" PVC to the 4 holes and have them covered with a coffee filter. The hole in the middle I put a PVC pipe coming straight up to be to the height of the other 4 holes. Next I placed the holed bucket into the undrilled bucket. Then I fed the bubble line down the middle of the pipe. I'm going with the idea that I draw water from the very bottom of the undrilled bucket and using a basic airlift system to let the water move into the drilled bucket and that water will flow out through the "filtered" openings. Right now I'm doing some fresh water testing to make sure all the seals are holding and trying to figure out if I get a better flow with single, double or quad layering of the filter. All have to get now to finish the plan is a heater and flow restrictor for the air pump.

Any comments or suggestions are welcome.
 

CazK

Member
hmm...I wonder if I should add 2 holes for water circuation at the bottom edge of the drilled bucket. I worry now that with the water level so high up that the water at the bottom might not be moving enough...or this might be a good thing...any ideas?
 

CazK

Member
well with a quick test I found the water not flowing at all at the bottome of the bucket. Even with the top 4 holes sealed the bottom holes are pulling the water in as the water is just aggitating at the top. This made me think that the pipe I'm using for the air lift idea is just too large to really "suck" the water up. So its back to the drawing board just a bit. Still have to find a good titanum heater to run down below the bubbler to I can keep the temp of the water as close to the right temp as possible.

Going with 1 1/2" holes at the bottom and a 3/4" hole through the middle to really PULL the water through. I also figure I want my water line about 1/4 to 1/2" below the top of the pipe to keep the cycle going.

I did get the valve adjuster for the bubbler so I can regulate how much pull is really going. Later tonight I'll try to post up some pics of the proto type so far...but it will be a few days till I get the v1.1 made up.
 

CazK

Member
ok so I'm late on the pics...but I have a good reason...this is what I've been working on:

Alpha
3164d661014b165c396b03fcd4daea604g.jpg


Yea this was the original...the bucket was actually an old salt bucket for the tank...but good recycling.
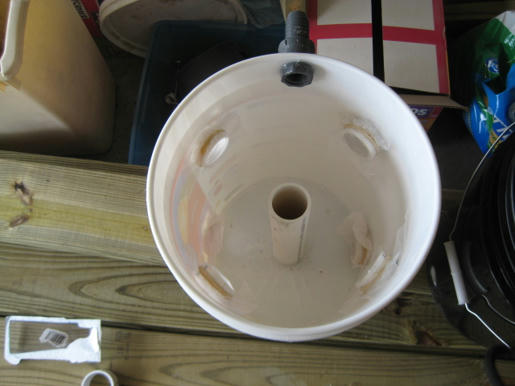
V1.1
28864081f3d18d0c83fdf74d466831dc4g.jpg

This one used 3/4" piping for the flow...but only 1" for the returns at the bottom. This version taught me a few things...make the hole for the pipe larger then the OD of the pipe so the pipe has more surface area of the bucket to make a solid connection to...oh and superglue wont hold PVC to a plastic bucket. If you are wondering this bucket is an unused paint bucket...my work uses them for deer feeders (dont ask). It also gave me a better thought which lead to the latest model....
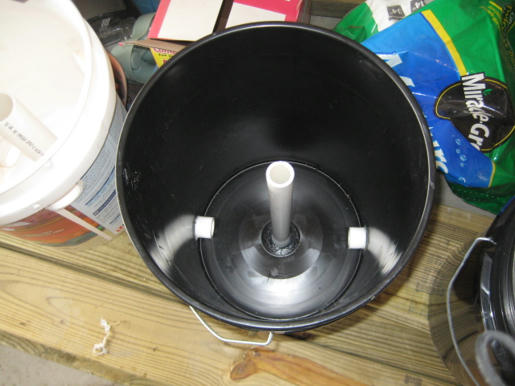
V2.0
7c26c6d8d21f45f48e0fbb8df629261b4g.jpg

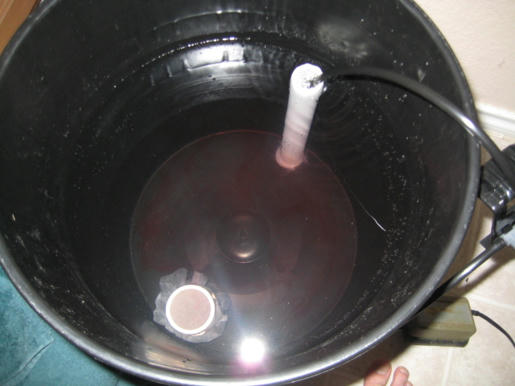
This is my final version...well least till I figure out if I made any MAJOR mistakes that need to be fixed...oh and till I can get more buckets from work. As you can see I stuck with the 3/4" PVC for the air lift of the water, and a 1 1/4" return to the bottom. This gives me good flow...not sure what the rate is but if you can see the RED in the picture that is a SINGLE drop of food coloring which took about 12-13 mins to get to that point after dropping it directly into the airlift. Not sure if this is too fast but I like knowing that the water is moving...and the airlift color cleared up in like 5 mins so I know it is definately pushing water. The return at the bottom has a coffee filter over it with a rubber band to act as my filter...I figure with a 20 micron average on the filters I wont loose the larve or food as the time goes by.

Well I want some feed back...LOL....I will be running a 50w fully submersible heater in the real run that I found petco for $30.

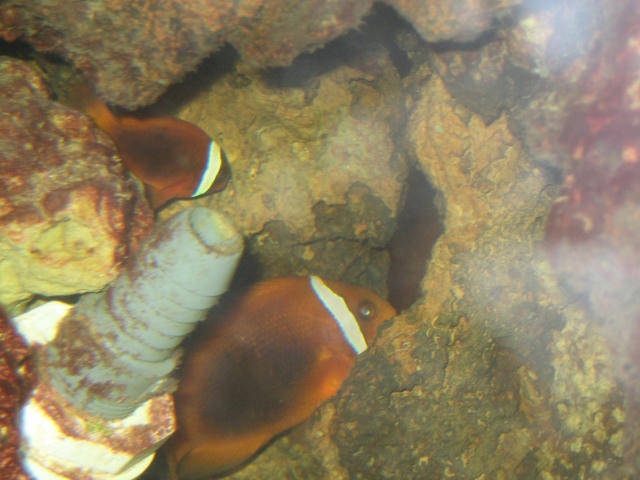
Thats all for now...oh and had another batch of eggs hatch last night...the tomatos seem to spawn pretty fast...and I wasnt expecting them to hatch for another night...so guess I have to wait for the next ones...
 

nunlef

Member
wow, that looks pretty fancy for a $0 budget. I'm guessing you're a) a plumber, or b) snuck some money out of the grocery budget :)

I'm interested in seeing how this turns out. When I finally pair off my oscellaris, I plan on setting up something that is functional but temporary.

Keep us posted,
 

CazK

Member
LOL...neither actually...the buckets I got from work free due to "defects"...and the pipes were extras laying around from the last time I rebuilt my tank some 5 years ago when I moved into my house. Only thing I've spent money on so far is $0.87 for a package of 100 coffee filters...oh and like $2 for more aquarium sealant to keep the pipes in place.

But yea now I have to wait for the clowns to lay the next batch of eggs...which if I'm lucky they will put them on my pipes in the tank again which I can change out easy as I have extras...then it will only be a matter of time...and ALOT of luck
 

CazK

Member
well guess I'm 1/2 lucky...the clowns have dropped off another batch...this one is a large enough batch that it looks like a large mushroom in the area...and if my timing is right they will hatch in like 4-5 days...and its not a rock I can remove...so looks like I'll have to shut the pumps off for a night or two...does anyone know if they fry hatch after ALL the lights are off or just the tank lights? Also is there anyone in the DFW area of TX that can help me get some photo and rotifers for a starting batch quickly?? I really dont want to have to go spend money at the LFS but if I have to I will...granted wife will want to kill me but hey when it comes to this cause I'll take the punishment....
 

1Reefer

Active Member
Exciting! I've always been interested in clowns burt don't have the spare tank right now :( .... glad I can follow here!
 

CazK

Member
well got to capture my first batch of eggs tonight...still dont have any rotifers stocked up...but had some phytos so I added that to the bucket and they seem to be going nuts for the moment. Lets hope that will sustain them till tomorrow after noon when I can get to the LFS and get them the real food they need.

This is where it gets interesting...I'm really hopeing at least 1 of the little buggers lives...but I'll do my best and prepare for next time as well
 

Trademark

Member
If you dont have any food I would keep it dark in the bucket until you have some, the light natural or not will have them hunting constantly
 

CazK

Member
Got my food about 2 hours ago...and lost a TON of the fry over the night due to food issues. So I'm down to only about 2 dozen fry at most left but they are eating like fiends...I started the rotifer culters and my green water is almost nice and dark...5 gallons of phyto does take a while to get deep green. Bit by bit I will get this worked out...and anyone who has any suggestions...I'll take em
 

CazK

Member
yea...just havent read through all 104 pages worth...LOL...might just have to PM and get some good details.

Well I have the sad news of reporting the fry have all died. So they lived about 30 hours...and I think they would have lived longer had I had the food prepared ahead of time...so its back to the drawing board and waiting for the next clutch of eggs
 

DxSOR25

Member
im jumping on this thread because i love clowns. and as a future breeder i like to see peoples success and failures. i have picasso from doni that i hope to breed in a few years!

also i like your bucket tank. hopefully this next batch will live and u can get some pics of it in action!!

goodluck and make sure to continue to post~

-Derek
 

Jojo23

Member
The hotter the temperature the quicker the fry use up their egg sacks. So when raising newly hatched fry keep the temperature at a steady temp that will not be too cold but that won't cause the egg sacks to be used up. That way you don't have to worry about feeding them for the first 4-7 days. The lighting may affect the temp so keep a chart w/ regular temp and chemistry readings on it. Keep in mind fry are very sensative to slight changes in the enviroment.
The higher the temp the hungrier they are, the hungrier they are the more they consume, the more they consume, the quicker they grow, the quicker they grow the shorter their life span.
When it comes to eggs being removed from the aquarium: The fry die in the eggs if they are taken out of the water. When hatcheries raise Salmon and Trout they do not allow the eggs to go into the water untill they are mix w/ smelt. Eggs in the h2o have seconds to be fertilized before they close up.
I myself am just learning but I have taken a course in Marine Bio and have helped raise Alantic Salmon (an endangered speacies). Hope I have been of some help for the future. Good luck.
 
Top