Maxx
Well-Known Member
The epic saga of one mans struggle to persevere against overwhelming odds, forces of nature, and financial handicaps to set up........................(Cue theme music from 2001 Space Odyssey)............................... A 58 GALLON REEF TANK!!!!!!!!
This has been a part time project for me for the better part of 2 years. Things have been planned extensively, researched exhaustively, scrapped, and started again many times....
I want to say thanks right off the bat to Mike (Mojo here and elsewhere), Curt Swearingen (CurtSwearing here, no he's not a potty mouth, his full name just doesnt fit.....) who have taken the brunt of all my questions, patiently answered them, and then restrained themselves from smacking me in the head when I asked the same question later cause I didnt like the answer I got originally.......nope, it didnt change......sigh...
Background Info
As a kid I loved to play in the ocean and I had several fish tanks growing up. We moved to Hawaii when I was 12 and I got hooked on Marine Aquariums. Right about the time that Mini-Reefs were taking off, (remember spray bars in your wet-dry filter that rotated? Remember when Zoo's and Xenia were hard to keep and Elegence corals werent?), my family moved off the island, and into Missouri.....I kept a couple of fish tanks then, but marine tanks were really expensive for a kid in high school, and it was tough to explain to girls why you couldnt take them out ot a nice restaurant cause you'd just spent $100 on some fish stuff....
I joined the Marine Corps out of high school and had no time, money, or space for aquariums. When I got out of the Marines in 97, I moved in with a buddy of mine, and started a 125 Saltwater FO tank. His dog promptly chewed through one the sump return lines and drained all 125 gallons of saltwater all over the floors of the my buddy's new house. I got yelled at, the dog got disciplined, and fishtanks were forbidden in the house.
I'm patient, (and sneaky), so I waited a few years and one day when he was gone, went out and got a new 20 gallon tank. I had moved upstairs (2 family house here in St louis...Mike, my buddy w/ the dog, lived downstairs, and I moved upstairs so we each had a place now), so it was easier to maintain. Mike made me swear on my life that there would be no floods with this tank. Otherwise, I was moving out w/ the tank.
The pictures of that tank are in my gallery. I tore it down about a year ago w/ the intent of finishing up the 58 gallon....its been taking awhile. Mike has since married, had a baby, and moved into his Wife's nicer, newer, bigger house, and my girlfriend Rocio and I have moved in together and currently live downstairs in Mike's old place, (Central Air baby!!!) Naturally I have all kinds of considerations now.....does it look aesthetically pleasing enough that Rocio will allow me to place the tank in the dining room?
How can I ensure that this wont leak or flood in the house sincve I have two Lab's myself.......etc
Well, I decided to DIY as much as I could so I would save money, (right.....) and I could make things to suit my needs.
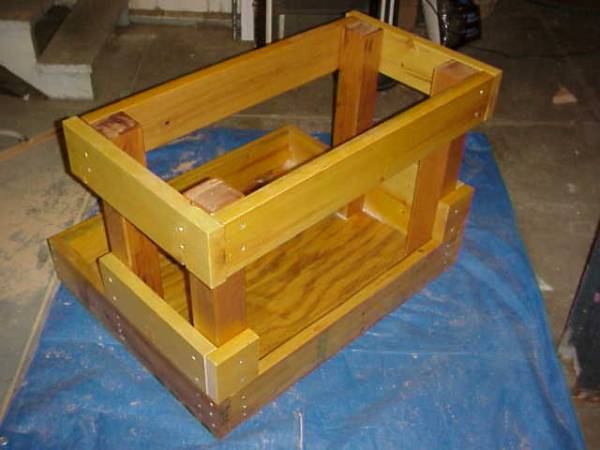
Do It Yourself type stuff
This was interesting for me since my father almost blew the house up attempting to fix the furnace once. The man seriously thought he was going to have to drop the engine on his 1970 Dodge Charger in order to change the spark plugs.....(to be fair, the was a car back then that required the engine being dropped/removed in order to get to the spark plugs......he just didnt have it)......so its not like I come from a strong back ground in DIY and handy type stuff. But I can usually eyeball something and attempt to figure it out and understand what makes it work...So I was willing to undertake this.....
With that in mind, several things here are far from professional looking. I made no attempt to hide the flaws in the photo's in order to help others learn from my mistakes,and avoid issues I had. Hopefully some of you DIY super genius' out there will chime in and explain better ways to do things than I did, so that others who follow will have a better lesson plan....
With that in mind, thanks for reading along, and being patient with all of my ramblings. Feel free to ask any and all questions....
Here we go
This has been a part time project for me for the better part of 2 years. Things have been planned extensively, researched exhaustively, scrapped, and started again many times....
I want to say thanks right off the bat to Mike (Mojo here and elsewhere), Curt Swearingen (CurtSwearing here, no he's not a potty mouth, his full name just doesnt fit.....) who have taken the brunt of all my questions, patiently answered them, and then restrained themselves from smacking me in the head when I asked the same question later cause I didnt like the answer I got originally.......nope, it didnt change......sigh...
Background Info
As a kid I loved to play in the ocean and I had several fish tanks growing up. We moved to Hawaii when I was 12 and I got hooked on Marine Aquariums. Right about the time that Mini-Reefs were taking off, (remember spray bars in your wet-dry filter that rotated? Remember when Zoo's and Xenia were hard to keep and Elegence corals werent?), my family moved off the island, and into Missouri.....I kept a couple of fish tanks then, but marine tanks were really expensive for a kid in high school, and it was tough to explain to girls why you couldnt take them out ot a nice restaurant cause you'd just spent $100 on some fish stuff....
I joined the Marine Corps out of high school and had no time, money, or space for aquariums. When I got out of the Marines in 97, I moved in with a buddy of mine, and started a 125 Saltwater FO tank. His dog promptly chewed through one the sump return lines and drained all 125 gallons of saltwater all over the floors of the my buddy's new house. I got yelled at, the dog got disciplined, and fishtanks were forbidden in the house.
I'm patient, (and sneaky), so I waited a few years and one day when he was gone, went out and got a new 20 gallon tank. I had moved upstairs (2 family house here in St louis...Mike, my buddy w/ the dog, lived downstairs, and I moved upstairs so we each had a place now), so it was easier to maintain. Mike made me swear on my life that there would be no floods with this tank. Otherwise, I was moving out w/ the tank.
The pictures of that tank are in my gallery. I tore it down about a year ago w/ the intent of finishing up the 58 gallon....its been taking awhile. Mike has since married, had a baby, and moved into his Wife's nicer, newer, bigger house, and my girlfriend Rocio and I have moved in together and currently live downstairs in Mike's old place, (Central Air baby!!!) Naturally I have all kinds of considerations now.....does it look aesthetically pleasing enough that Rocio will allow me to place the tank in the dining room?
How can I ensure that this wont leak or flood in the house sincve I have two Lab's myself.......etc
Well, I decided to DIY as much as I could so I would save money, (right.....) and I could make things to suit my needs.
Do It Yourself type stuff
This was interesting for me since my father almost blew the house up attempting to fix the furnace once. The man seriously thought he was going to have to drop the engine on his 1970 Dodge Charger in order to change the spark plugs.....(to be fair, the was a car back then that required the engine being dropped/removed in order to get to the spark plugs......he just didnt have it)......so its not like I come from a strong back ground in DIY and handy type stuff. But I can usually eyeball something and attempt to figure it out and understand what makes it work...So I was willing to undertake this.....
With that in mind, several things here are far from professional looking. I made no attempt to hide the flaws in the photo's in order to help others learn from my mistakes,and avoid issues I had. Hopefully some of you DIY super genius' out there will chime in and explain better ways to do things than I did, so that others who follow will have a better lesson plan....
With that in mind, thanks for reading along, and being patient with all of my ramblings. Feel free to ask any and all questions....
Here we go


")