Justin’s 28 gallon JBJ LED Nano Cube

corrado007

Active Member
Hey BlueCoyote79, glad you found the info helpful.

Tom, thanks for the the thumbs up. :)

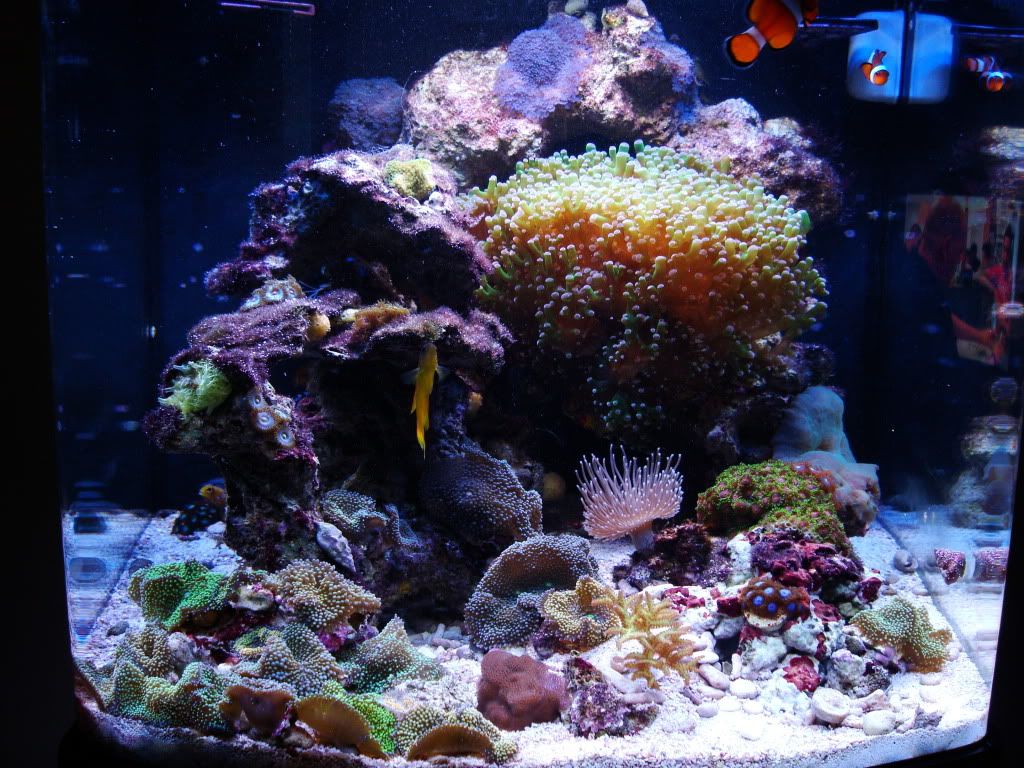
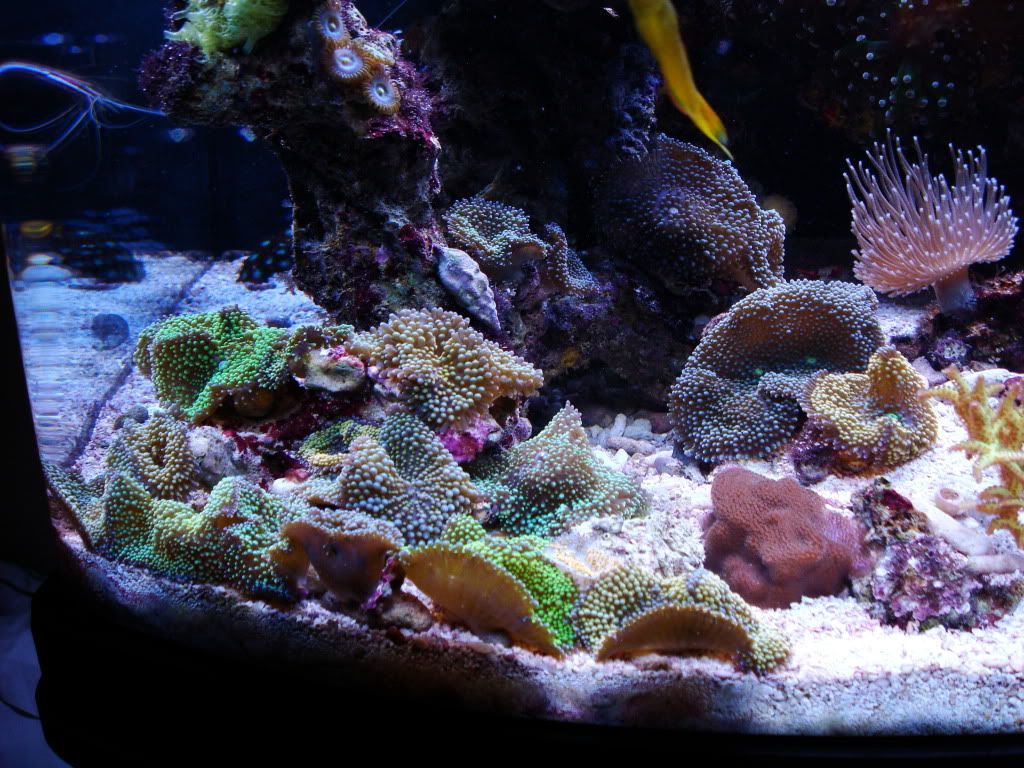
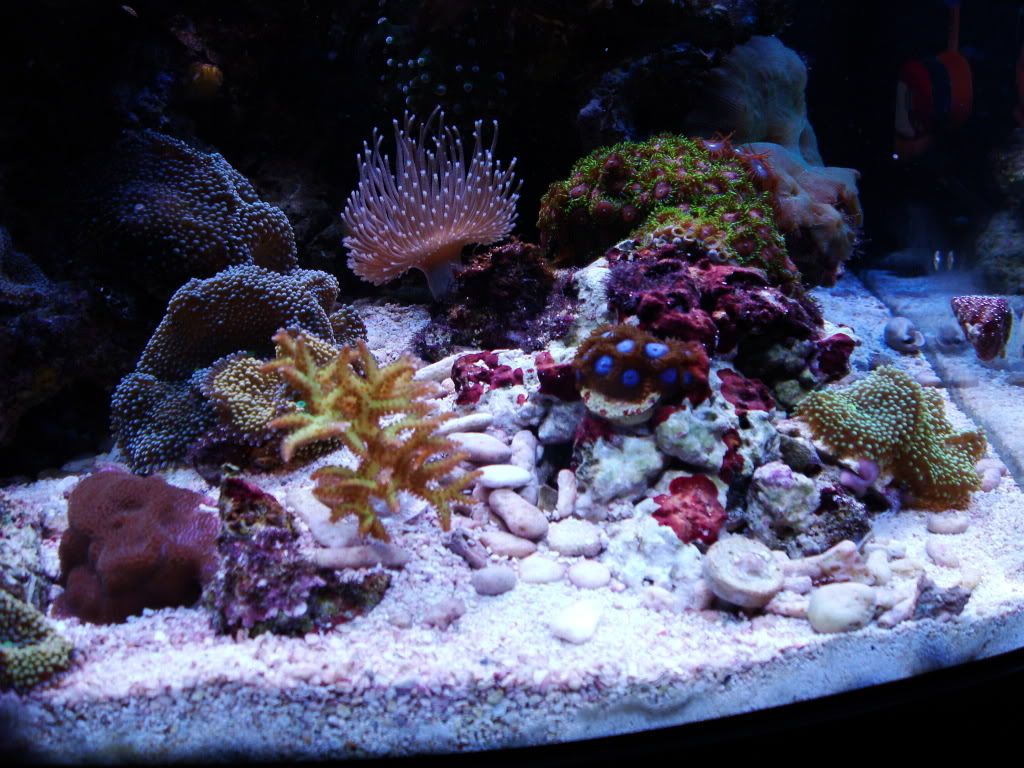
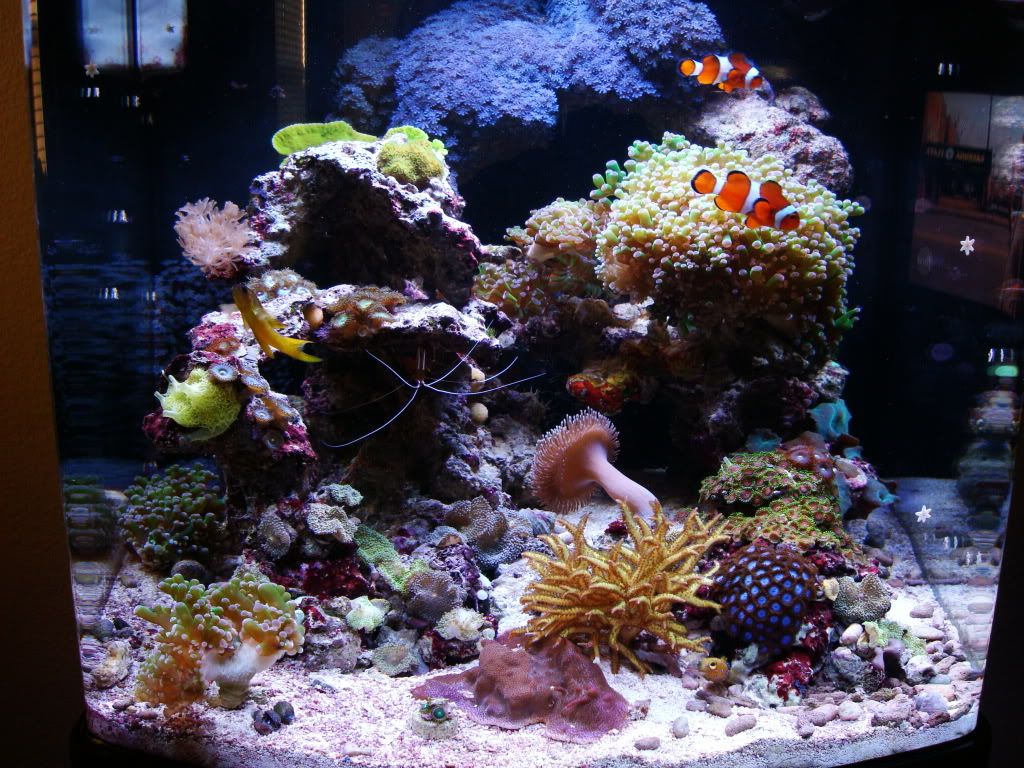
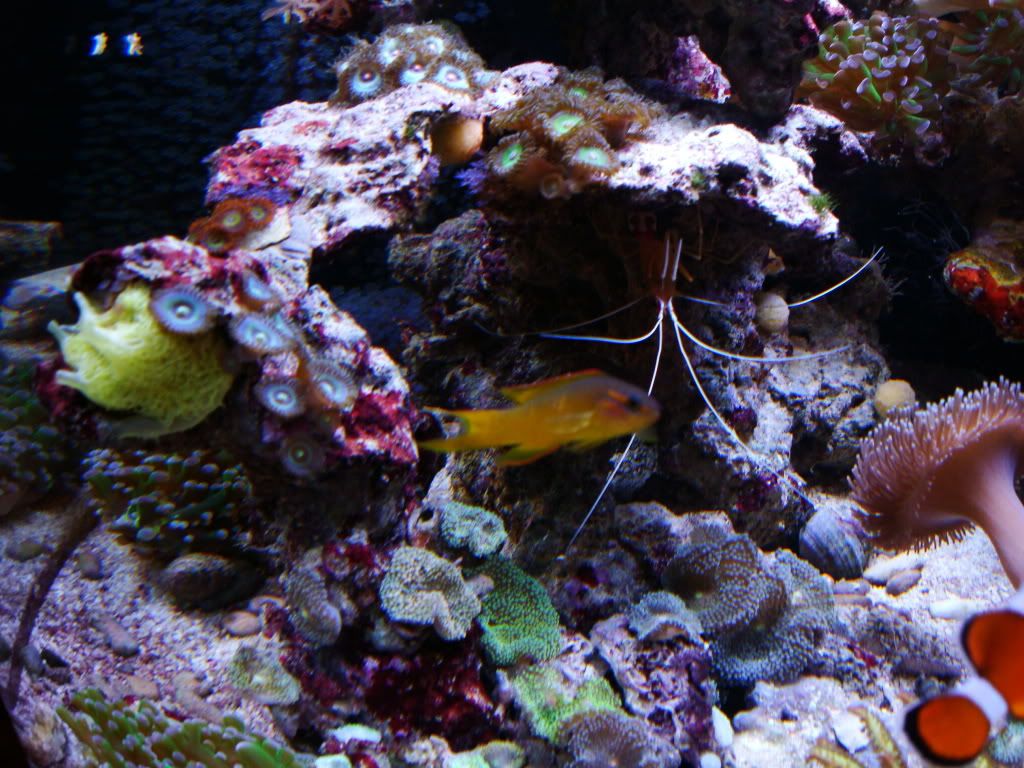
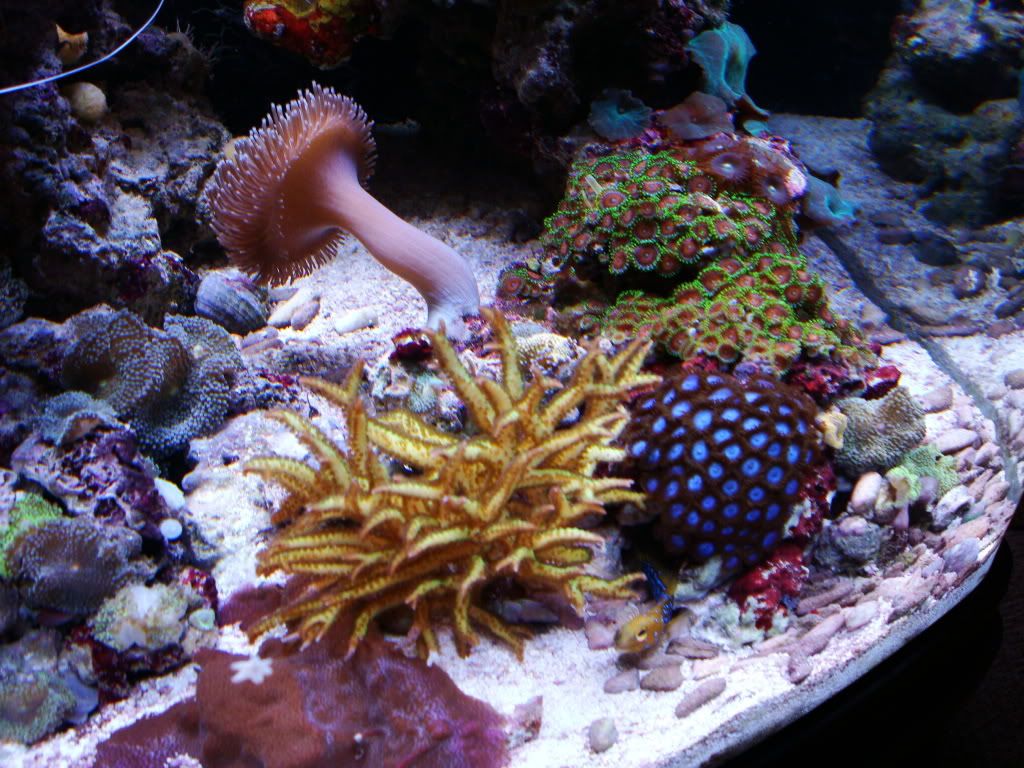
I thought I 'd share some photos of my current tank residents. I'd love some feedback on your opinions of my bioload for this little 28. I'm considering adding one more fish, a little green clown goby which should have a relatively small footprint but still, I'd love some opinions.

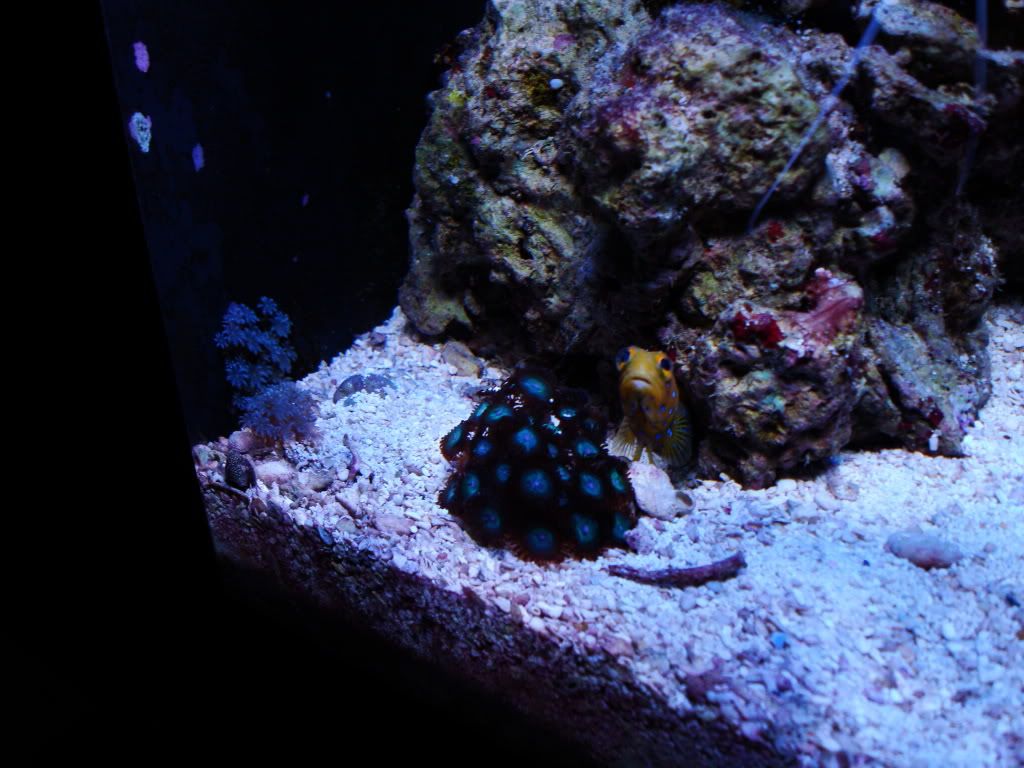
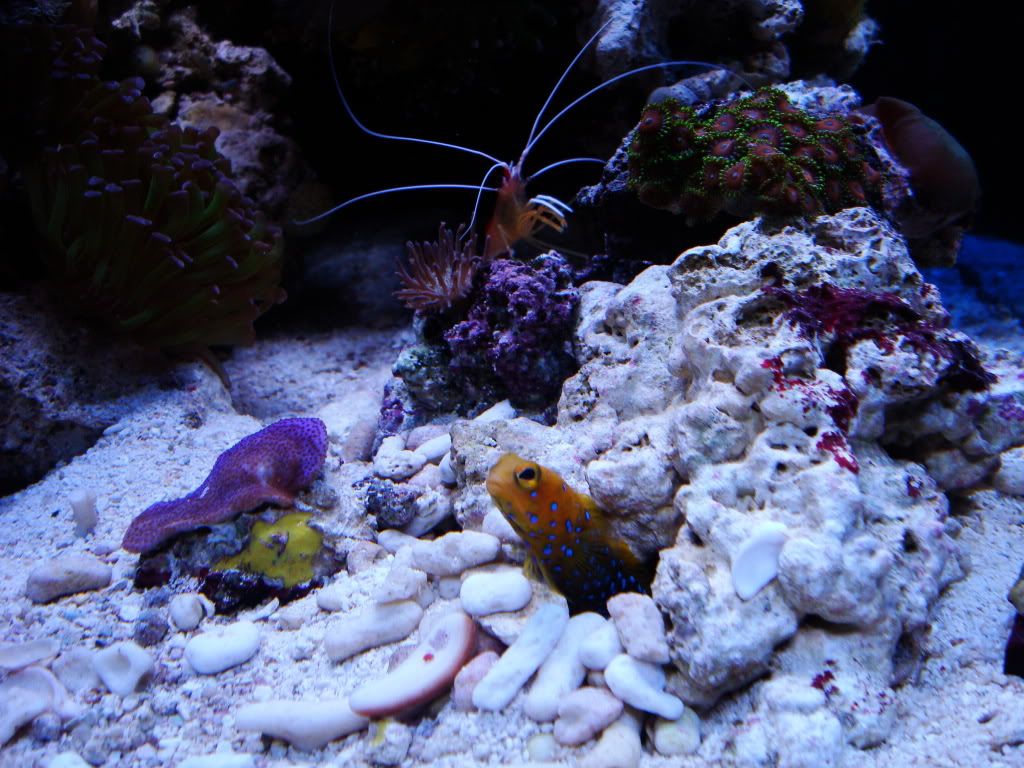
Here's the star of my tank in my opinion, it's my Bluespot Jawfish. I'm thinking of putting another inch of sand in the tank for him but he seem pretty happy as is so it's still up for debate.

826e310a.jpg


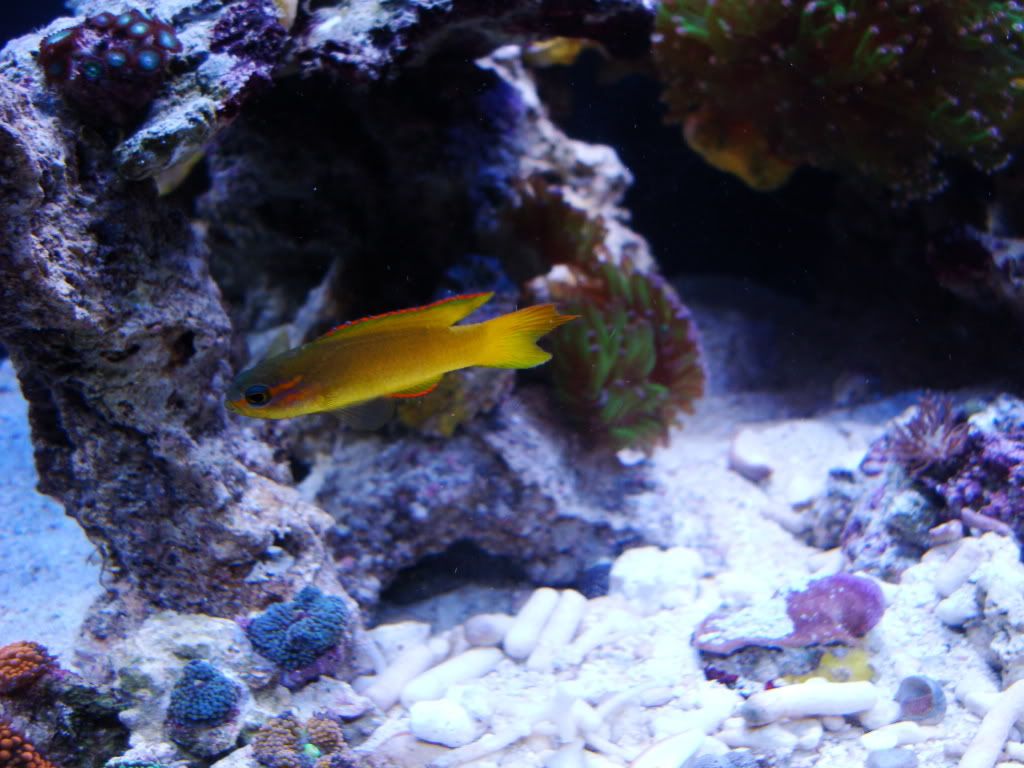
Next up is my Yellow Assessor, it took me forever to get my hands on one of these guys a few years ago but now I've seen them a few times in my LFS.

bbd55a1b.jpg


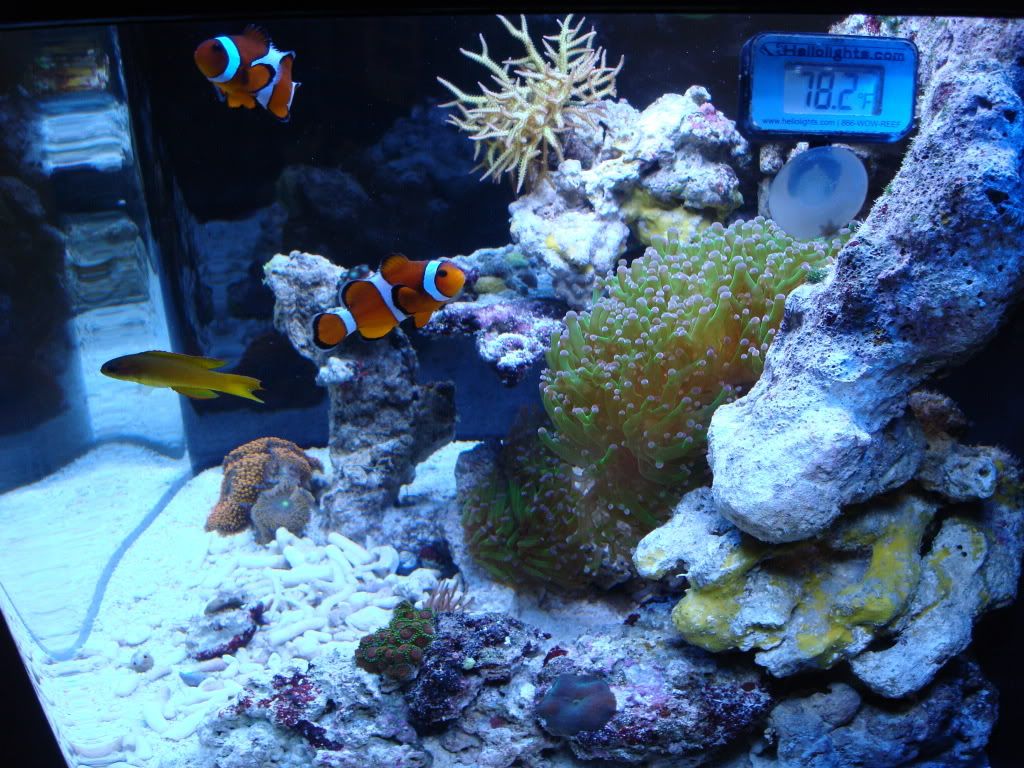
And here's my paired Ocellaris Clowns, they are my oldest fish as I've had them for around 3-4 years.

a80163d8.jpg


And finally, my little green banded goby. Tiny little guy but he's quite active.

8d707a26.jpg


My thought was that you'd typically want no more than 4-5 fish in one of these 28 gallon tanks but i'm considering the size of these fish as well. The clowns are fairly small, the assessor is quite small, the green banded goby is tiny, and the BSJF is the only fairly good sized fish in the tank. What are your thoughts?
Thanks
 

corrado007

Active Member
DIY ATO Project

I finished my DIY ATO over the weekend so I thought I'd post some photos and description of it.

First off, I decided to go with a DIY rather than the JBJ ATO mostly because I think custom DIY stuff is fun but also because l read about a few people with the JBJ who were having trouble with the timer even when turned up to max time, not being a long enough period to top off completely.

I wasn't aiming for a budget set-up, really just buying components that I thought would look and work best so it ended up costing around $55 for all the components except the pump and container. The pump was $15 and I think I'm going to order a 5-6 liter HDPE container which should hold enough RO/DI for about a week with the low heat LED lighting (slow evaporation). HDPE (high density polyethylene) is the stuff 5 gallon salt buckets are made of and it's perfect for holding RO/DI since it doesn't leach junk into the water like most plastic will. HDPE has the recycle symbol with a number 2 on the bottom in case anyone decides to look for containers made of this material. I'm using a 2 gallon HDPE paint bucket right now but I'm going to replace it because I want something rectangular for better space efficiency in my small stand and a clear material so I can see the water level at a glance. The containers I'm looking at can be found here or sometimes on ebay or amazon. I'm specifically thinking of this one which will likely run me about $12 shipped. So all together my ATO will end up around $85; not too bad for stable salinity and water levels IMHO.

I ordered most of the components from DigiKey.

I didn't want to have a big external power adapter to clutter up my power strip so I decided to build the power source for the relay, indicator lights, etc into the control module.

I used the following parts:

- 115VAC to 12VAC power transformer (to provide low voltage power for relay, float switches, & LED)
- Bridge rectifier (to change low voltage from AC to pulsating DC)
-DPST 12VDC relay (to switch pump & LED indicator)
-Illuminated power switch (to indicate ATO turned on)
-12VDC LED indicator light (to indicate pump is running)
-115VAC power receptical (to plug the pump into)
-project box (to house all components)
-2 float switches (here's the link to them)
-mono headphone jack and plug (for quick connect of float switches to the control module)

Here's a photo of the majority of the components

b01b8191.jpg


Here's a test fit of the components to make sure they'd all fit well

a03c4d67.jpg


The completed wiring (accidentally melted the edge of the box with my soldering iron)

508e51ae.jpg


A test run. The blue light indicates power to the ATO is on and the green means the pump is running.

0ebfe681.jpg


The float switches mounted in a simple bracket and wired to a headphone plug as a quick connect to the control module.

eb80266f.jpg


I made this little shelf out of some scrap plastic for the Aqualifter pump.

01234208.jpg


I used a heat gun to bend the plastic for the float switch bracket and pump shelf. I also wore some mechanics gloves while working the hot plastic.

f03b31bf.jpg


The pump in the shelf

841fabaf.jpg


The control module and pump installed and plugged in

02ed0404.jpg


The float switches installed

61cb7cc0.jpg


and from the back

c31dd254.jpg


The output from the Aqualifter pump

a18c5125.jpg


And a shot of the control module and bucket in the stand. As mentioned above, I plan to get a 5 liter HDPE container to replace the 2 gallon paint bucket in the bottom of the stand. It'll hopefully free up some more space down there for storage. I'm also hoping to get around to setting up my Aquacontroller Jr. to the Cube this week which should clean up some of the wiring.

b2618497.jpg


It seems to work well so far. I've only had it running for a day now but it's pretty much silent and is keeping the water level stable. The first float switch triggers the pump when it gets too low and the pump simply keeps going until it raises the water level enough to switch the float switch back off. The second float switch is just a safety measure. If the lower/primary one get stuck somehow, the second one will shut off the pump when the water level rises the extra fraction of an inch. The Aqualifter pump is rated to a max head height of 30 inches which is just about how far the trip is from the pump to the ATO water outlet in the back of the tank. It's just a quick drip by the time it gets there but it seems to do the job.

Oh, and lastly, a schematic of the control module.

8ffe74b6.jpg
 
Last edited:

corrado007

Active Member
I just ordered a new ATO container from U.S. Plastic Corp. I was looking for a container made of HDPE (high density polyethylene) since it is the same material 5 gallon salt buckets are made of and doesn't leach bad stuff into the RO/DI like most other plastics will.

Anyway, it was only about $5 and shipping was also only $5 so as long as it fits well in my stand it should work out well. I'm losing about 1/2 liter a day through evaporation so the ATO container should only need to be filled about every 10 days I'm hoping. It took me a while to locate an HDPE (recycle symbol #2) container that was slim enough to not take up much room in my little nano stand, I really hope it fits well when it arrives.

Here's a pic from the U.S. Plastic Corp site.

4d4a9491.jpg


I'll try to remember to post a pic of it inside the stand once it arrives.
 

jg2269jg

Member
hey how much did it cost to make that top off and would you ever make one for someone else,,, Aka ME,,, I have the HQI 28 gallon and o was looking for a way to top off. Thanks Jeff
 

corrado007

Active Member
hey how much did it cost to make that top off and would you ever make one for someone else,,, Aka ME,,, I have the HQI 28 gallon and o was looking for a way to top off. Thanks Jeff
Wow Jeff, thanks for the interest in my ATO. I take that as quite a complement.

As for the cost to make it:
corrado007 said:
I wasn't aiming for a budget set-up, really just buying components that I thought would look and work best so it ended up costing around $55 for all the components except the pump and container. The pump was $15 and I think I'm going to order a 5-6 liter HDPE container ... which will likely run me about $12 shipped. So all together my ATO will end up around $85...

And as for making them for others, I'd really love to help out a fellow reefer, especially a fellow 28 nano owner but I'm afraid I'm going to have to leave the building up to you on this one. It's fairly time consuming to order parts from different sites and go through the assembly process and since I consider this a hobby I wouldn't want to charge for my labor, time, etc... I've tried to provide enough info to help others who may want to build a similar ATO. If you decide you'd like to tackle the project and you have questions feel free to ask away, I'd be happy to help. If you're not comfortable with DIY projects then perhaps you'd consider the JBJ ATO or a similar mass produced unit.
Thanks again Jeff :)
 

corrado007

Active Member
I picked up an Apex Lite controller for the Nano but it has been sitting in the box for about 2 weeks. I've been pretty busy lately but finally found a little time to install it so I thought I'd post some pics. I've also been meaning to post a pic of the new ATO container I ordered. I had been looking for a slim HDPE container that wouldn't take up a lot of space in the stand. Seems to be working out great so far. Evap is so low it has lasted over two weeks without a refill so far.

Here's the top section of the stand with the controller power strip installed and all components plugged in.

5213f4aa.jpg


And here's the bottom section, I ended up mounting the LED ballast down there and put the ATO container there as well.

412190a2.jpg


Here's the top and bottom before I put anything else in the stand and before the Apex display module.

b21760a6.jpg


Here's a shot of the whole thing completed with the display module installed. I made a plastic bracket for the display module mount which worked out okay but I may end up modifying it a little.

a9bef74e.jpg


And one last one, a close up of the top section of the stand with the display module.

137aed69.jpg
 

4Runner2003

New Member
Hey Justin,

Your tank looks great. Do you have any more pictures? I just ordered my JBJ 28G LED nano Tuesday and it's suppose to get here Monday. I can't wait. If you have any recommendations that you hve learned with this tank, please let me know.

Thanks

Scott
 

corrado007

Active Member
No new photos and as a matter of fact nothing new at all. My wife and I had our first daughter 4 months ago and it's been all I can do to keep the tank running. It's amazing how such a small baby can take so much time and energy. I'm really glad I downsized from my 90 to the 28 in preparation for my daughter.
Congrats on your new tank, you'll love it. It's a great size and designed really well. If you have any specific questions I'd be happy to try to answer them but as for general advice, nothing new. Oh, one thing, I've found that the LEDs are a bit too intense near the top of the tank for most corals, especially in the middle of the tank. I have some birdsnest SPS near the center at the top and it's a bit bleached/faded but i fragged a few pieces of it that I put down in the sand and they've doubled in size and have great color so be careful to light acclimate your corals to the LEDs or you may have issues.
Good luck and be sure to start a chronicle of your own so we can follow your progress with your new tank. I'd love to see photos along the way.
 

4Runner2003

New Member
Thanks Justin and congrats. I am sure you have your hands full but it is worth it. Thanks for the advice too. I'll will definantly post my progress :)
 

corrado007

Active Member
Well I suppose it's time for another update. My daughter is finally nearly 5 months old and she's requiring a little less time so I'm taking the opportunity to post a few new pics. Things have been pretty much on standby, just weekly (and sometimes every other week) water changes to keep things from getting out of hand. Everything seems to be going well with the exception of some sort of hitchhiker red macro algae that's taken over some of the upper rocks on my aquascape. I've got a pic of it below that's pretty clear. If anyone knows what this stuff is or how to get rid of it, I'd love to know.

First a FTS from this evening.

0ad68b41.jpg


And here's my Florida Ric corner.

049156a1.jpg


Some of my mixed corals.

ca01bb07.jpg


Here's my BlueSpot Jawfish, he's typically in the front but occasionally forgets where he lives for a day or so.

ce6ded4c.jpg


And here's that darn red macro algae that's a pain in my neck.

955d5463.jpg
 

corrado007

Active Member
I partially disassembled my LED hood on my 28 Nano today to do a little cleaning and dusting. I started to see little dust bunnies under the glass and plastic light cover so I cracked it open and vacuumed it out, cleaned the glass splash shield, and kept one of the screws out so I can search for some replacements that won't rust. They are beginning to rust just a little. Anyway, the point of this post is to share a few photos. I snapped a few of the LED system while it was apart in case anyone is curious how it's set up. This is the stock 89 Watt professional setup by the way.

48c55872.jpg


a4900761.jpg


255befc0.jpg


78adc577.jpg


1d7384a1.jpg
 

corrado007

Active Member
Once again, it's been quite a while since I posted an update on my 28 LED Nano so I'll share a few photos I just took. Things are going pretty well with the tank, no major issues. As a matter of fact, I had some really nasty red turf algae a few months back and after a little research found out that simple Mexican Turbo Snails could take care of it and they surely did. No more red turf algae. All of the corals seem to be healthy and growing with the slight exception of my Florida Rics; I can't seem to find the ideal flow and light for them so most are just getting by and have lost some color. If anyone has suggestions for me on taking care of them I'd love some advice. I also just fragged my Frog Spawn as it was getting a bit too big and blocking out the light to some of my Rics on the ground. Anyway, here's the pics:

e1d70233.jpg


9ef08f54.jpg


cba3e9d5.jpg


5712e991.jpg
 

tnwillia

Well-Known Member
Beautiful tank Justin, love the blue Zoas, I've never been able to keep them for any length of time. Have fun!
 

corrado007

Active Member
Wow, thanks guys, I appreciate the complements. It's quite a fun little project. I am pretty amazed at the Tubbs blue zoas, it started a 3 polyp frag and has just gone wild. I wish everything would go that crazy. :)
 

jfmichalak

New Member
Loving this post....I just ordered this same tank, going from a 55 bow (Fish Only)to this 28 (Reef). Question to Justin - how thick is your sand bed?
 

corrado007

Active Member
Congrats on the new cube! I'm sure you'll love it as I do. My sand is actually sloped from about 2.5 inches in the back to about 1.5 inches in the front. Seems to be doing quite well at that depth. Good luck!
 

jasno999

New Member
Re: First shot of the Nano with clear water

Justin - or anybody. Can you post some more details and pictures to show exactly what unit you bought for a skimmer and exactyl how/where you fit it in the back of the nano? I saw how you cut the magnet but I did nto see any pictures installed- I was wonderign how it fit, where it fit and how the water flows into and out of it.
 

corrado007

Active Member
You cut off the magnet and it is pretty much a perfect fit then for the center chamber. It is just slightly loose in there so I put a simple piece of air line tubing between the skimmer body and the wall of the center chamber to keep the skimmer in there snug. The skimmer also has a water line marked on it so I try to keep the water level right at that line. I don't think I have any pictures at the moment but if I can dig some up I will try to post them.
 

corrado007

Active Member
Here are a few photos I just took. Hopefully they answer your questions better than my brief explanation did. And by the way, this is the Tunze 9002 w/ an In Tank (Stevie T) cup on it as the stock collection cup is round and requires cutting a round notch in the hood to fit which I didn't want to do.

65f737a3.jpg


be6c131e.jpg
 
Top