JeF4y
Member
Where to begin...
Well, let's see. All she really wanted was a few goldfish. That quickly ended up changing into a full-on reef aquarium. Now, not knowing ANYTHING about reefing, we bought a bit of hardware and dove in. We originally thought we should go very small scale, something modest. The Biocube 29 would be perfect for us. Small enough for the bedroom, yet not just a bowl of water. (again, we had no idea what we were doing).
We didn't buy any livestock yet, but instead, spent some time reading and researching a LOT.
Our intent was a small reef with a few LPS corals, 2 clowns and a mandarin. So that's what we set out after.
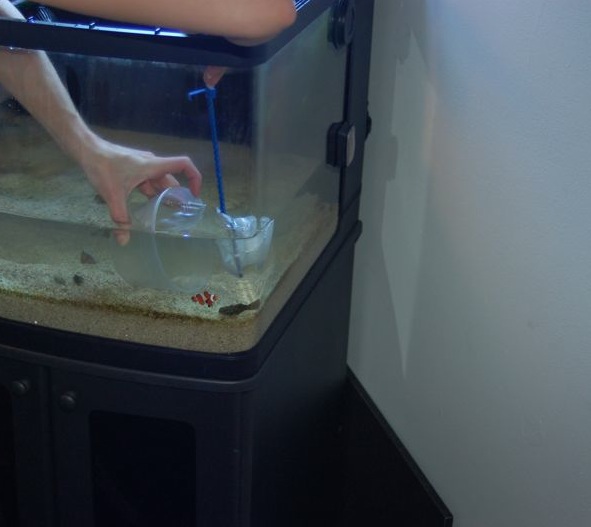
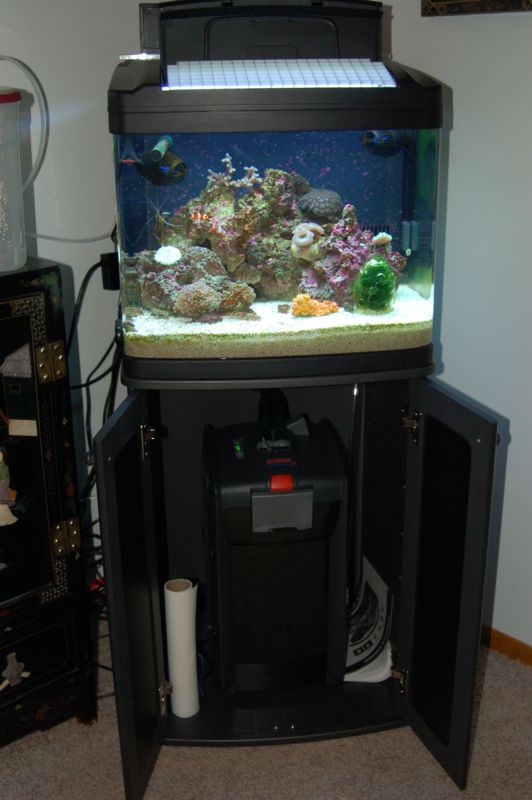
We started with 50# of crushed coral, and 30# of fully cured, straight out of a functioning reef tank - liverock. After letting that sit for a while, we added the CUC and a few corals. Then the fish.
Here's what we started with:

Everything was going along just fine, everyone was quite happy. But we wanted something more. What originally started out as a place to grow pods, ended up as a full-blown experiment in how much money can be spent and how crazy can you get for a simple biocube. Now, I'm sure there are people who have gone MUCH crazier, but, well, this is our story at it. Before I begin, I have to say that JohnnyBravo was a big inspiration for what I did here, and he gets credit for some of the plumbing work.
Goal:
Add fuge/sump to grow pods, and expand water capacity.
Replace crushed coral substrate with deep-sand bed.
Step 1:
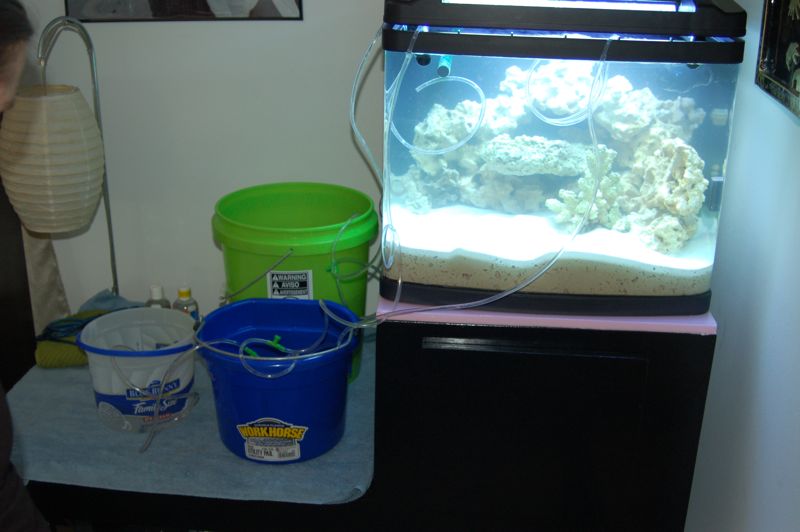
Find the biggest sump that can possibly fit in the space we have in the bedroom.
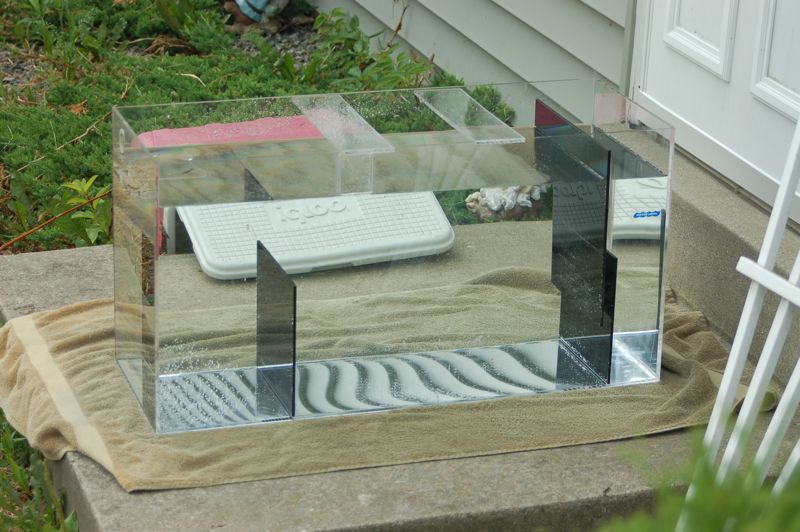
I found an ebay seller "Filter-Tech" who had a Refugium "for 150 gal tanks" which looked like it would fit the bill. The dimensions are 31x12x16 which gives 25.7 gal to the top, or 19 usable gallons (minus 3-4 gal for rock & sand).
(sidenote: if anyone is looking for a sump/fuge, I HIGHLY recommend this ebay seller. They are very quick to ship, respond, and they do custom work. Very good quality at a good price.. and no, I don't know who they are other than my transactions with them.)
Step 2:
Build a stand! Not just any stand... No... A stand that the wife thinks looks good and is functional. So it needs to be bi-level so one level is bed-height and the tank is 12" higher so we don't have to stoop to see the fish.
Frame:

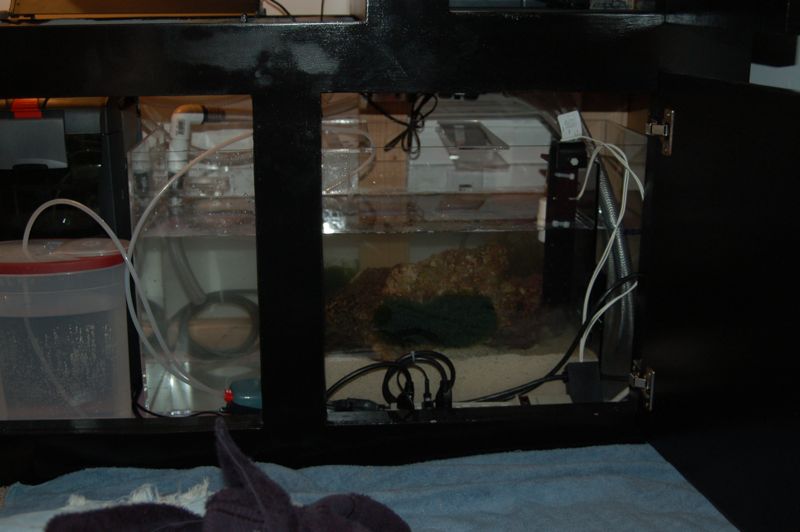
Stand front without doors - I should note, the top of the lower level (nightstand) actually lifts off. Very useful in what will be a PACKED bottom:

Stand Rear - This part will remain open & has overhangs so that it can get closer to the wall yet hide some of the plumbing.

Step 3:
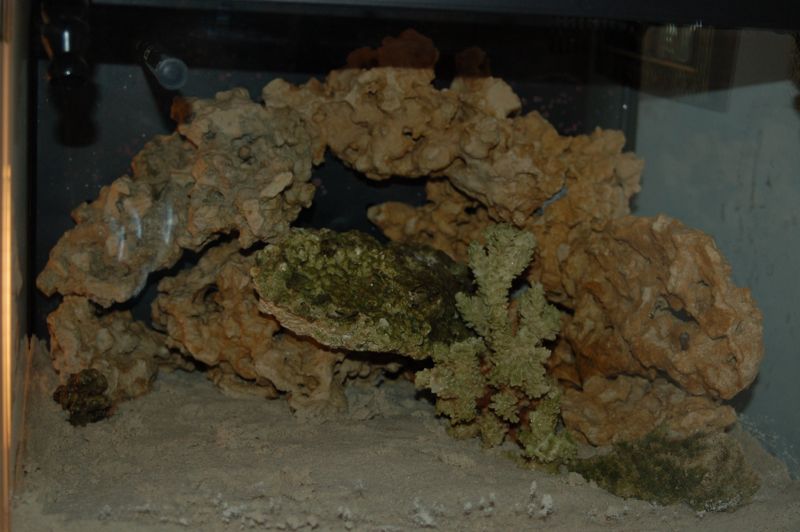
Buy some Marco Rocks, and 60# of Marco Sand, and pick up some lace rock and a few rocks from my boss who used to reef years ago:
Marco Rock:

Bosses old Rock:
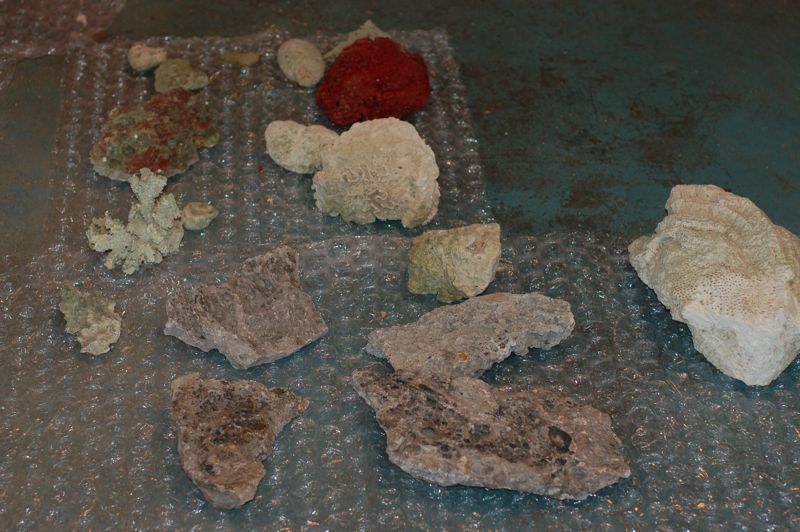
Lace Rock:

Step 4:
Soak/Season/Cook/Kill/Acclimate it. Whatever you want to call it, I took the rock, threw it in the biggest cooler I had with a fat piece of liverock from the tank and then cycled it with both fresh saltwater and drain water from my weekly water changes on the tank. It sat in my garage and maintained a temp in the low 80's for just over a month.

Well, let's see. All she really wanted was a few goldfish. That quickly ended up changing into a full-on reef aquarium. Now, not knowing ANYTHING about reefing, we bought a bit of hardware and dove in. We originally thought we should go very small scale, something modest. The Biocube 29 would be perfect for us. Small enough for the bedroom, yet not just a bowl of water. (again, we had no idea what we were doing).
We didn't buy any livestock yet, but instead, spent some time reading and researching a LOT.
Our intent was a small reef with a few LPS corals, 2 clowns and a mandarin. So that's what we set out after.
We started with 50# of crushed coral, and 30# of fully cured, straight out of a functioning reef tank - liverock. After letting that sit for a while, we added the CUC and a few corals. Then the fish.
Here's what we started with:
Everything was going along just fine, everyone was quite happy. But we wanted something more. What originally started out as a place to grow pods, ended up as a full-blown experiment in how much money can be spent and how crazy can you get for a simple biocube. Now, I'm sure there are people who have gone MUCH crazier, but, well, this is our story at it. Before I begin, I have to say that JohnnyBravo was a big inspiration for what I did here, and he gets credit for some of the plumbing work.
Goal:
Add fuge/sump to grow pods, and expand water capacity.
Replace crushed coral substrate with deep-sand bed.
Step 1:
Find the biggest sump that can possibly fit in the space we have in the bedroom.
I found an ebay seller "Filter-Tech" who had a Refugium "for 150 gal tanks" which looked like it would fit the bill. The dimensions are 31x12x16 which gives 25.7 gal to the top, or 19 usable gallons (minus 3-4 gal for rock & sand).
(sidenote: if anyone is looking for a sump/fuge, I HIGHLY recommend this ebay seller. They are very quick to ship, respond, and they do custom work. Very good quality at a good price.. and no, I don't know who they are other than my transactions with them.)
Step 2:
Build a stand! Not just any stand... No... A stand that the wife thinks looks good and is functional. So it needs to be bi-level so one level is bed-height and the tank is 12" higher so we don't have to stoop to see the fish.
Frame:
Stand front without doors - I should note, the top of the lower level (nightstand) actually lifts off. Very useful in what will be a PACKED bottom:
Stand Rear - This part will remain open & has overhangs so that it can get closer to the wall yet hide some of the plumbing.
Step 3:
Buy some Marco Rocks, and 60# of Marco Sand, and pick up some lace rock and a few rocks from my boss who used to reef years ago:
Marco Rock:
Bosses old Rock:
Lace Rock:
Step 4:
Soak/Season/Cook/Kill/Acclimate it. Whatever you want to call it, I took the rock, threw it in the biggest cooler I had with a fat piece of liverock from the tank and then cycled it with both fresh saltwater and drain water from my weekly water changes on the tank. It sat in my garage and maintained a temp in the low 80's for just over a month.