(First Reef Tank Ever) **** 600gal Display **** 1300gal System

Status
Not open for further replies.

cbui2

Member
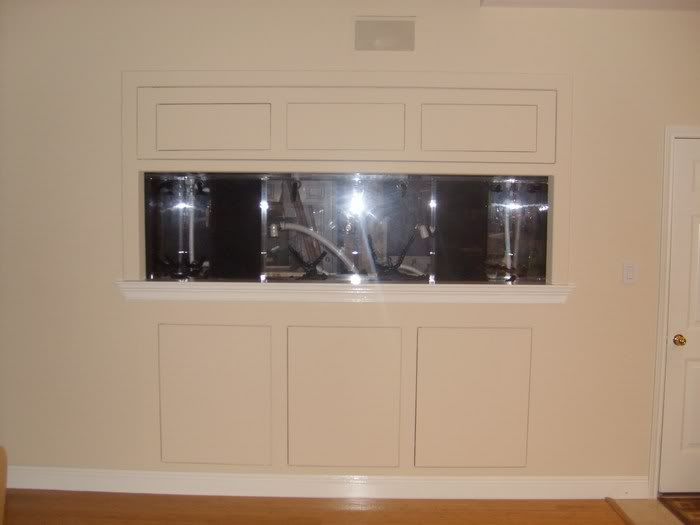
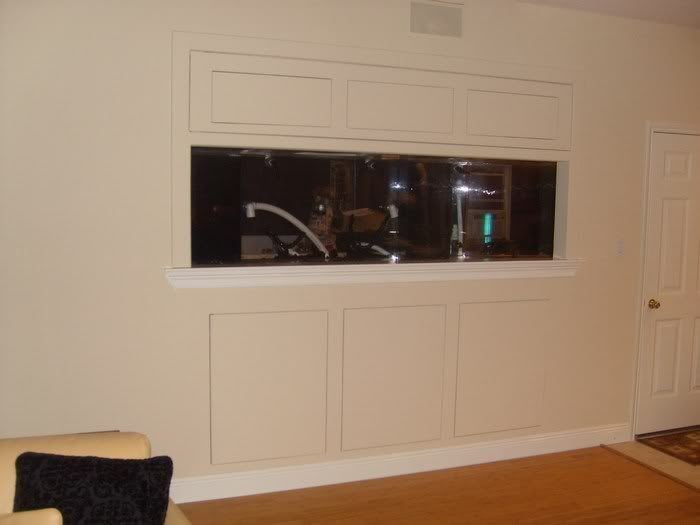
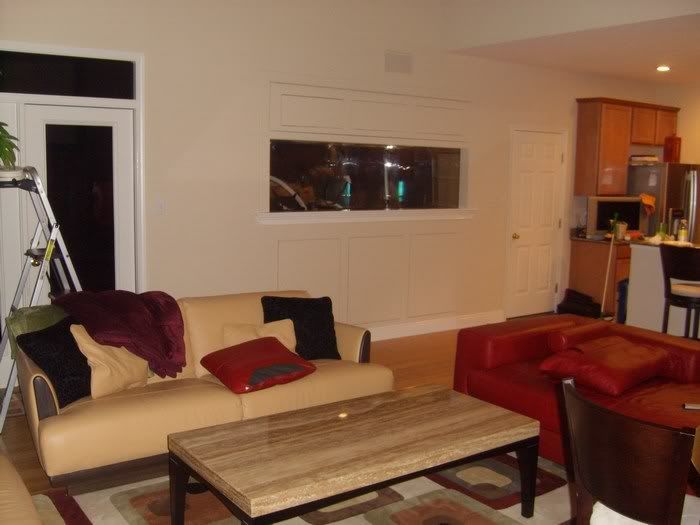
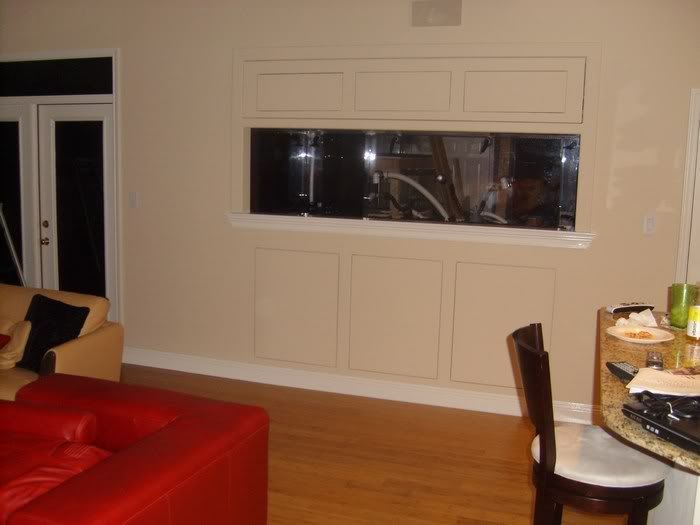
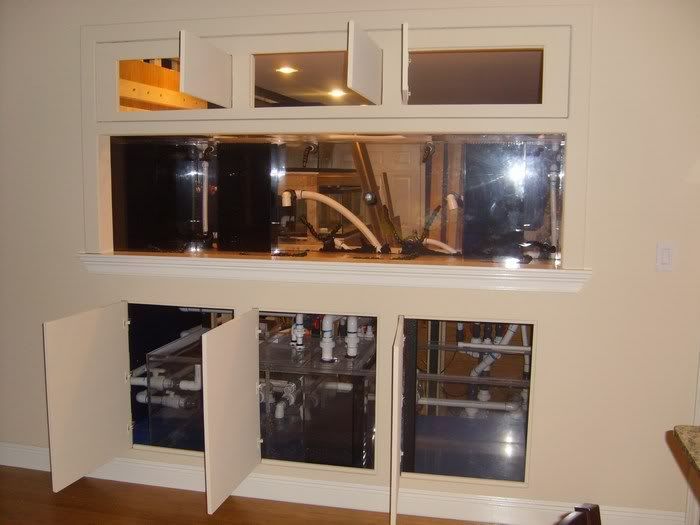
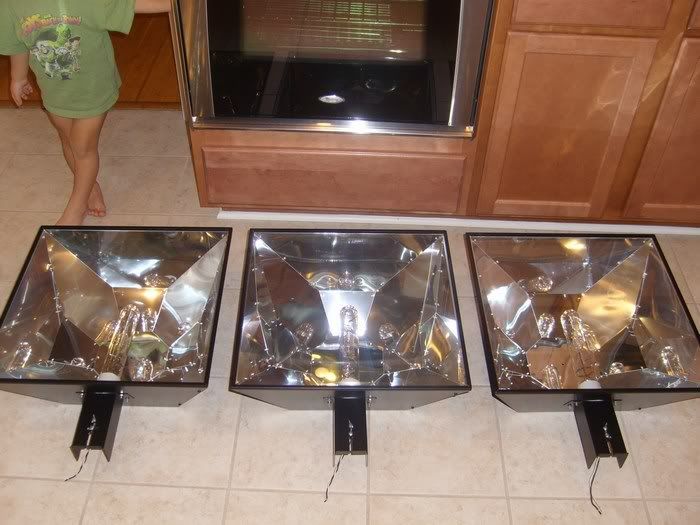
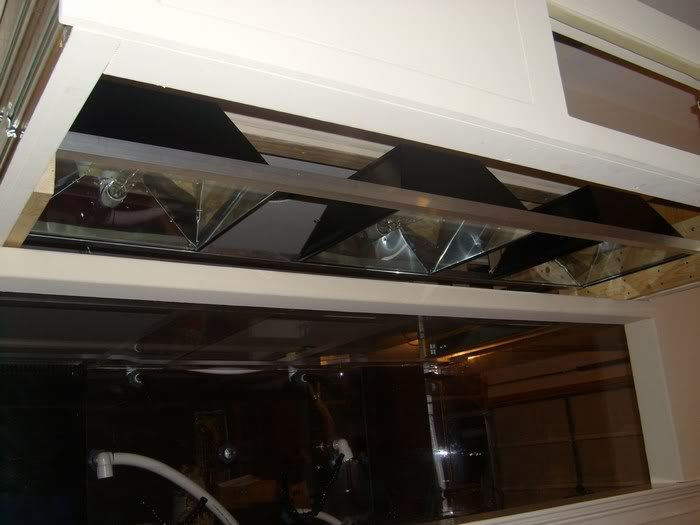
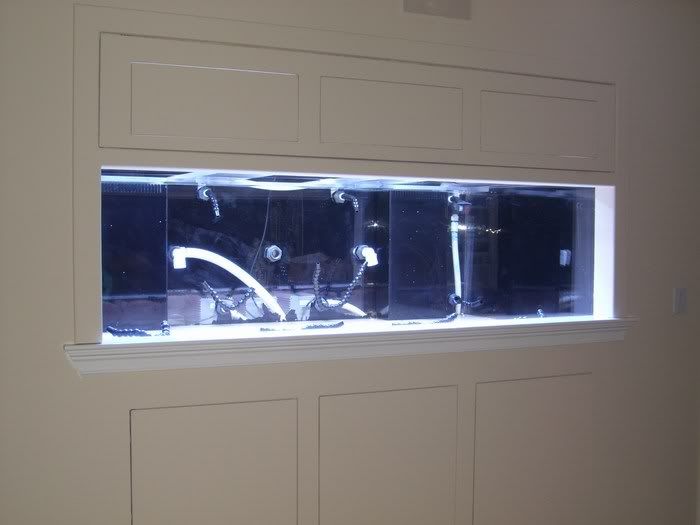
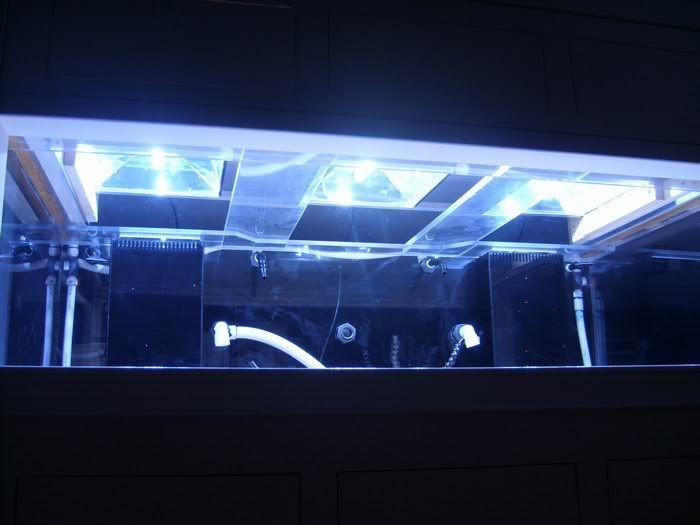
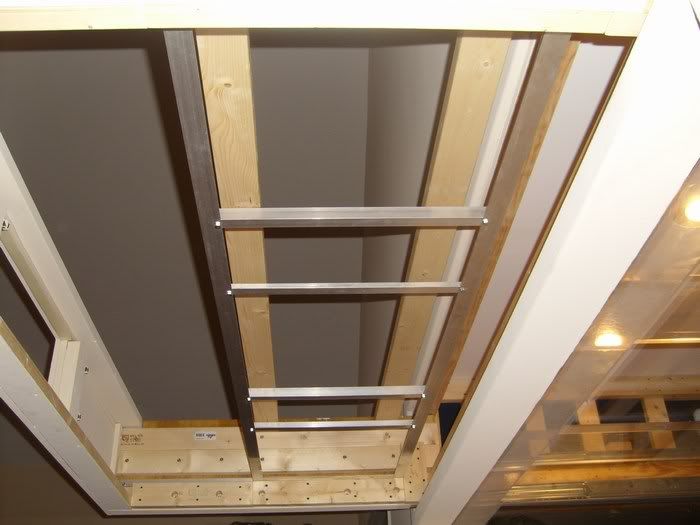
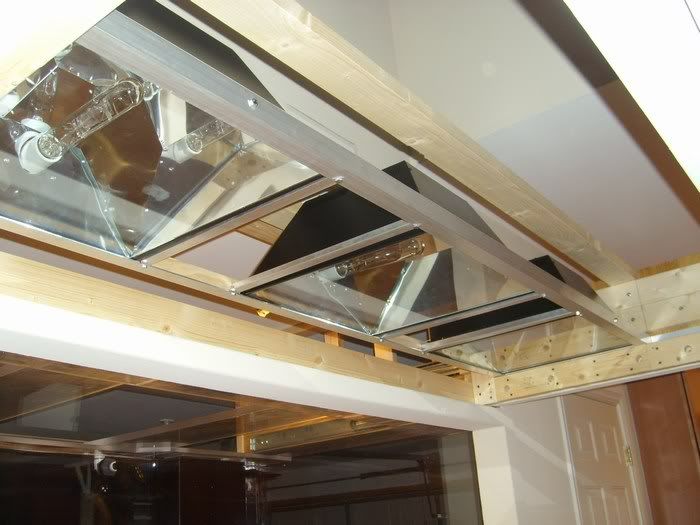
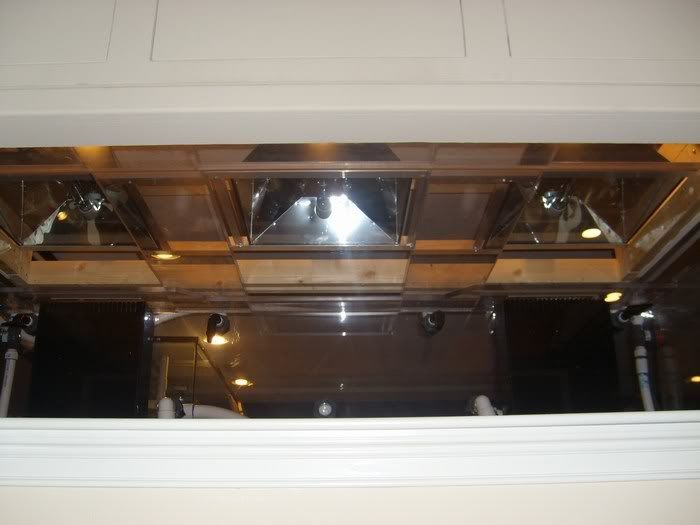
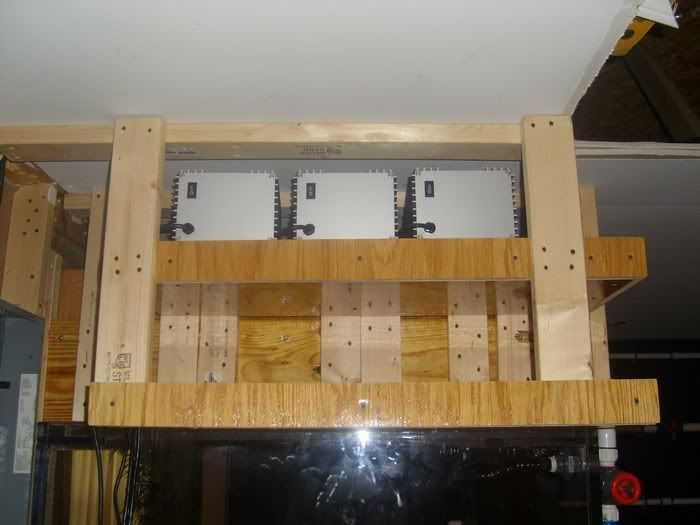
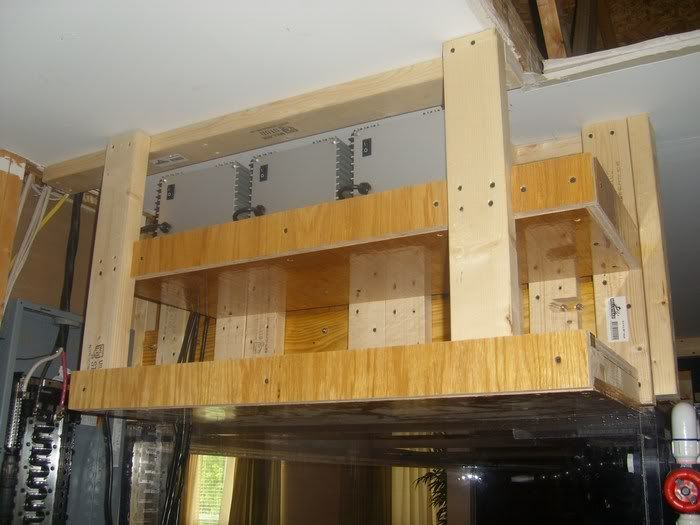
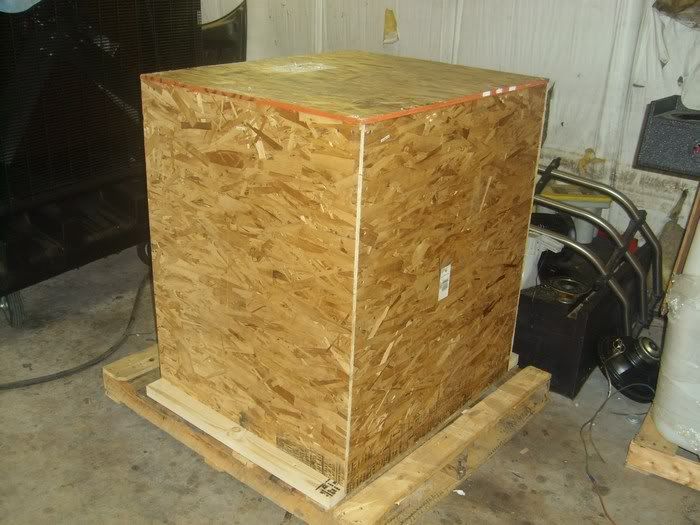
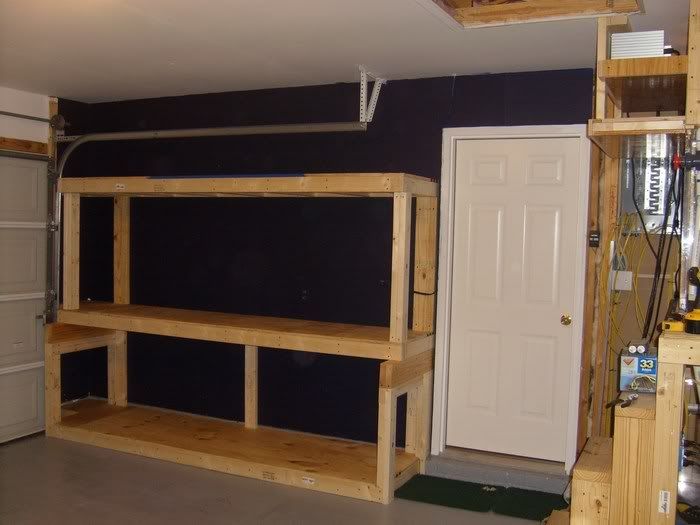
5-14: ok finally finished with cabinet and I am happy how this turn out, just plain and simply exactly how I liked it. I figure if all the trim molding was painted white then I can tell where the tank begin and ends. since i have blended the cabinet in with the entire wall. it has such a better view from all different angles. i will be working on lighting this week then chiller will be mounted and finished the rest of plumbing. 1 step closer on getting rocks & water in.
5-14.jpg

5-14a.jpg

5-14d.jpg

5-14e.jpg

5-14g.jpg
 

cbui2

Member
5-15: ok some more work done today and here are the updates.
first thing was to assemble all 3 LM3 reflectors which my 3yrs. old baby volunteer to help and how convenience that the guy sell them on ---- is located down here and had them hand delivered to me. next was to cut aluminum to fit the slides which I had to be extra careful to have the holes drilled just right if not the slides will not work properly even if I am off about 1/4" or so. of course I am not completely done yet and extra supports will also be installed to hold them in place making them more sturdy since I cant afford to have any mistake as kids are around the house. MH are powered by 3 PFO Single HQI 400watts ballast w/14k hamilton. these babies are so bright it feel like I have no roof just direct sunlight.
5-15.jpg

5-15a.jpg

5-15b.jpg

5-15e.jpg

5-15f.jpg
 

cbui2

Member
5-18: ok finished LA3 rack and additional modifications was added to secure all fixtures. 1st 1.5" x 1/8" thick aluminum angle was the main support to hold LA3 in place. 2nd 2x4 was added to top, back and sides to support the entire light canopy making it slides so much easier since the 3/4" plywood was removed due to any heat build up therefore making it lighter. 3rd 1" x 1/8" thick aluminum angle and 1x2 white pine was added to support the LM3 from moving no more than 1/8" either way so MH fixtures would not fall down while sliding rack is in motion. 4th LA3 will also be secure from the top just in case fixtures do ever fall down and hopefully it will not get that far.
5-18.jpg

5-18b.jpg

5-18e.jpg

5-18f.jpg
 

cbui2

Member
5-22: ok here are some more updates that I just completed. 2x4 and 3/4" plywood treated w/poly was constructed to finished the shelves for total of 6 PFO HQI Single 400w and 2 IC 660.
5-22.jpg

5-22a.jpg


Tradewind 1.5HP 18,000BTU also made it here. I will begin forming the area needed to be done then concrete can be poured and the rest of plumbing can be done this weekend. after this i will be starting on my QT's setup which should only take couple days to build the stand then i will finally start making ro water.
5-23.jpg

5-23a.jpg

200gal ro/di reservoir
200gal.jpg


the vho's on each end will not be installed just the middle.
3 LM3 w/20k radium (rear), 3 reef optix v w/14k hamilton (front), and 8 36" URI super atinics space between the LM3 and reef optix v.
topview.jpg
 

cbui2

Member
5-29: these are the lastest updates, since it has been raining i guess indoor working for me. hopefully weather will be good next few days so i can start on my chiller and getting area prep and concrete can be poured. today got a chance to build the stands for QT tank (135gal middle) and continuous water change sump (90gal below) and top shelf is for storage. QT tank will be equipped with 2 hang-on refugium w/protein skimmer. Aqua Medic 4 dosing pump will be in charge of auto top-off and continuous water changes. with 2 hang-on filters heavy feeding will be performed to get all the babies in tip top shape. also continuous water change will make it so much easier thus less work for me getting my hands dirty and all left to do is turn ball valve when water change sump gets low. i feel that introducing small amount of water into the system will make all fishes happy and they might not even noticed the change.
5-29.jpg

5-29a.jpg

5-29b.jpg

5-29c.jpg
 

cbui2

Member
Ok here are some more updates, and manage to get some work done after coming home. sod was removed all along the wall. using 2x4 w/3" wood screws to support the outer wall and 2x6 for inner. This was much better to support than the regular stakes sold at HD, also foam expansion joint boards will be used along the back wall and step. next brick will be spreaded out evenly at the bottom to raise wire mesh up in place than rebar will be place above the mesh which will be tied together to make it more durable since generator and chiller will add about 1500 lbs. slope is from back to front making sure so no puddles are visible and of course mosquito heaven too. slab area is 12'L x 38"W and approximately 6"-7" of concrete will be poured using concrete mixer which holds about 5 80lbs bag.
5-30.jpg
 

lcstorc

Well-Known Member
First of all, Welcome to RS!
Wow, what a project. Looks like everything is coming along nicely. I can see this is going to be a beautiful system.
Keep the pics comimg. We love pics.
 

Dentoid

Smile Maker
PREMIUM
:hallo:Welcome to the Sanctuary. Looks like a fun, mammoth project. Ambitious for a first timer. You've got some skills though! I spent some time in New Orleans back in 1992. I did an oral surgery externship at the Charity Hospital. Best of luck with your project!
 

blue_eyes53813

Well-Known Member
That is one awesome set up... Congrats.. I cant waite to see the progress.
1 question.. Have you thought about moisture in the house from the tanks?

From my tank I had mold starting in some windows.. Something for you to watch out for.
 

vdituri

Well-Known Member
Holy cow!
I want to see the blueprint plans for this monster. There must have been sketches galore.
I'm having trouble getting my mind around your setup.
It's amazing!
 

boozeman

Well-Known Member
:welcomera to RS
I have been following your thread in the Large tank forum of RC for quite sometime now :invisible
Glad you joined here, an awesome first time effort...the care in planning is quite evident :thumbup:
 

cbui2

Member
That is one awesome set up... Congrats.. I cant waite to see the progress.
1 question.. Have you thought about moisture in the house from the tanks?

From my tank I had mold starting in some windows.. Something for you to watch out for.

thanks, but alot of planning was done prior to turning my garage into the fish room. 1st 4 layers of primer treated the walls, then 5 layer of paint. next window unit 12,000btu will keep the garage temp 74deg all day long. 2 more exhaust fan located in the attic at different section was installed and set on timer every 30min to circulate air, but really wasn't needed b/c the roof line was also done with foam insulation about 6" all around the fish room and entire house keeping temp in the attic rougly 85deg during peak season also additional fiberglass insulation above the ceiling and walls were done too. this foam insulation was the best thing i did when i moved into my new home 7months ago. mold only start if no air are circulating and heat build up also causes this too. in new orleans high humidity is a big issue, but i did alot of research to factor details needed to be done.
 

cbui2

Member
thank you all for your kind comments, i have loaded 15 80lbs of concrete today and 15 more is needed tommorrow. i will be able to mix the concrete sunday which will take some time judging i wil lbe doing all the work myself, hehe.
 

cbui2

Member
thank you all for your kind comments,
ok here are some more updates, yesterday was prep day moving 30 bags concrete, mixer, water and etc. i need to do the job site which made it so much easier then trying to accomplished it all in one day.
started sunday morning 8am mixing 2 bags at a time then pouring the concrete in placed and spread it out evenly to the end.
6-3a.jpg


finished 10:30am
6-3c.jpg


got a chance to uncrate chiller, here are some pic's.
Tradewind 1.5hp 18,000BTU
6-3e.jpg

6-3f.jpg

6-3g.jpg
 
Status
Not open for further replies.
Top