Squatch's Continuing Adventure with a 40g breeder

Squatch XXL

Well-Known Member
I did quite a bit of reading on the topic of "Tank Safe Silicone". I found that GE Type 1 silicone is listed as "Not safe below the water line of aquariums" and is 100% silicone with no mildew/mold additives. There is quite a bit of positive feedback on this brand/product (I.e. no massive die offs).

From what is suggested, it is actually safe for aquatic life after it cures, but may not have the strength that GE wants to chance with larger tanks.

I have no caulk gun.

I have all of the necessary plumbing and have it piped out.

Also, I have my sump baffles and my overflows drawn up on my plex. Its too late to get started on cutting....Ill be up till the glue dries if I get these cut.

Photos tomorrow.
 

Squatch XXL

Well-Known Member
Its almost tomorrow, so here it is.

Back of tank from durso to the sump


Sump position and pipe layout. I will be adding legs to the 90 degree after I create a canopy out of my plexiglass. I plan on notching the hood so that it can be removed.


Close up of sump and drain lines. I am planning on using the male x female adapters there so that I can remove the section that is resting on the sump IF I have to remove it for cleaning etc.


Layout of overflow boxes and sump baffles. I have the height of the overflow set so that my crappy HOB would work.


Its starting to look like a home. this is the general idea for the burrow. I will do my best to keep it behind the rockwork. The store did not have 2-1/2" pvc at all. I opted for 3". As I start the rockscaping I may shorten this and/or even add a few more fittings.


None of the joints are glued. Not yet. I need to add a few 2x4 pieces in the back to support the drain lines.

Also will be creating reinforcement plates for the back of the tank from this plex. Its 1/4" and pretty beefy. It may not help, but it won't hurt. I got the time and materials. What is pictured is less than half of the total piece.

The sump pump is going to return most likely to the center of the tank. I tried to line up the side of sump with center tank. I don't plan on any fancy return, maybe a bull-head tee with a pair of street 45s to give some direction.
 
Last edited:

Squatch XXL

Well-Known Member
All of my plex cuts came out perfect EXCEPT for the sump, which is a 10 gallon fish tank. After assessing the situation, I found that the tank was 1/16" smaller at the bottom than at the top. I had to file both pieces for a bit, which was the hardest part of cutting 1/4" plex. This was nostalgic for me. The first time Young Squatch used a plex hand cutter was for a sump for a 75g reef over 15 years ago. I never thought of a straight edge at that time.....My god was it ugly.....but functional.....

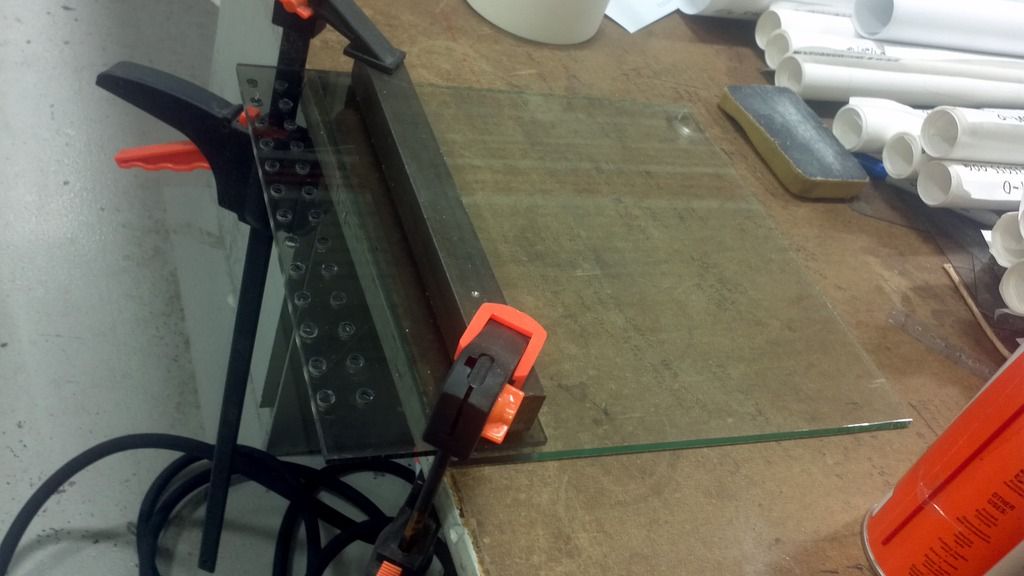
Here is a mock-up of my corner overflow taped in place. I'm going to engineer a way to cut 1/8" gaps for teeth using a right angle grinder. I may have to make a jig, and just slam it into a clamp. I will provide photos when all the pieces come together.


StirCrayzy

Well-Known Member
cutting Teeth is the hardest part of DIY Acrylic building.
on my acrylic work, I could never find a satisfactory process that I could get clean/straight/square enough finish quality.
so I drilled 1/4" holes in my acrylic fuge baffle.

they work great, flow as good as teeth if there sized right to keep breaking surf tension.

Looks better than any of my failed attempts at manually cutting teeth. I do have CNC capability, but it's just a lot of effort for one offs.
 

Squatch XXL

Well-Known Member
I tried to use a right angle grinder with a 1/8th inch thick wheel to cut out my teeth. As precise as I can get on steel, the plastic is simply too fragile. I created a functional overflow that looks tragic, and is getting chucked.
so I drilled 1/4" holes in my acrylic fuge baffle.
I had actually tried 1/8" holes, but I may upgrade to a larger bit as you did. What is your spacing on these 1/4" holes....If I was to guess, it would be centered Every half inch from your photo.
 

Squatch XXL

Well-Known Member
I over thought the process, than reduced it to the easiest method. I enjoy the fruits of my labor. As far as I am concerned, The hard work is done. All that is left is the plumbing and the sump layout, which is only based on my heater....which is HUGE and will be simple. Ill explain my thoughts as best I can.

This is the "test fit" of a unmolested corner box. I test fit it to verify that I could get both my durso and the bulkhead out. 2 thumbs up.


I then layed out teeth, and attempted to try my luck with a grinder and a 1/8" wheel. It works much better on carbon steel. These things were tossed.


@StirCrayzy

Your advice about the drill bit had me crunching numbers, and I want the maximum flow rate. A "no-teeth" setup is the only way to take the math out of size of holes, and relative elevation of where they would actually work. My pump runs from 260-450 gph. I figure I will lose at least 25% due to head loss from fittings and height.

I had to figure out the best way to glue these in without any glue "tank-side"

Step1: Secure and glue triangle. Also, the other piece is my layout for my 2 reinforcement squares for the backside of the tank. They are visible in a few photos.


Step2: I beveled the bottom edge of the "face" of the overflow. Then I secured it with tape. Then I hinged it open from the top. I caulked the corner piece from side to side, than folded it back down and waited for that glue to dry. I had all exterior faces masked with more blue tape than is on most rolls.


Step3: Mask off area on the sides of the "face" piece. Then cram glue into the V shape from where the corner tangent hits the tank, and I flushed it up with the angle of the face.


Tommorrow I will mask off most of the tank. I want to hit the overflow boxes with some Krylon Fusion paint which is safe if given more than enough time to cure (7+ days). I have the time to wait for the silicone. Also, I will be painting the background Black on the outside...And the piece of eggcrate on the back wall...That is my "anti-strike" background. I figure if it is black as the background, it will blend in.

Thanks @BigAl07 for your prior thoughts on Krylon Fusion:
http://www.reefsanctuary.com/forum/index.php?threads/reef-safe-paint.63487/#post-869369


That looks great...but what about my livestock going over the Niagara falls? Also a cameo of my "reinforcement" plate on the back of the tank.


This is the most dead simple way I could think to engineer an overflow box without teeth, but with livestock loss prevention. That piece is tight in both boxes, but is not glued in any way. I don't think Id even have to.

I am projecting water this coming weekend. My live rock stunk from the shrimp slightly for 2 days. That "bio-spira" product must have actually done some good, because there is no reason other than that why my garage does not smell like low tide at the bay in August.
 
Last edited:

Squatch XXL

Well-Known Member
Busy as a beaver:

Painted left overflow:


Painted right overflow: I did not get a good second coat of paint, and the bottom corner is slightly opaque. I didn't care. Reasons follow.


I didn't get too upset when I noticed the right overflow was not quite perfect in a small part in the corner. Its not enough to notice unless the sun is shining directly into it, but that is how I get.

The main reason however is that to mask this tank off to not have any errant spray took WAY too long. I had 10 minutes of painting and 2 hours of ripping apart the Sunday edition.

I left the bottom triangle clear so that I could see from one end of the bottom to the other. I don't plan on hiding anything in the tank any more.

And a FTS that due to lighting turned into a selfie of me, with a reflection of me inside of my sunglasses.


I have quite a bit of surface skimming and feel comfortable that I could some day run this at 1000+ gph...which is just about totally unnecessary.

Here is a shot showing the eggcrate backdrop:


FTS with sunlight.


The eggcrate backdrop will get siliconed in place in the top corners so that its easy to remove.

I was/am overly paranoid about drilled holes in a fish tank. This with the species I chose makes me feel better. The reinforcement plates will let me sleep.
 
Last edited:

Squatch XXL

Well-Known Member
Sump is curing.

As was being built


Finished:


"Cure tank" (I.e. Paint and silicone):


The sump's first baffle keeps the water level where a HOB filter would work. A real skimmer is a few weeks down the road. I am waiting for a proper deal to pounce on. I used to use a Red Sea skimmer classic, and loved it. It was a big boy.

The sump was so simple to make that when I need to upgrade, Ill simply get a larger tank. If this one is too small, than Ill go get a 20L. Ill find out next weekend when I give it a trial run in the garage.

Also, here is a photo of some of my panes of glass. That's my tank on the other side.


Squatch XXL

Well-Known Member
I glued the background eggcrate flush with the back of the tank. I did this by applying glue to the top of the eggcrate, and clamping it directly to the top frame of the tank. It may introduce salt creep, but I liked the look better than having glue visible anywhere on the tank back.

Sump works as intended. Won't bother leak testing the tank until this weekend. I am out of projects until saturday or sunday.

And then...

So I did something that is going to upset some members.

I came upon a super cheap sea clone knock off. It is identical in design, so I imagine it is moderately terrible. Issues with the clown come from water level in the tank, which require daily adjustments....Also the air intake control is garbage. Years ago I had one.....I cut off the j pipe, upgraded to a better powerhead and kept it in the sump. I used automotive vacuum plug with a small hole melted with a needle instead of the junk they provided. The only time it was off was when it needed cleaned every week or 2. It kept corals in my 75g happy for 3 years. Its a simple solution that basically is no longer a sea clone.

I upgraded to a red-sea berlin classic (man I wish I still had that). It had similar issues with the same rubber air-adjust knob....same vac cap fix did the trick.
 

Squatch XXL

Well-Known Member


Glue on backdrop is dry. Clamps are removed. The lighting was good to show it without reflections.

The only reason I was in the garage was that my front grill needed a touch of JB weld due to my mis-management of a woman at a green light on a cell phone. A 4 mph collision caused a 2 inch scratch on her bumper and cracked my grill. My car got fixed, and I got a good FTS.
 

StirCrayzy

Well-Known Member
I'm not entirely sold on the back glass eggcrate... Is it that likely Mr Mantis will choose the back of the tank to pick a fight with himself? What if it decides to strike the other 75% of the glass?
 

Squatch XXL

Well-Known Member
I'm not entirely sold on the back glass eggcrate... Is it that likely Mr Mantis will choose the back of the tank to pick a fight with himself? What if it decides to strike the other 75% of the glass?
Its not so much about reinforcing against a strike, as much as it is reinforcing a plate of glass that has 2 holes drilled into it. I am just protecting the weakest part of the tank.

Most if not all of the "rumors" involving stomapods breaking tanks involve research on larger species in much smaller observation containers of 5-10 gallons....By expert biologists who keep more than a few of these critters in their "lab". Statistically if you keep lots of stomapods in 10 gallon and smaller tanks, you are gonna have issues. I have yet to read of one hobbyist that had to deal with a broken tank.

I just don't want the back glass directly hit. I am not concerned about the other 3 sides, as they have no holes. To be honest, I think that its unnecessary.....But it feels better knowing that it cant directly strike the back.
 

Squatch XXL

Well-Known Member
Tank supply and returns are piped out and glued in. I added a few pipe supports where the pipe runs horizontal toward the sump.
Pump is rated from 260-450 gph and is adjustable. I estimate that at 100% open I will be pushing 320-350gph through the 3/4" supply line. It bull-heads behind the tank (Straight pipe into the wrong side of a tee) and from there it comes up and wraps to the back of the tank. I will eventually replace the current "45s" in the tank with a set of ABS because they are black.

With all the drilling I did, I did not want to think about a return hole in the middle of the tank. I FEEL that I pressed my luck enough with my 2 holes.

Returns to sump are 3/4" each and each should be very close to the same elevation.


Tomorrow there will be a water test. I figure by Saturday, this tank will have rocks and substrate and will then get to sit for a few weeks while it cycles the crushed coral substrate. I give it less than 2 weeks.
 

Squatch XXL

Well-Known Member
Well done!
Thanks Frankie. I decided to save the external return pump for the 20 gallon long that will go in later on down the road. This pump was an impulse buy, and does not have a standard threaded inlet. IIRC, I used a Mag Drive....And they were pricey then, however I only ever needed to buy 2 of them, and I used one in a pond after that for a few years.

Oh my how they have come down in price. I wonder about the quality?

Also, I'm not done yet. I feel confident enough to do this in place. It could get interesting, though I highly doubt it.
 

Squatch XXL

Well-Known Member
I highly doubt it.
Sump is PERFECT......I mean that in the worst way.

Right about where the pump stops sucking air is the highest I can have the water level at, or if the power goes out I have a wet floor.

This will be addressed in the morning.
 

Frankie

Well-Known Member
RS STAFF
Attach a 90° pvc elbow to it facing down like I did in that picture you like of mine.
 

Squatch XXL

Well-Known Member
Attach a 90° pvc elbow to it facing down like I did in that picture you like of mine.
I can't. This pump does not have a threaded connection. It has a goofy adjust knob that allows for more or less flow.....Which I am pretty sure in industrial applications that pumps should be throttled on the output line, not the imput due to cavitation. I simply have to get a larger sump.
 
Last edited:
Top