Zigginit's 55g Mixed Reef Tank

zigginit

Member
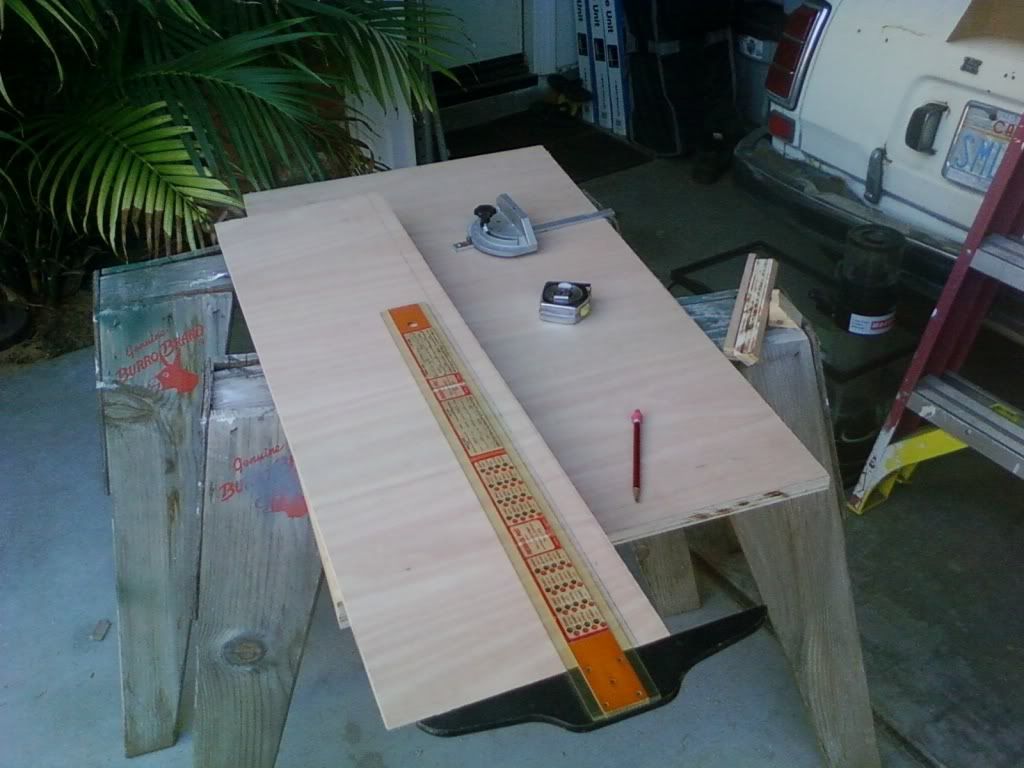
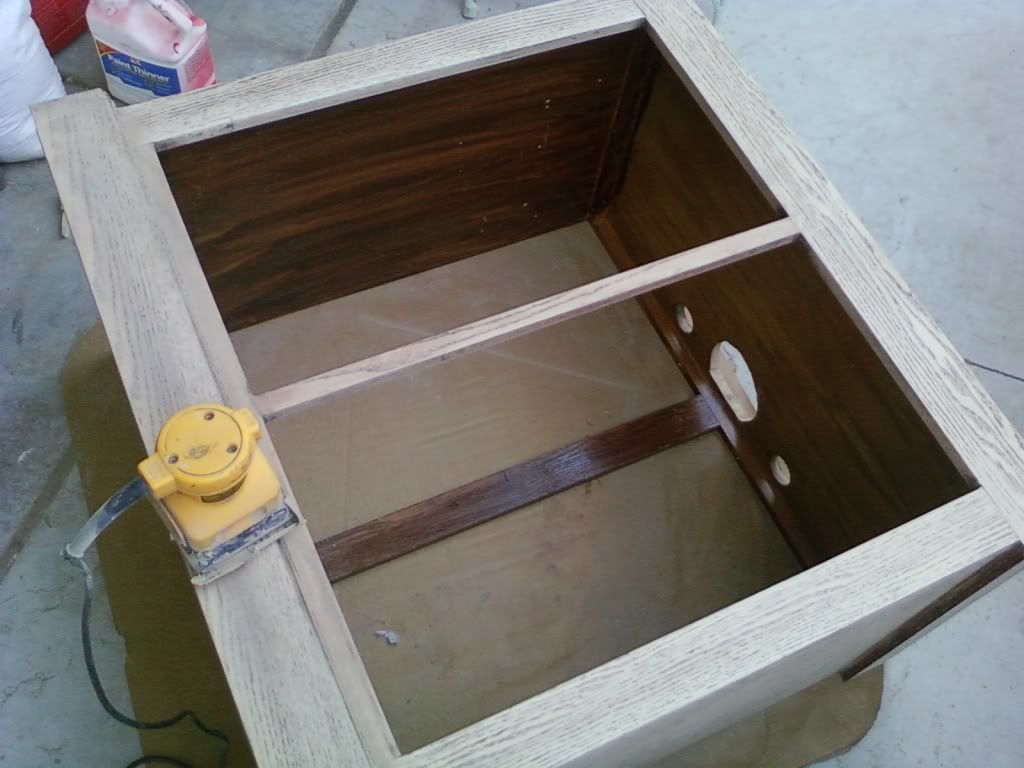
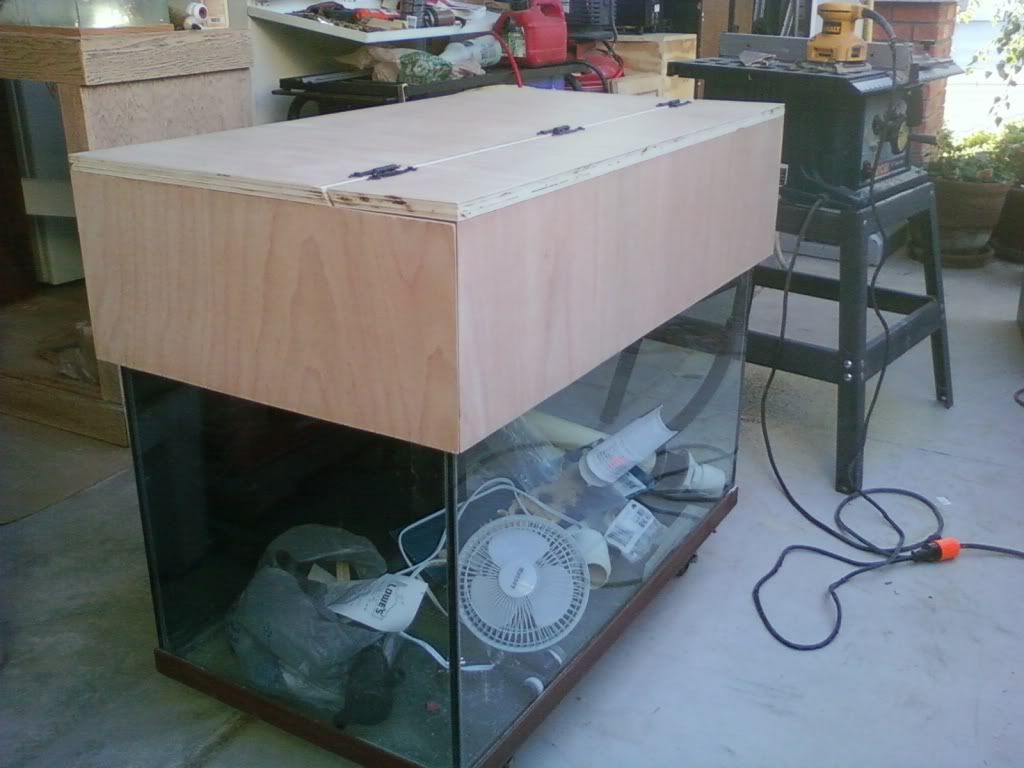
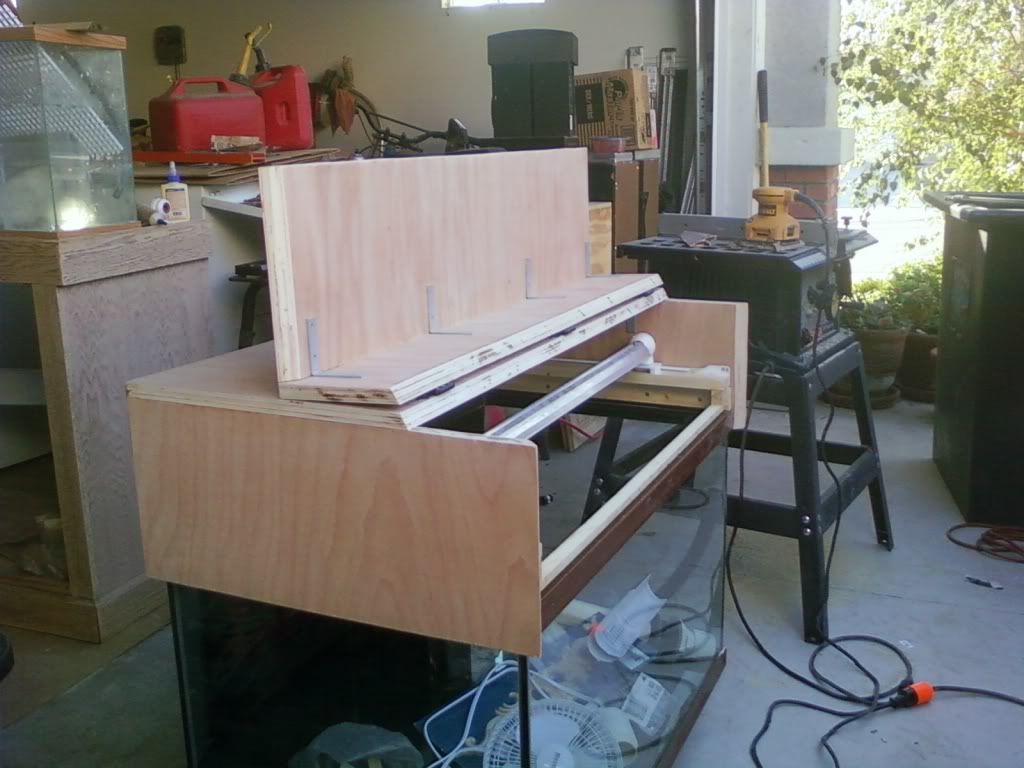
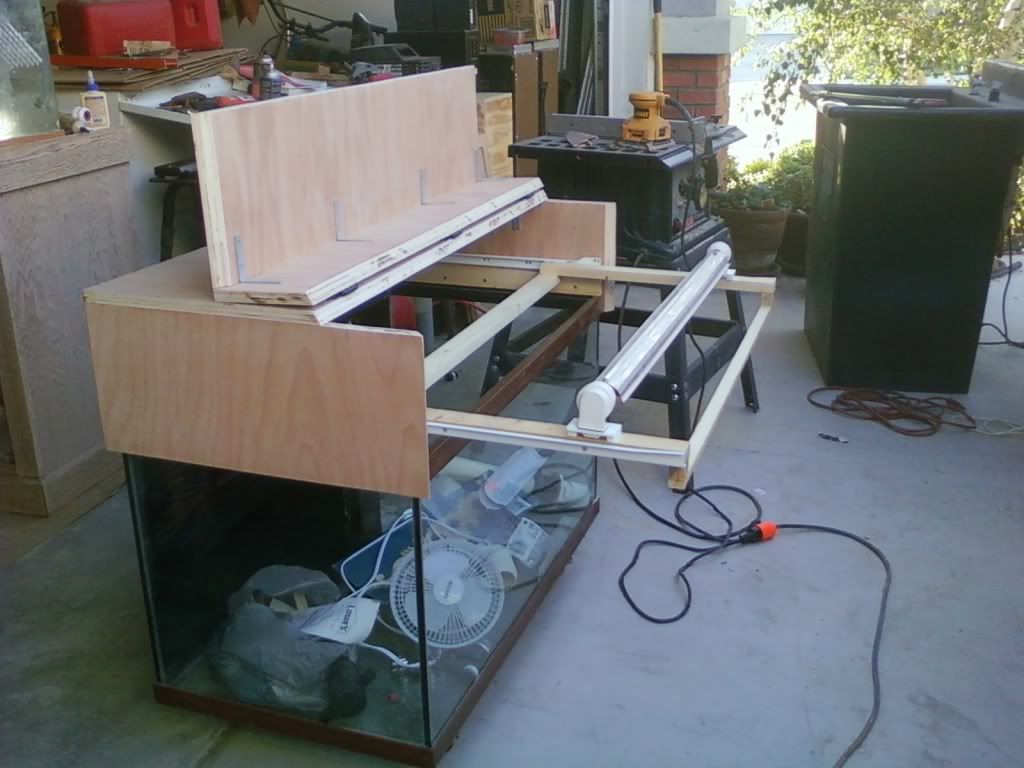
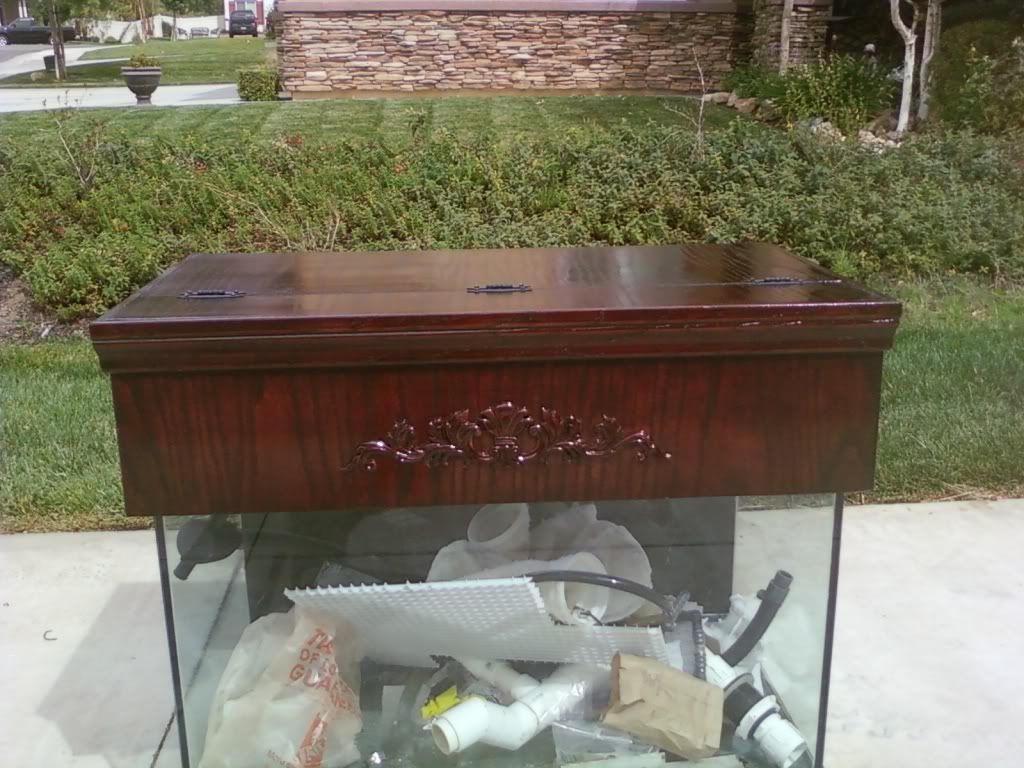
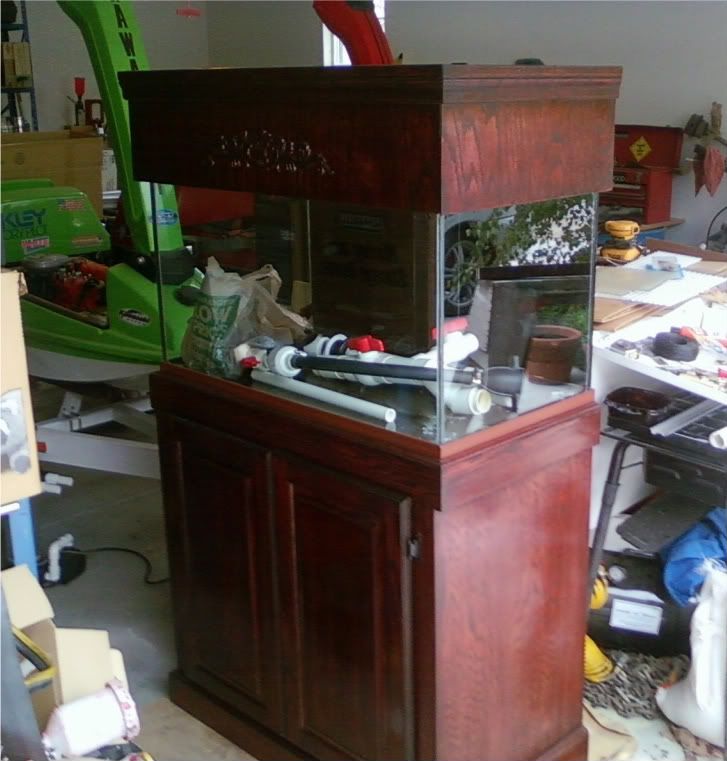
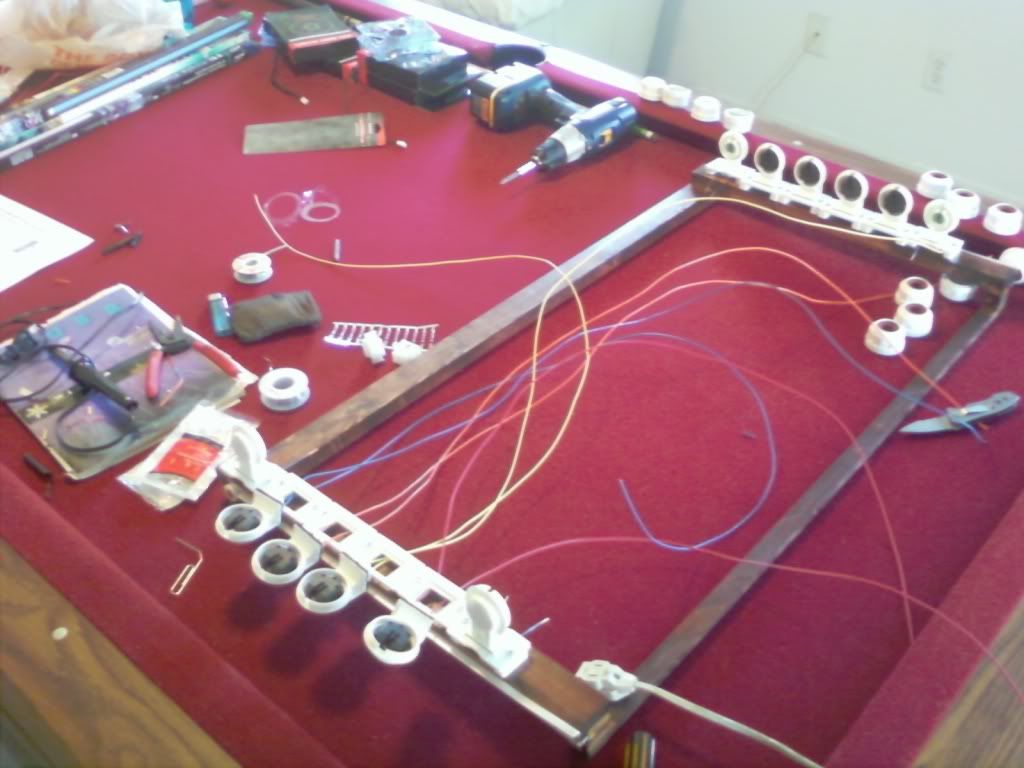
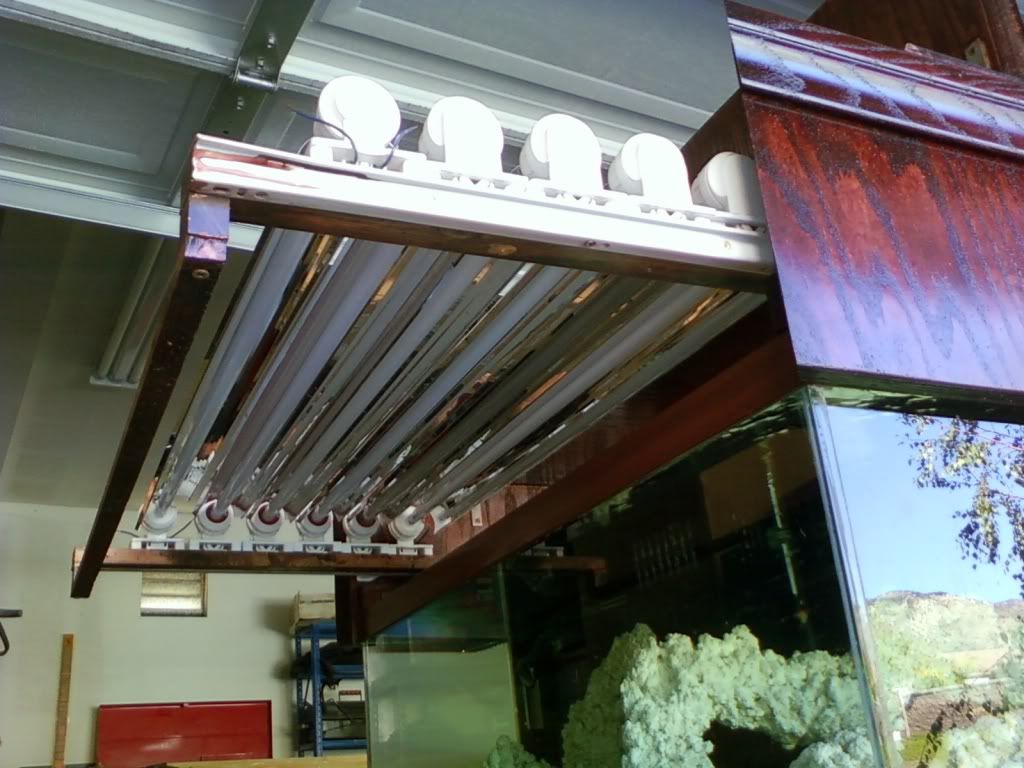
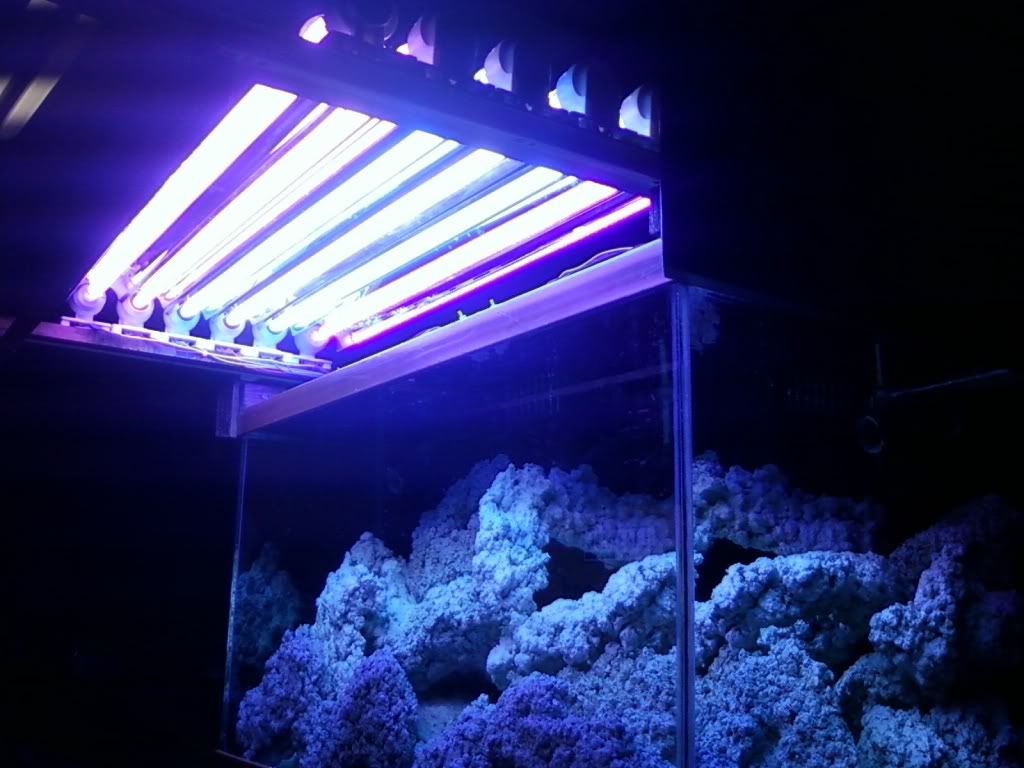
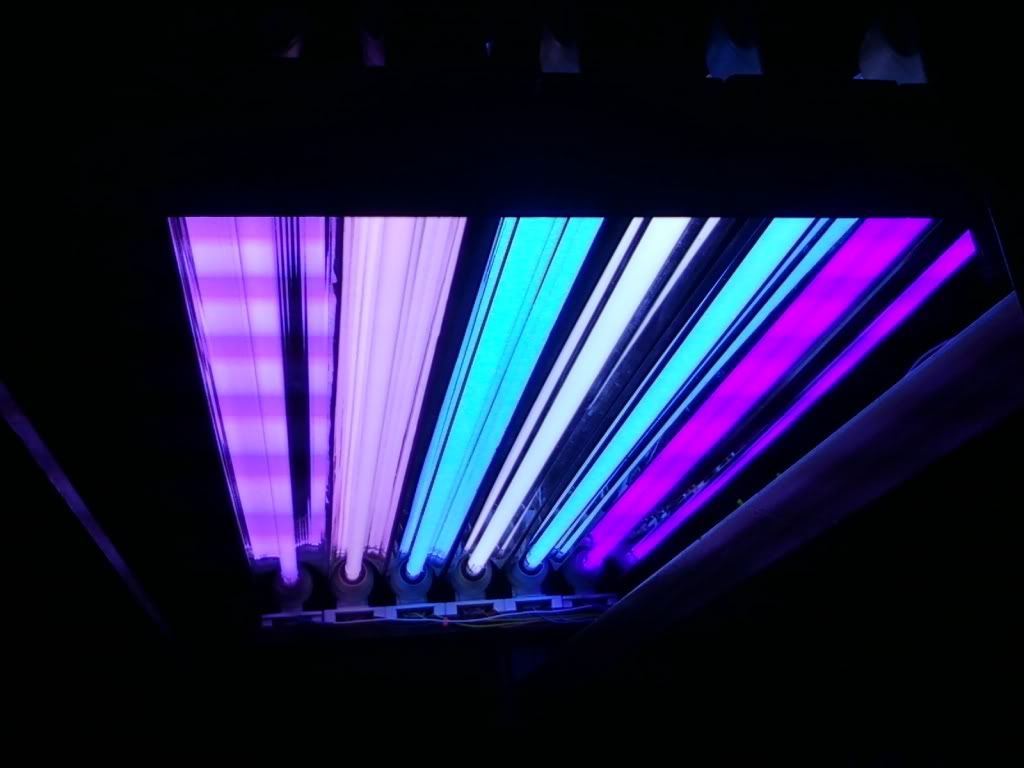
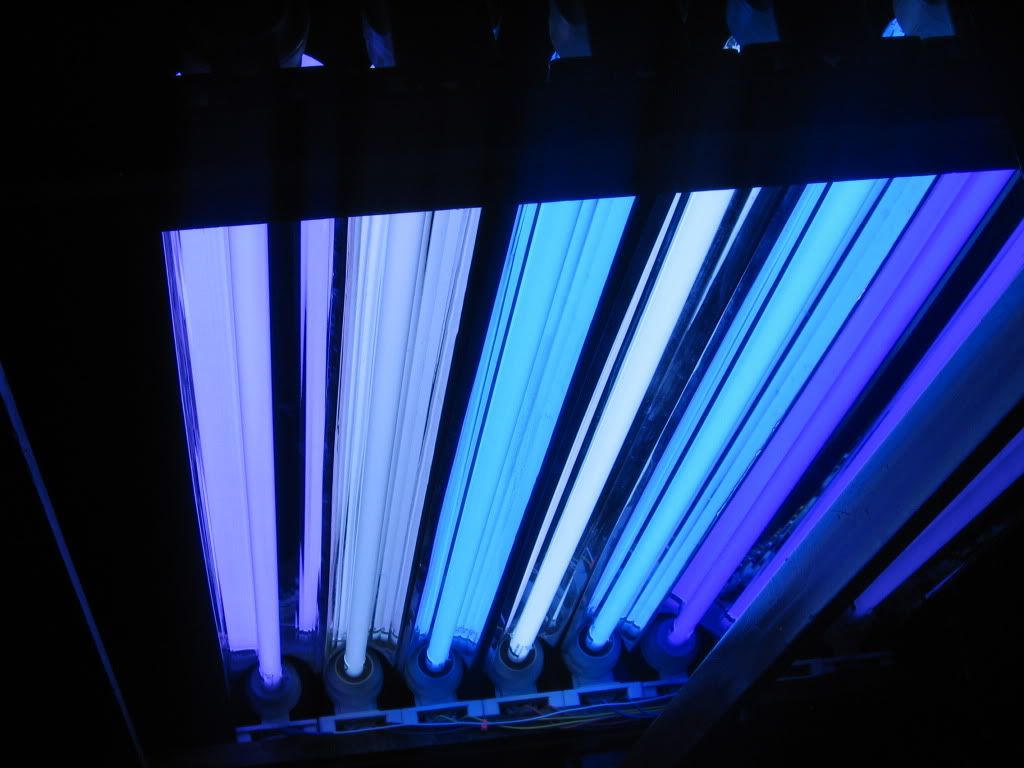
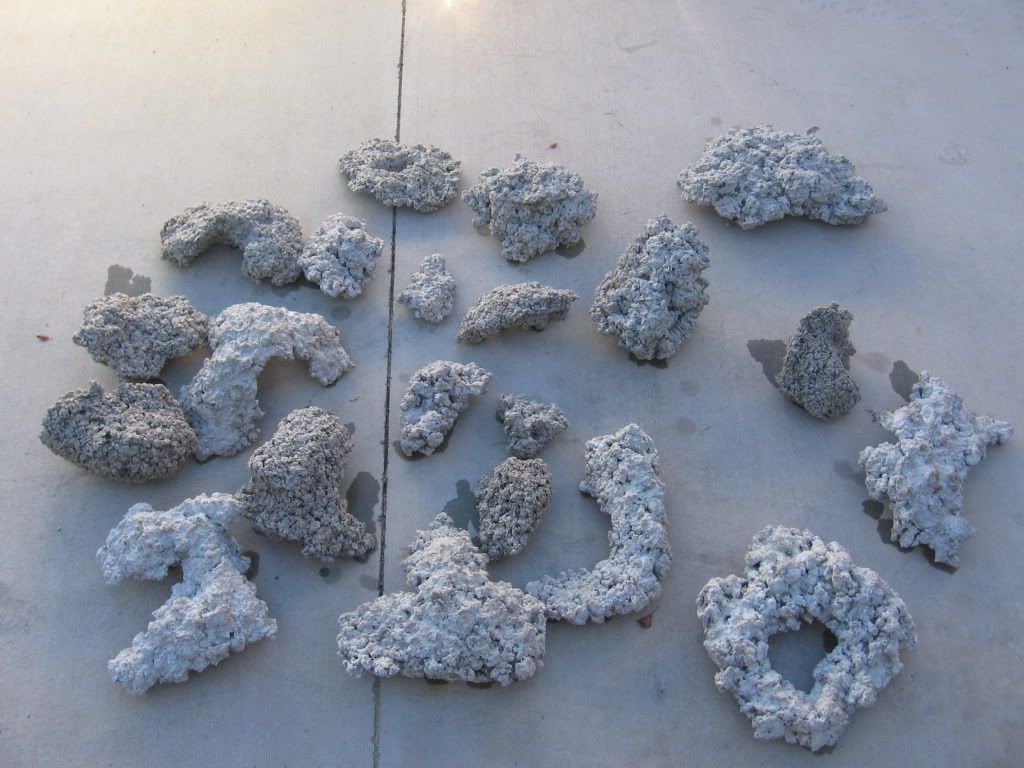
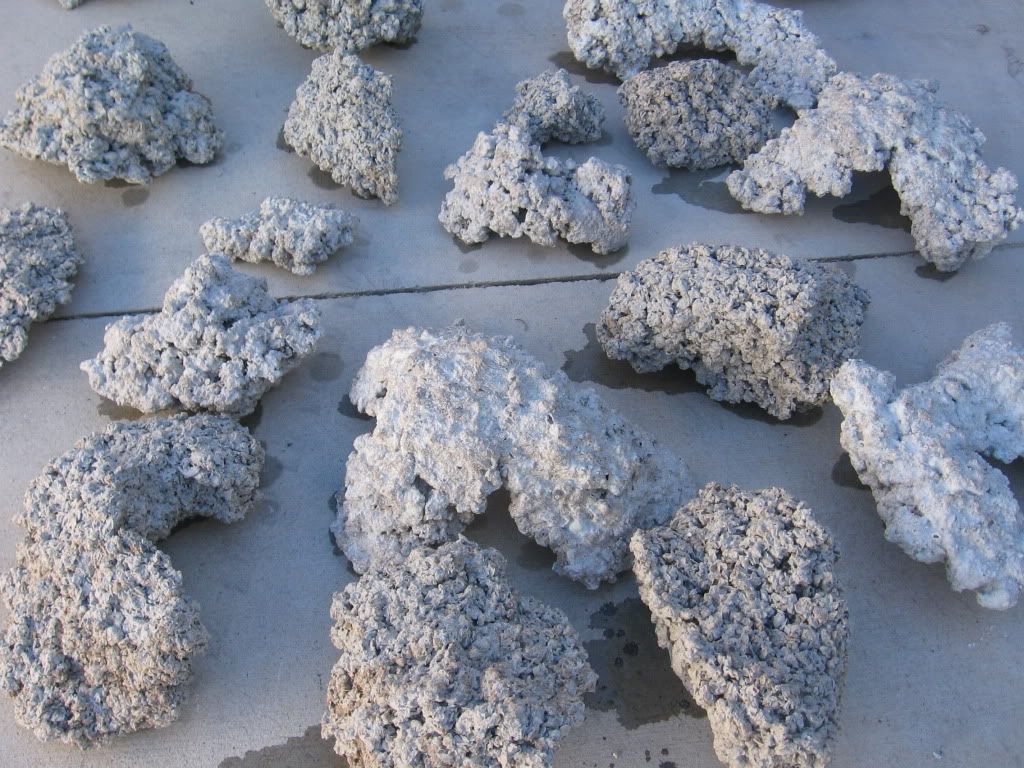
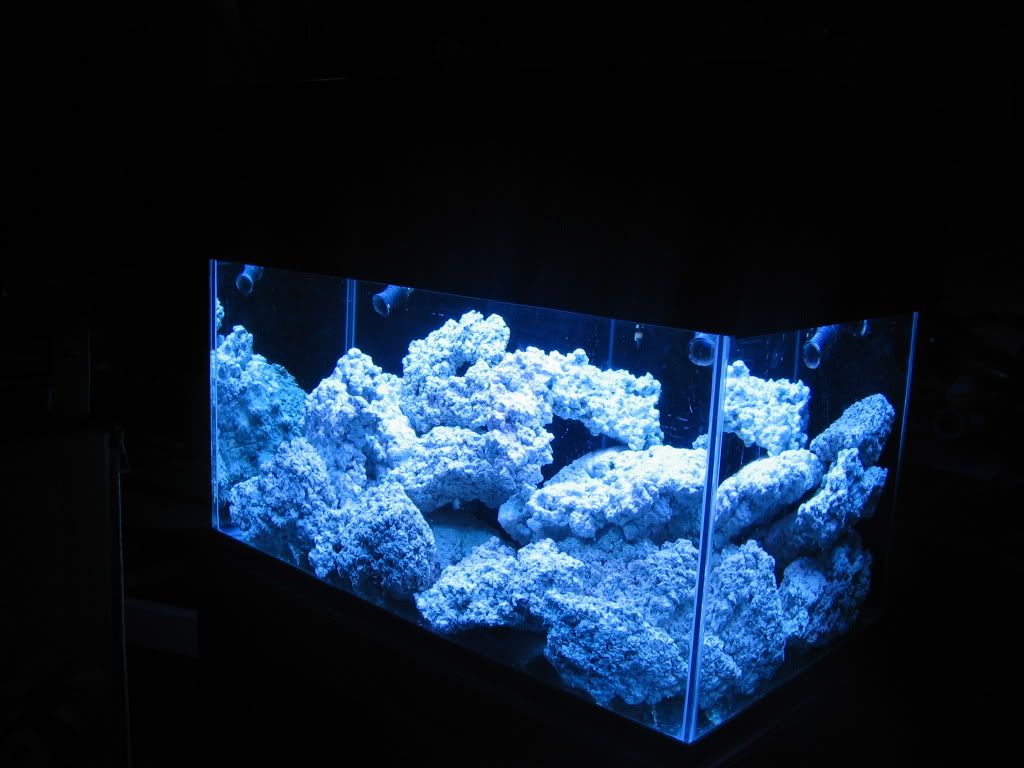
Ok so I had a BC29 for about 2 years now and i have been kicking myself the whole time for not just starting with a bigger tank. i know i will want to go bigger then a 55g gallon but i got a great deal on this and its not your standard 55g. it is 36x20x20. it has a lot more floor space then a normal 48X13X21 55g tanks. anyways it came with a solid red oak stand but needed to be restained. no canopy. i built a solid oak canopy to match the stand and it turned out better then i could hope for. i put 6 T5 lights in there too. 4 run off an icecap 660 ballast and the other 2 run off a workhorse ballast. i use the 2 bulbs for sun up and sun down. i even made a slide out t5 rack for the lights so i can clean them or change them easy. the rack unplugs and can be removed all the way for a deep clean or fix. im proud of my work so far and have to show a few pic's:

SSPX0279.jpg

SSPX0269.jpg

SSPX0286.jpg

SSPX0287.jpg

SSPX0288.jpg

SSPX0304.jpg

SSPX0306.jpg
 

zigginit

Member
part of my new tank build was to make DIY Live Rock. i used white portland cement, crushed oyster chells, sand, and rock salt. i have some that i didnt like the look of so i made a white portland cement slurry and brushed it on the surface of the rocks to give it a more white look. i then changed my formula (this time using the crushed oyster shells, last time i did not find them yet), this made the rocks look so more real and white on there own. no need to brush over them anymore.

i now use about 4 parts oyster shell, 2.5 parts white portland cement, 0.5 parts sand, and 0.5 parts rock salt. mix the stuff first with water to a wet but not runny mix, then add the salt last as it will dissolve if you dont do it last. i put the mix in a bed of white sand or more rock salt in the shape i wanted it. rock salt is cheap and will dissolve off the surface of the rock when done. last time i had brown sand stuck to it and it looked bad (thats why i covered it with the white cement slurry!) anyways everything looks great now. let it cure in fresh water for a few weeks to cure the cement. it will rais the ph very high and the water needs to be changed every 2 days. the bigger the tank you cure the rock in the faster it will cure because it has more water to leach out the lime in the cement. im still at this point now but am almost done after 3 weeks. then i will cure in salt water with live rock to seed it.

IMG_2773.jpg

IMG_2771.jpg

IMG_2774.jpg
 

zigginit

Member
the lights are in this order in the above pics, but i will be moving them around untill i find what i want.
FRONT
ATI Purple +
ATI Aqua Blue Special (12k)
ATI Blue +
UVL 75/25 (14k)
ATI Blue +
UVL Super Actinic (420nm)
BACK
 

Dweezil

Well-Known Member
You should be VERY proud of your work! Well done. Very nice build and excellent job on the hood.
 

zigginit

Member
You should be VERY proud of your work! Well done. Very nice build and excellent job on the hood.

thank you for the kind words, i am very happy with my work so far.

i am going to put 4 120mm PC fans in the canopy for cooling of the icecap driven bulbs. i have these very cool blue LED fans that will go right above the endcaps of the 4 bulbs in the center as they are the icecap driven bulbs. this should give the bulbs longer life. and the blue LED fans will just look nice too.:yup:

also i moved the bulbs around and now have them in this order and am happy with it for now:
front
ATI Purple +
ATI Blue +
ATI Aqua Blue 12k
UVL 75/25 14k
ATI Blue +
UVL Super Actinic 420nm
Back

with this combo it looks very icy blue but crisp and white almost. i think because the DIY live rocks have no color yet that the white from the Portland cement make the tank brighter. as time goes on i think the colors will fill in and maybe it will look a little more on the blue side. i would like it to look a little more blue but like i said i think i just need to let the tank take on some color before i buy any other bulbs.

I CAN ALREADY TELL THAT CORAL WILL POP WITH ALL COLORS NOT JUST GREEN! the zip ties used to hold some wires and the wires them selves are glowing already under this light. also some of the oyster shells i added to the DIY live rock have colors in them and they too are glowing. they have an orangish red glow to them! I CANT WAIT TO PUT MY CORAL IN.

one last thing, these light are sooooooo bright. i have it in my garage right now so i can work on it and at night when i turn the lights on it lights my street up! lol people where looking out their windows like were is the UFO. i will grow anything i bet.
 

zigginit

Member
pic update with bulb order:
front (right)
ATI Purple +
ATI Blue +
ATI Aqua Blue 12k
UVL 75/25 14k
ATI Blue +
UVL Super Actinic 420nm
Back (left)

SSPX0348.jpg
 

zigginit

Member
thanks i cant wait to set this bad boy up inside the house and put some fish and coral in it. my BC29 looks so small and "yellow" now that i have this tank setup out in the garage.
 

zigginit

Member
so i hear that the ATI Purple + has high PAR levels too, anyone know if thats true? GRIM REEFER said it has as much as a blue+ and is really the same as the fiji purple.

in put anyone? anyone been using these bulbs?
 

IXL

Member
Love everyting you've done ... I wish !
If I was just half as good as you in being a DIY Guy ;(... since Im not? i just buy it full price..
( sucks ).
On another note ... your Rock scape goes totaly against the laws of SW Tanks? just wondering what are your thoughts , ( don't get me wrong I like it & would love to set my tank up that way ) but, Looks like there will be no flow in several places and your rock is leaning on the glass.

Key note: I'm not Hatting , I'm all about prevention..congrats on your setup :)
 

Shagon

Member
^ agreed


and i have that same tank. its a oceanic? the lights look awesome.

what are you going to stock it with?


EDIT: i went back and read the post some more. you haven't actually set that up in the house yet? so the pic of the rocks is just a test fit?
 

zigginit

Member
thanks for the post, the pic above is not how its going to be setup inside my house. its in the garage right now and the rocks are still curing so i didnt stack them the way i wanted them to be in the end. i just wanted the water flow to go over each rock so it can cure faster. when i set it up inside the house i dont think im going to even use all that rock. i made a lot of it so i can pick the ones that look the best. i have about 40 pounds of real live rock in the biocube inside already that im going to mix with the DIY rock. whatever rock is left over i think i will sell or maybe just keep depending on how much is left over.

nice observation though :)
 

zigginit

Member
as to what im going to stock it with, its going to have a lot of SPS and LPS. i may have a few soft coral but not much, whatever i have in my BC29 right now. i do like how rics will look under the T5 though, maybe ill get more of them.

i also plan on having a zoa garden at the bottom and a frag rack on the back wall somewhere.
 

zigginit

Member
well i did a PH test to see if the DIY rocks were done curing but sadly they are not yet. the ph was above my test kits max of 8.8, and they are curing in fresh water mind you. they will be ready once the ph stays near 7 after more then a few days in the same batch of water. for now im just doing 100% water changes every 2 or 3 days. i wish i had a heater for the tank already so i could heat the water up kinda high as i think it will cause the chemical reactions to happen fast in the cement. all the rocks are at this point about 3 weeks old i think, some a little older as i made some every day for a week.
 
Hmmm interesting that you made your own rock... gutsy haha I wouldn't have thought of it but it sure does look cool! Awesome job on the lights by the way, very clean very professional looking.
 

zigginit

Member
thanks for the comment, making the rock was a lot of fun and it was cool because i could make shapes and sizes that i wanted. the oyster shell mix is very light too. the only draw back i can think of is taking the time to "cure" the portland cement so it stops leaching and raising the ph. i read it take about a month before the leaching stops so it not like you can use it right away. a lot of people are doing this and having good results. corline algae loves to grow on it i read. the other draw back is no free hitch hikers, but that can also be a good thing. lol.
 

zigginit

Member
when i first made the live rock i took a small chunk that broke off (about the size of a small apple) and stuck it in the bio cube to see what would happen to it. at first it looked really white compared to the other rocks, then is turned grayish and had some brown spots color up, and now i can see small patches of purple that are just starting to grow all over it. i think in a few more weeks the thing will be nice and near solid purple :) i already see that the little red worms like to use it as a home already.
 
Top