You are using an out of date browser. It may not display this or other websites correctly.
You should upgrade or use an alternative browser.
You should upgrade or use an alternative browser.
My first Marine, a Fluval M40 journey
- Thread starter Gallma02
- Start date
Hi all,
Welcome to my journey into the world of keeping marine fish and hopefully corals. I used to keep tropical fish about 20 years ago (makes me feel so old!) and recently decided to finally take the plunge into marine. Thanks to those who helped with my initial questions and please feel to comment, ask questions, and make suggests as I am sure I will be making loads of mistakes.
I am hoping to record my experiences here, hopefully some will find it interesting.
I started reading a number of forums and watching loads of youtube videos and pretty quickly decided I wanted a Red Sea Max 250, which appeared the perfect size for a corner I had picked out. Then the “discussion” with the Mrs occurred in which it was decided that better start smaller to get some learnings, and I am pretty sure to see if I would look after it. Therefore, my ocean was downgraded to a puddle and I ordered the Fluval M40 Nano tank (14 Gallons, 51 litres). At least I already have a quarantine tank if I do upgrade.
Sadly only sat down and started documenting after I had done a bit, so please excuse the number of posts I will be putting of the experience at the start of the tread.
Hope you enjoy,
Mark
Getting ready
Instead of ordering online with next day delivery I decided to go through my LFS as they had spent time talking me through things. Sadly, this meant four days of waiting making me feel like a child waiting on Christmas again. To keep busy I started looking at other items I would need. It was at this point it started to sink in that this hobby was going to a cost a bit. The tank had cost me £379 and I had I just spent another £250 and the tank was not even here.
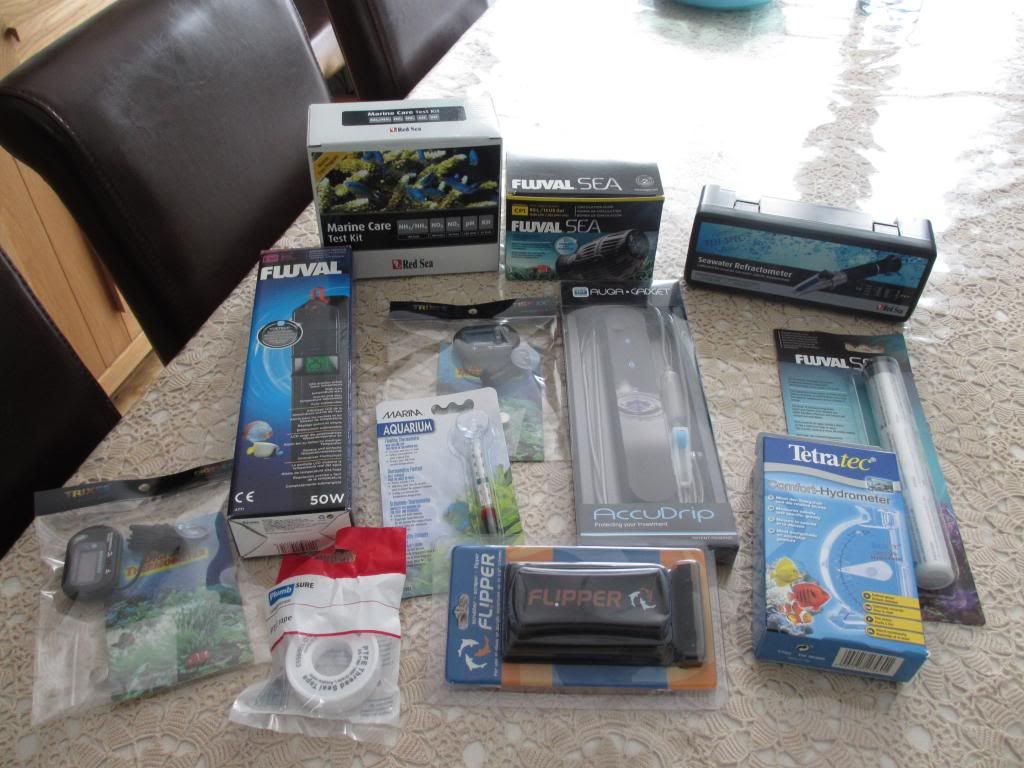
So my first of what I am sure will be many orders included;
- Thermometers, a glass one and couple of digitals for temperature checking.
- Testing kit, went for one of the Red Sea which seemed to have everything.
- Refractometer, which looks a nice toy
- Magnetic Glass Cleaner
- Drip accumulator, not sure if this is just a gadget but hey my not!
- Aquatic Epoxy Stick, decided I would use this on the live rock after reading that cleaners could cause rock movement.
- A Fluval heater and circulation pump, which I would need if I decided to make my own water and for water changes.
Instead of ordering online with next day delivery I decided to go through my LFS as they had spent time talking me through things. Sadly, this meant four days of waiting making me feel like a child waiting on Christmas again. To keep busy I started looking at other items I would need. It was at this point it started to sink in that this hobby was going to a cost a bit. The tank had cost me £379 and I had I just spent another £250 and the tank was not even here.
So my first of what I am sure will be many orders included;
- Thermometers, a glass one and couple of digitals for temperature checking.
- Testing kit, went for one of the Red Sea which seemed to have everything.
- Refractometer, which looks a nice toy
- Magnetic Glass Cleaner
- Drip accumulator, not sure if this is just a gadget but hey my not!
- Aquatic Epoxy Stick, decided I would use this on the live rock after reading that cleaners could cause rock movement.
- A Fluval heater and circulation pump, which I would need if I decided to make my own water and for water changes.
First arrivals
Well got home from work today and was greeted by parcels of goodies!
Getting excited now to get going. Gave the LFS a call, sadly no sign of the tank after four days, but assured me it will be here by the weekend. Therefore decided to order what I would need to get the tank up and running, another £140 later after ordering the following to arrive on the weekend.
- 7kg of Nano Live rock
- 10kg of Red Sea Reef Pink - Live Aragonite sand
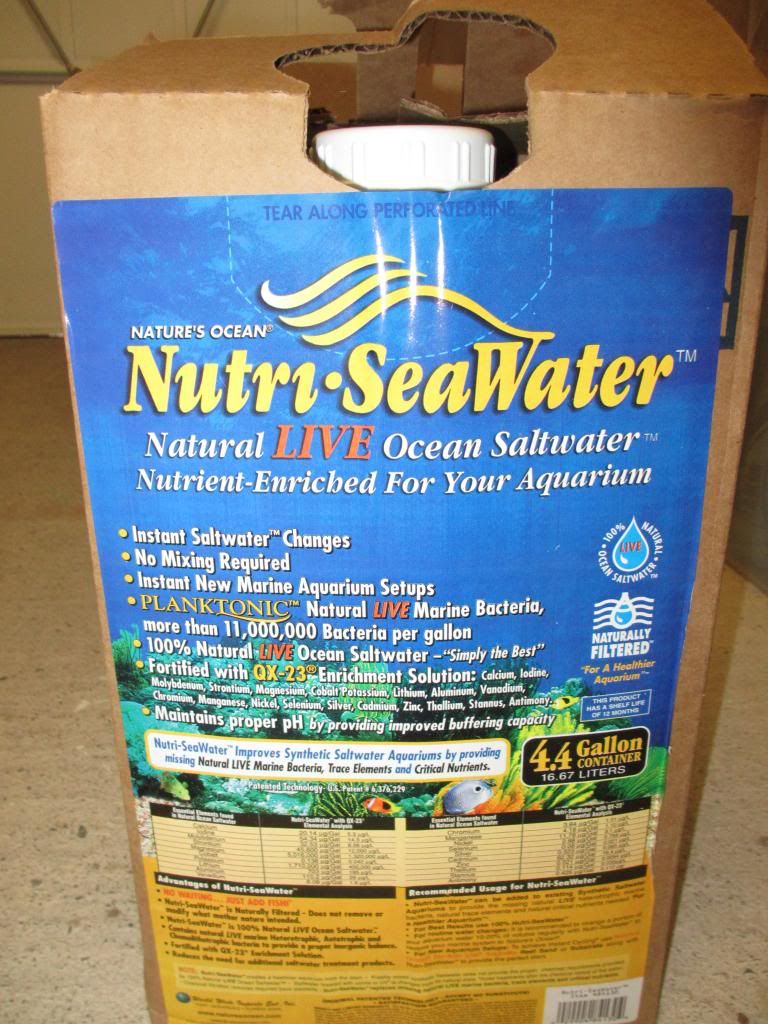
- 60L of Nutri Sea Water
After getting some help here on the forums, I decided to buy Nutri Sea water to use in the tank. My reasons were (1) that I could not justify paying for a RO unit for the house at this stage, (2) going to the LFS to get ready mix salt water was roughly the same price and (3) this way it gets delivered so no nasty trips with containers of water in the car.
Well got home from work today and was greeted by parcels of goodies!

Getting excited now to get going. Gave the LFS a call, sadly no sign of the tank after four days, but assured me it will be here by the weekend. Therefore decided to order what I would need to get the tank up and running, another £140 later after ordering the following to arrive on the weekend.
- 7kg of Nano Live rock
- 10kg of Red Sea Reef Pink - Live Aragonite sand
- 60L of Nutri Sea Water
After getting some help here on the forums, I decided to buy Nutri Sea water to use in the tank. My reasons were (1) that I could not justify paying for a RO unit for the house at this stage, (2) going to the LFS to get ready mix salt water was roughly the same price and (3) this way it gets delivered so no nasty trips with containers of water in the car.
Still no tank!
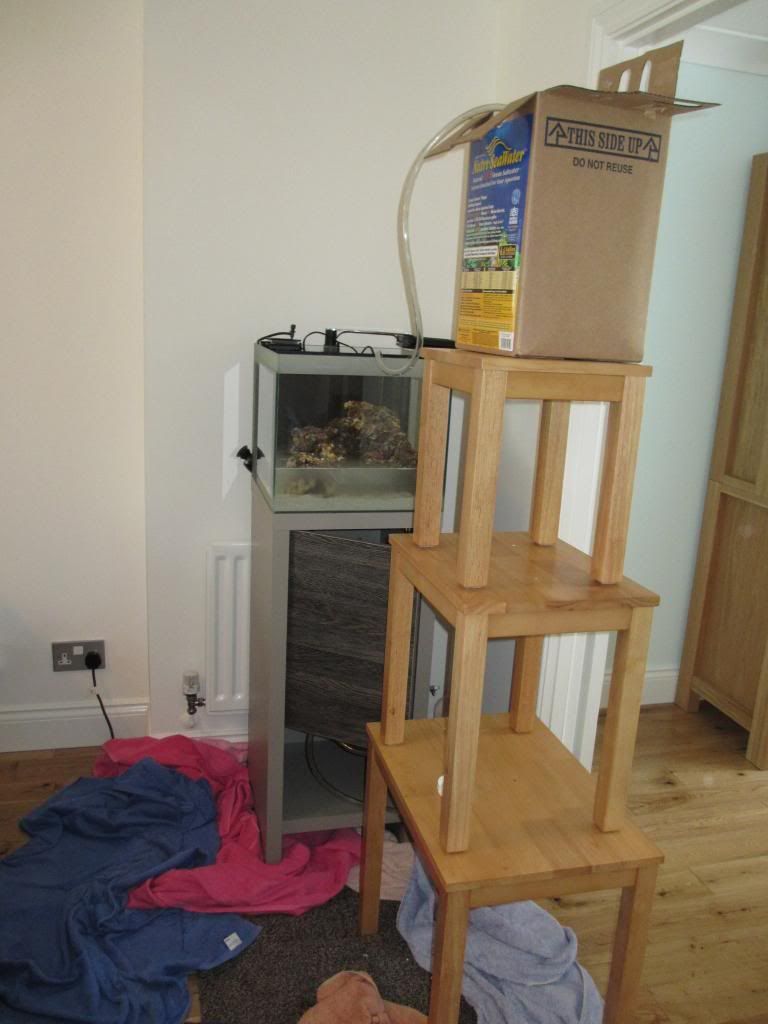
Well the weekend has arrived and still no tank, it appears there was a mix-up and it would take another few days at least. My disappointment was short lived however as my second package had arrived.

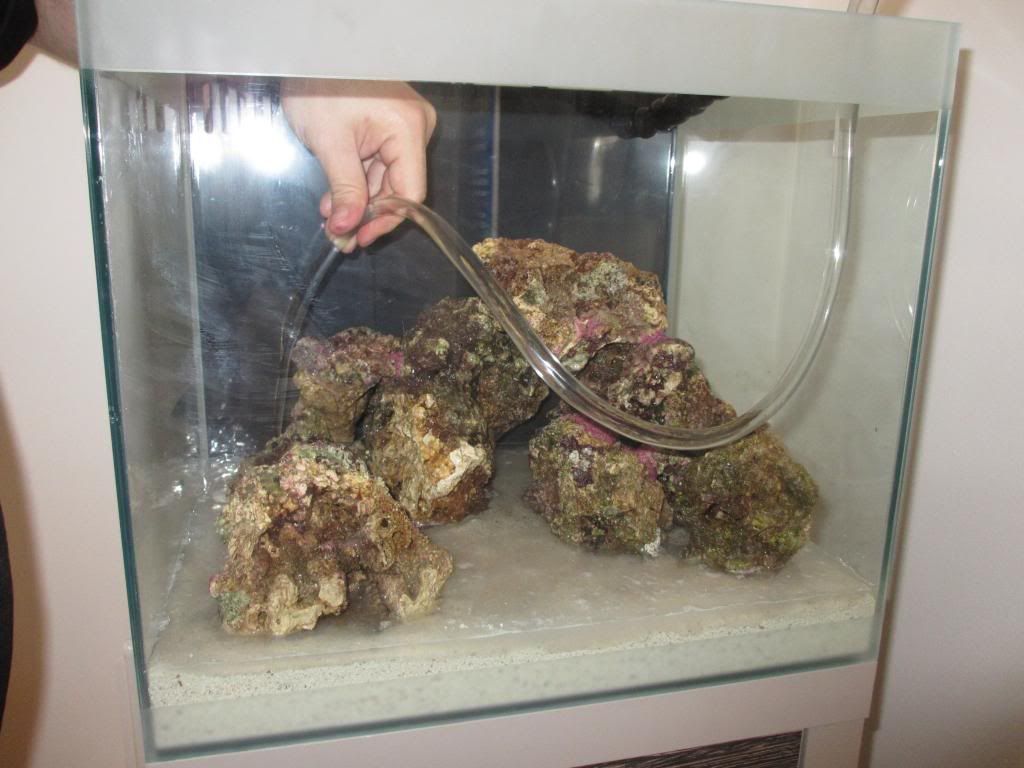
Now this presented a problem with no tank and no idea when it would arrive I needed to look after the live rock. After reading, it appears all I would need is circulation although some people indicated adding a heater was a good idea. Therefore a quick trip to the store to purchase a new container and I was back to create my makeshift tank!
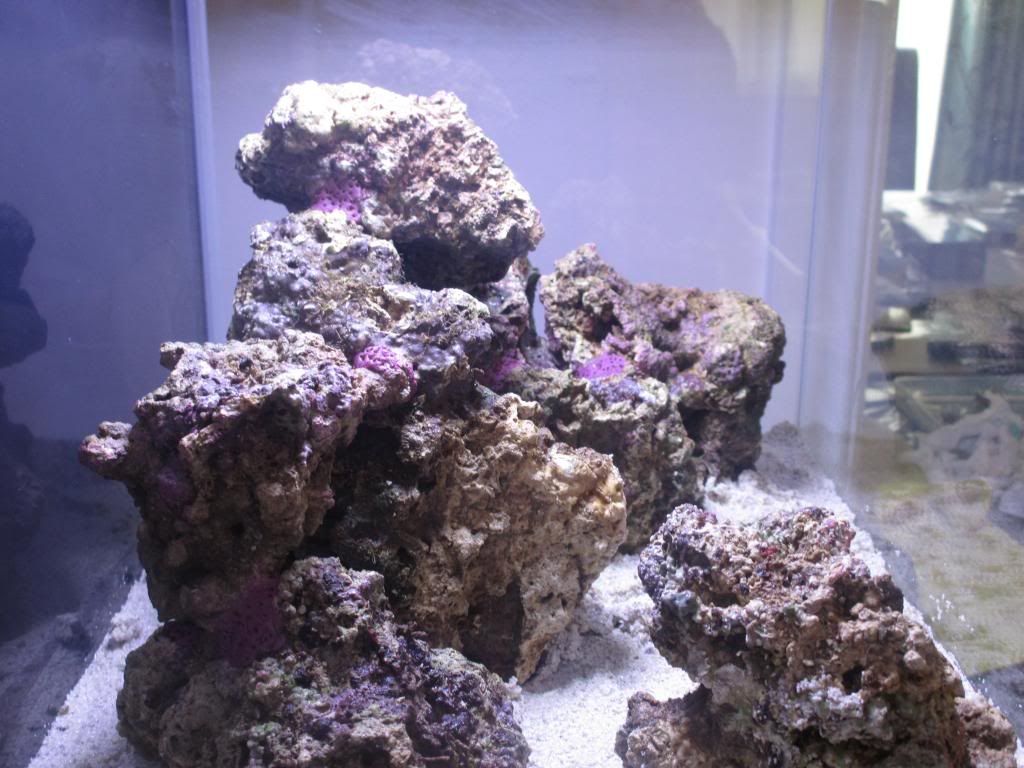
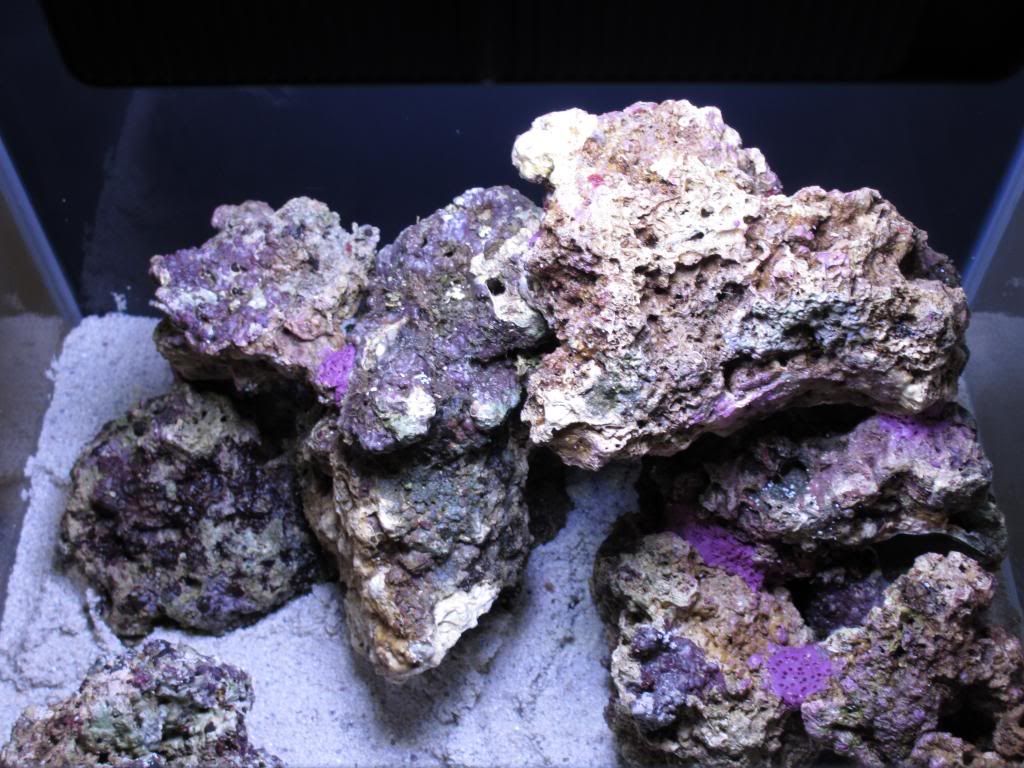
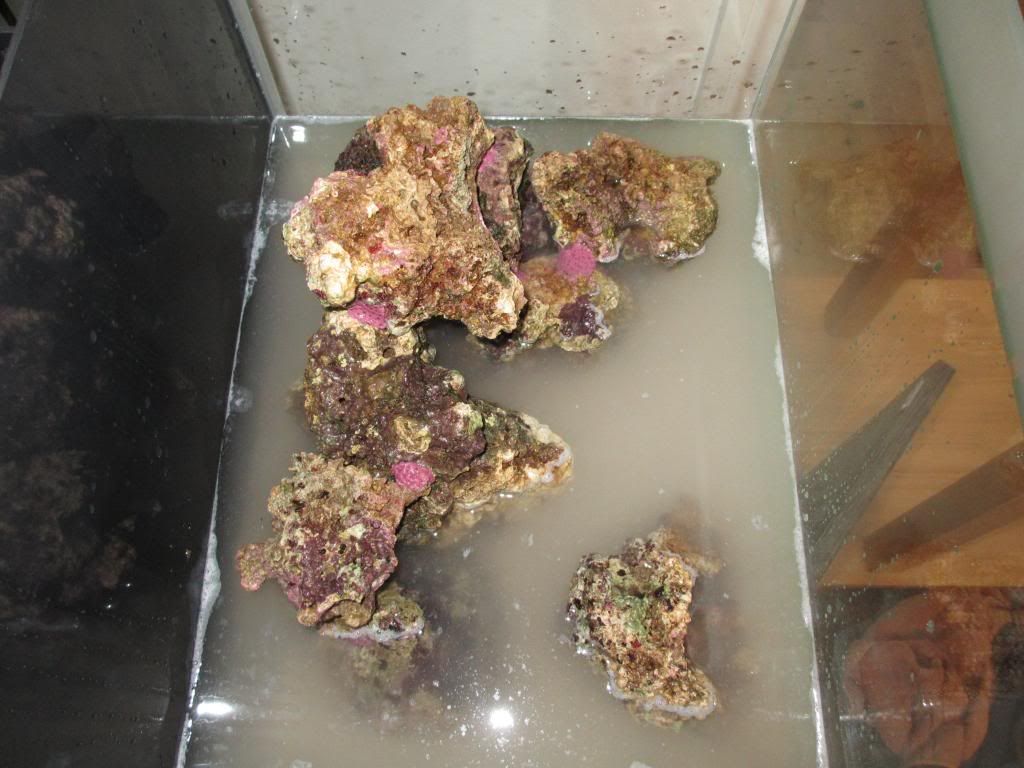
Now I could not resist trying my hand at a little rock scaping while I waited for the tank. So while the Mrs was out I took over the dining room table and set my rocks out.
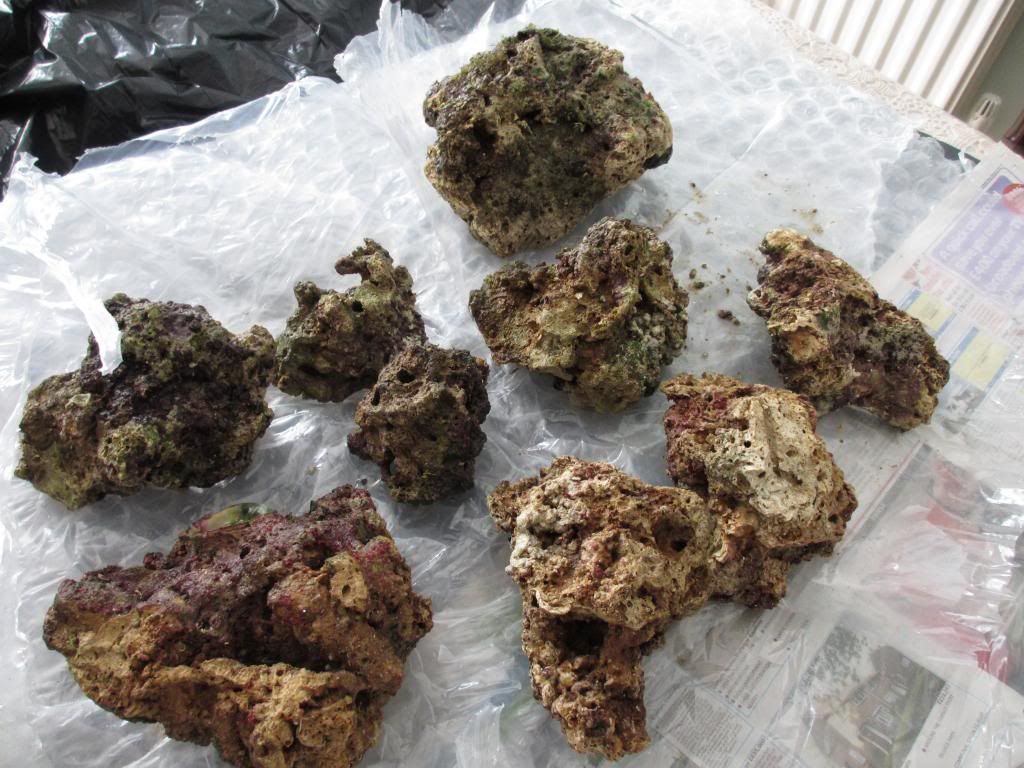
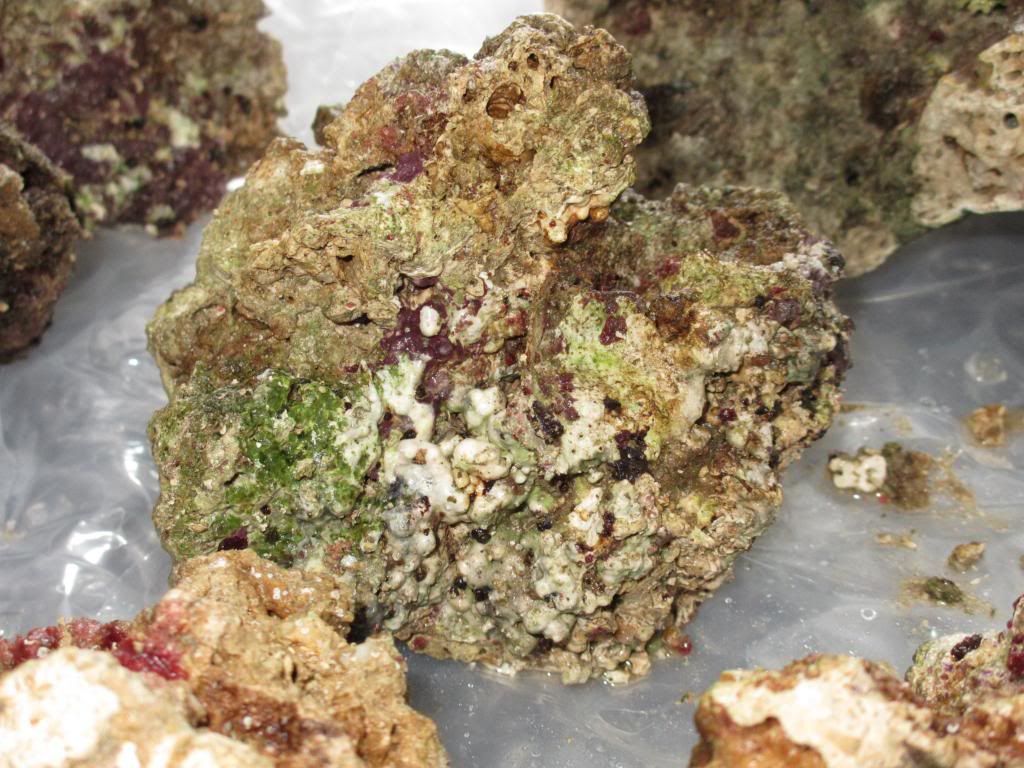
They looked like what I had seen in pictures, but honesty had no idea if they were good or not. Here is a close up of one of them.
Used the top of the temporary container I bought as a pretend base as the container I got was roughly the dimensions of what I would have in my tank. Tried a few options and this is the one I thought would be the one I go for
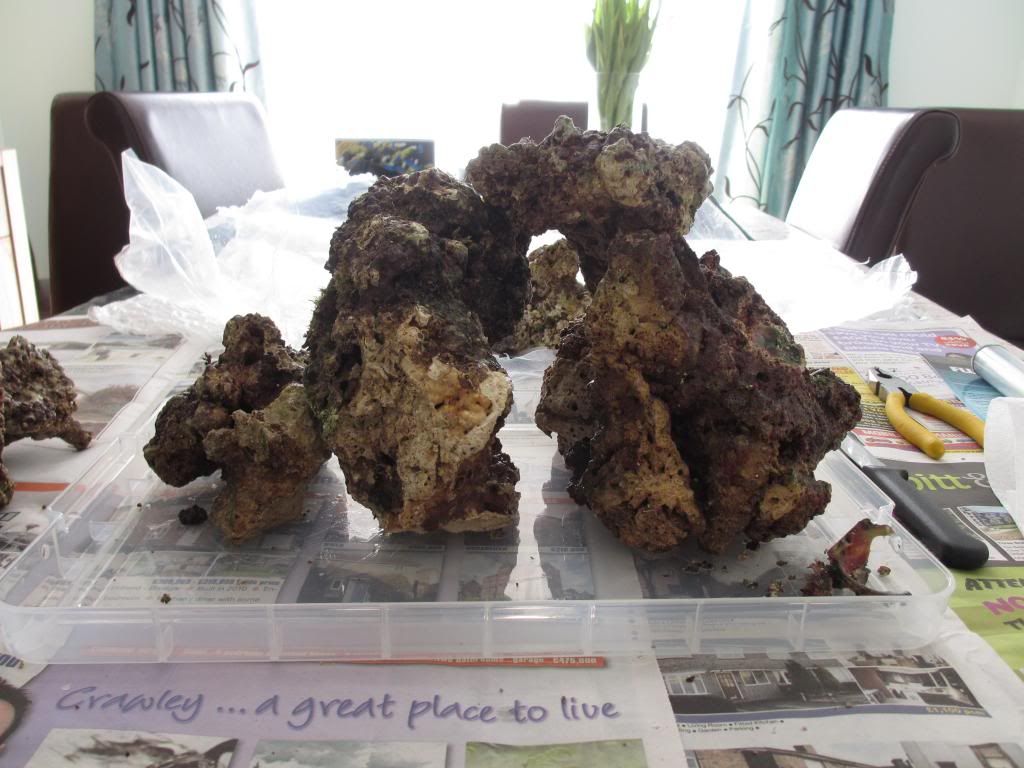
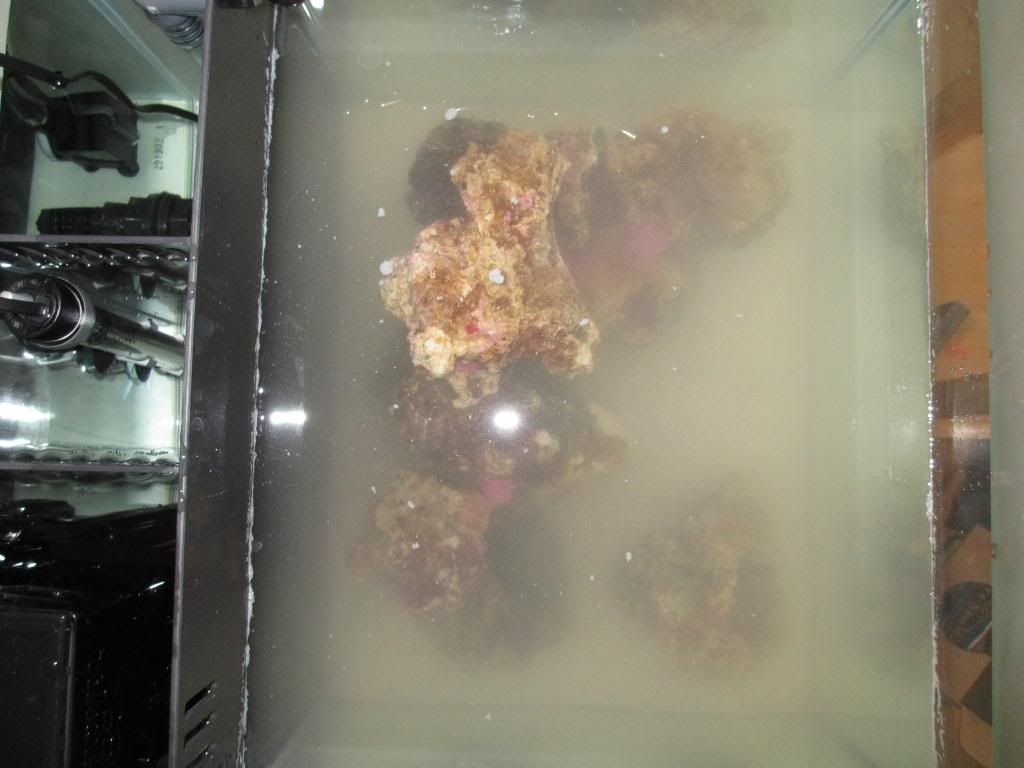
Since I decided I thought I would try doing some epoxy work. The two mounts were made up of a few rocks each so I thought let’s get cracking. Using the Fluval Epoxy Stick, I read the instructions (a little faster than I should have granted) and got cracking. It’s a messy business so I would recommend wearing gloves for sure. You need to rub, roll the epoxy for 5 minutes while it warms up. As it does you get little bits everywhere, make sure you put something down to protect the work space. I found that trying to attach the epoxy to the rock was difficult, although it would stick to my hands like crazy it would just not stay on the rock. I ended up using probably too much and did just one of the mounts. Also the epoxy I bought was a grey colour which seemed to stand out so I think I will be getting a different variety.
Anyway, running out of time for the day, so the live rock was placed in their temporary home and my first “marine tank” was up and running. Have to admit I was shocked how quite the circulation pump was, I did not think it was on it was so quite. The Fluval E50 heater seemed to be doing the job and the different colour display for the temperature zones I think is a great feature. Really looking forward to the tank arriving now.

Well the weekend has arrived and still no tank, it appears there was a mix-up and it would take another few days at least. My disappointment was short lived however as my second package had arrived.

Now this presented a problem with no tank and no idea when it would arrive I needed to look after the live rock. After reading, it appears all I would need is circulation although some people indicated adding a heater was a good idea. Therefore a quick trip to the store to purchase a new container and I was back to create my makeshift tank!
Now I could not resist trying my hand at a little rock scaping while I waited for the tank. So while the Mrs was out I took over the dining room table and set my rocks out.

They looked like what I had seen in pictures, but honesty had no idea if they were good or not. Here is a close up of one of them.

Used the top of the temporary container I bought as a pretend base as the container I got was roughly the dimensions of what I would have in my tank. Tried a few options and this is the one I thought would be the one I go for

Since I decided I thought I would try doing some epoxy work. The two mounts were made up of a few rocks each so I thought let’s get cracking. Using the Fluval Epoxy Stick, I read the instructions (a little faster than I should have granted) and got cracking. It’s a messy business so I would recommend wearing gloves for sure. You need to rub, roll the epoxy for 5 minutes while it warms up. As it does you get little bits everywhere, make sure you put something down to protect the work space. I found that trying to attach the epoxy to the rock was difficult, although it would stick to my hands like crazy it would just not stay on the rock. I ended up using probably too much and did just one of the mounts. Also the epoxy I bought was a grey colour which seemed to stand out so I think I will be getting a different variety.
Anyway, running out of time for the day, so the live rock was placed in their temporary home and my first “marine tank” was up and running. Have to admit I was shocked how quite the circulation pump was, I did not think it was on it was so quite. The Fluval E50 heater seemed to be doing the job and the different colour display for the temperature zones I think is a great feature. Really looking forward to the tank arriving now.


to ReefSanctuary, a real Sanctuary of reef forums, with lots of very nice members

Cheers for Starting a new tank thread & sharing your tank with us so we can follow along - we love pics
") Nice looking rock !
Nice looking rock !It’s ARRIVED!
Got the call this morning that my tank has arrived, so instead of 4 days it’s taken 18! Then again I am told you need a lot of patience for this hobby so all good. Well the tank arrived in 2 boxes, the tank with equipment in it and the flat pack cabinet in the other.
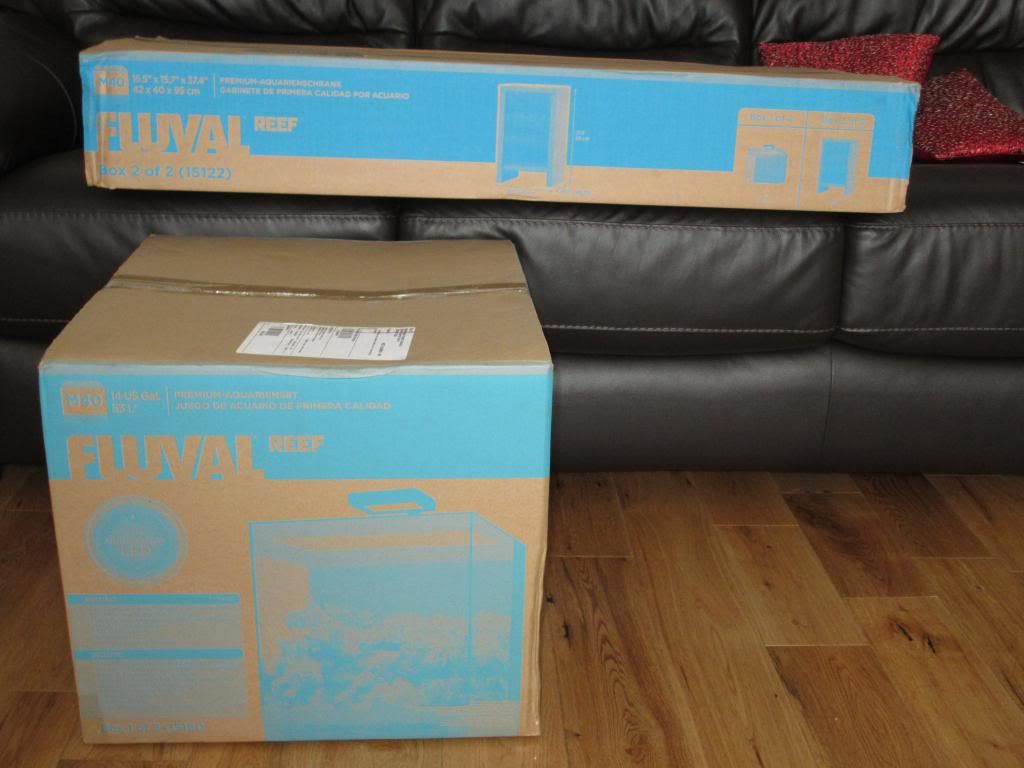
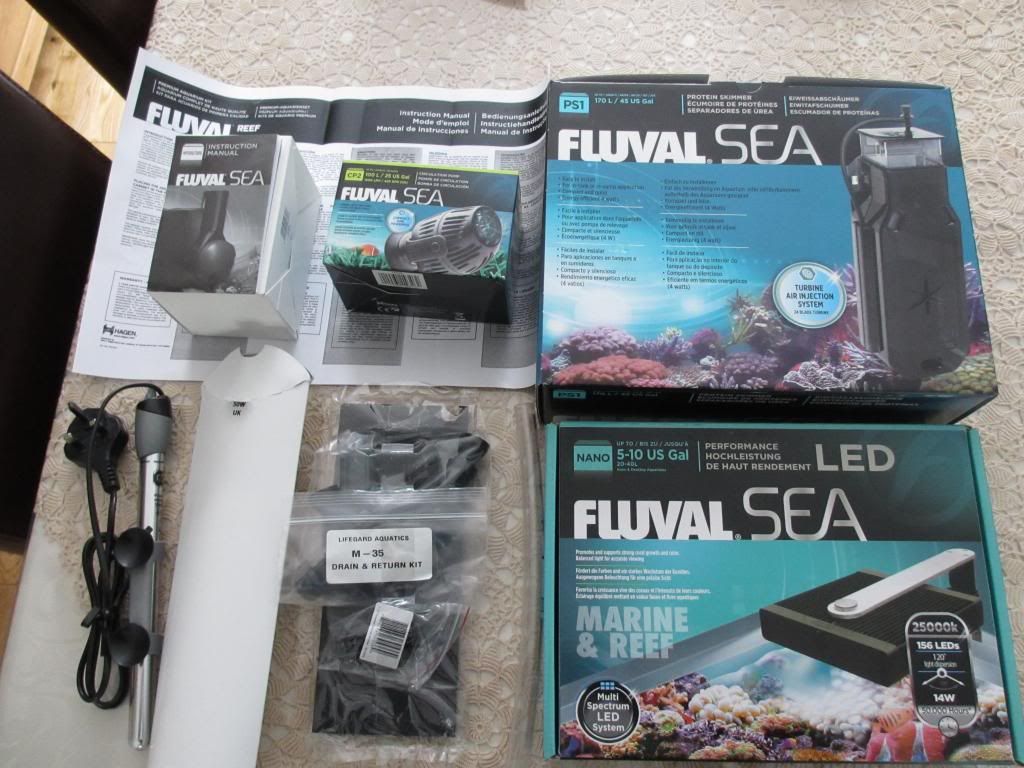
Opened the boxes with great enthusiasm and was itching to get going, the first box contained the tank. All the provided equipment supplied with the Fluval M40 (Heater, Skimmer, Pump, Circulation pump, LED lights) was present. The boxes were loose in the tank and although in cardboard I did find a few marks on the tank which was disappointing but not enough for me to send it back.
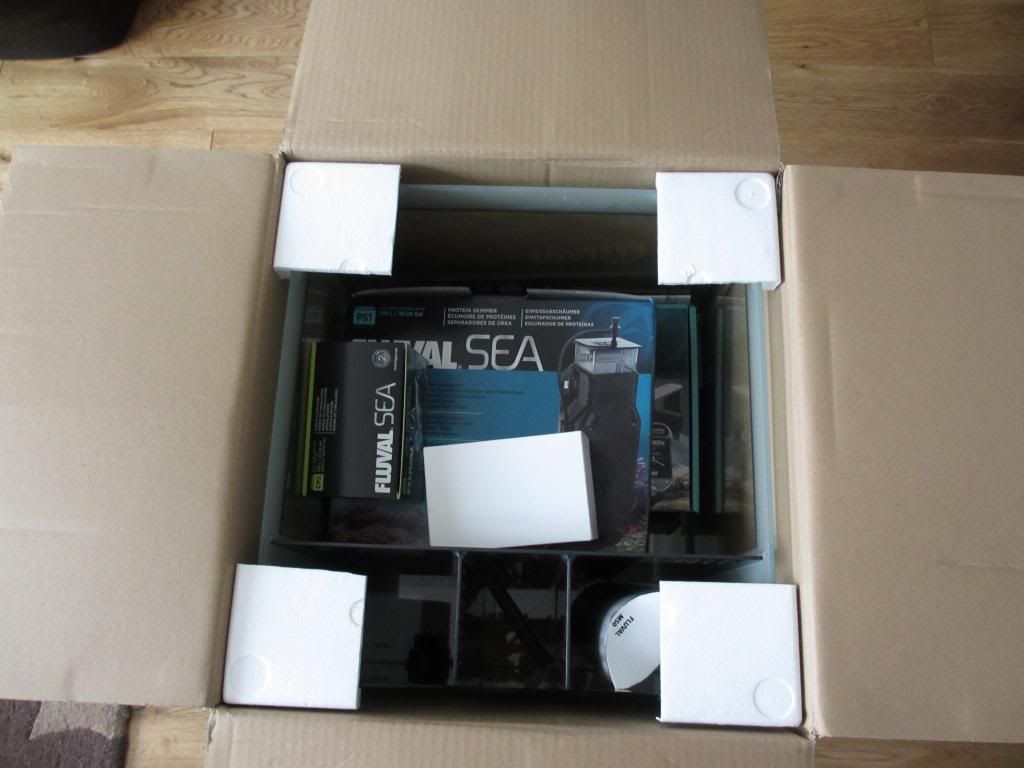
I will talk through each of these when I get to the setup phase later, but all the equipment appeared to be present.
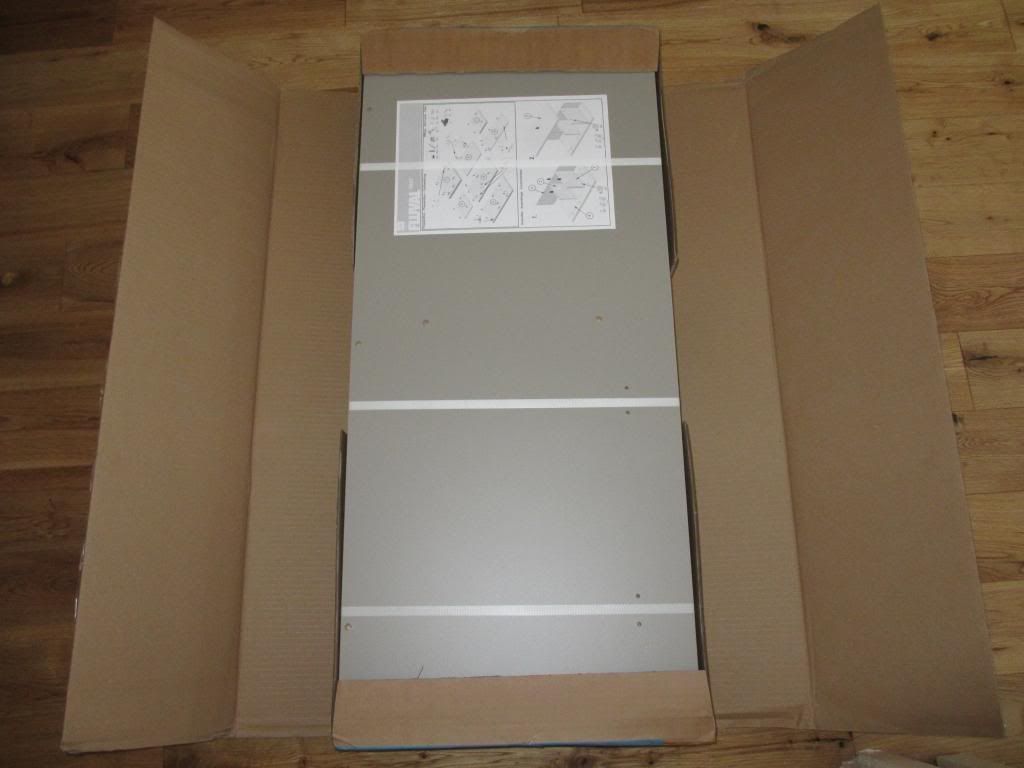
The second box was your standard flat pack furniture you get these days. Looked really solid and all the sections were present which means nothing stopping me now.
Although I wanted to start straight away, the Mrs and I had plans so it was off for some great food knowing I had a treat waiting for me.
Got the call this morning that my tank has arrived, so instead of 4 days it’s taken 18! Then again I am told you need a lot of patience for this hobby so all good. Well the tank arrived in 2 boxes, the tank with equipment in it and the flat pack cabinet in the other.

Opened the boxes with great enthusiasm and was itching to get going, the first box contained the tank. All the provided equipment supplied with the Fluval M40 (Heater, Skimmer, Pump, Circulation pump, LED lights) was present. The boxes were loose in the tank and although in cardboard I did find a few marks on the tank which was disappointing but not enough for me to send it back.

I will talk through each of these when I get to the setup phase later, but all the equipment appeared to be present.

The second box was your standard flat pack furniture you get these days. Looked really solid and all the sections were present which means nothing stopping me now.

Although I wanted to start straight away, the Mrs and I had plans so it was off for some great food knowing I had a treat waiting for me.
The Build
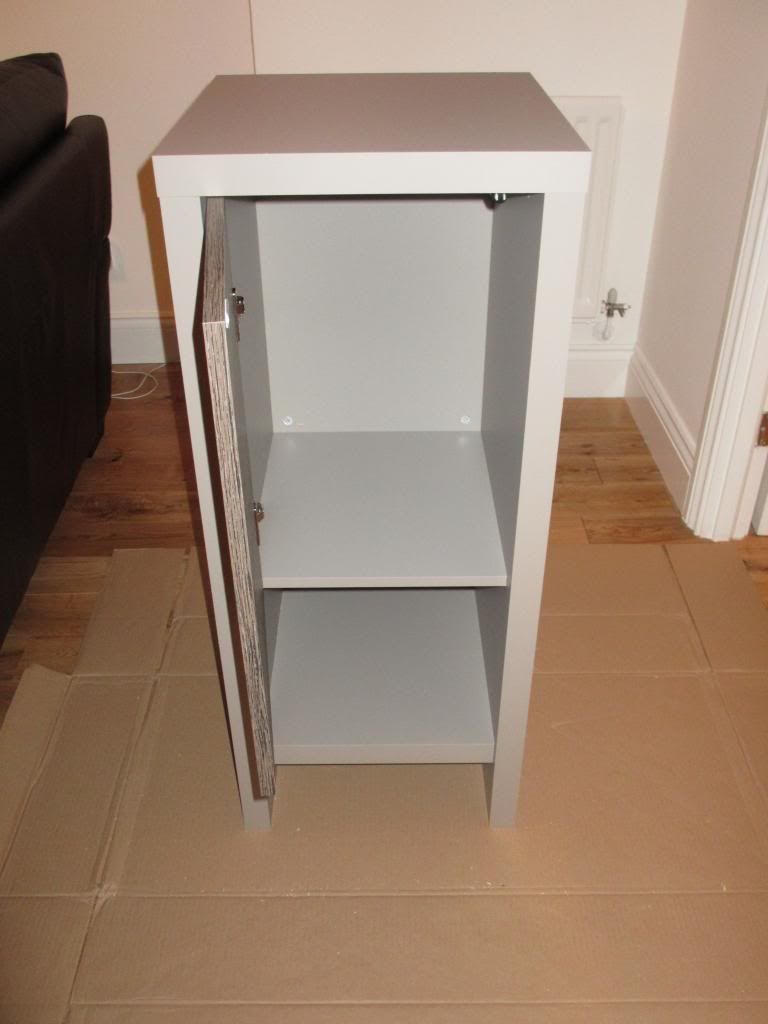
Time for the fun to start, I have the day off and can’t wait to get started. Started with the cabinet which I thought would be fast. The instructions were very straight forward and the whole job was done in a couple of hours. I did need to use a hammer a couple of times to get some of the items into place. Also the door hinge screws are far bigger than the holes provided in the wood, therefore when you try screw them in the wood started to get damaged. Therefore I used a drill to expand the holes slighting and the screws went it easily.
The completed cabinet is really steady and feels like a quality build. I am wondering why the door simply did not cover both shelves rather than one, but assume it has something to do with the tank size and risk that a taller door would not be stable.
The tank itself looked good. The M40 has a front display section and then three rear compartments which act as the sump to store the pump, skimmer and heater. It also has the unique feature of a valve which is designed so you can empty the one rear compartment without the water in the main section of the tank getting impacted.
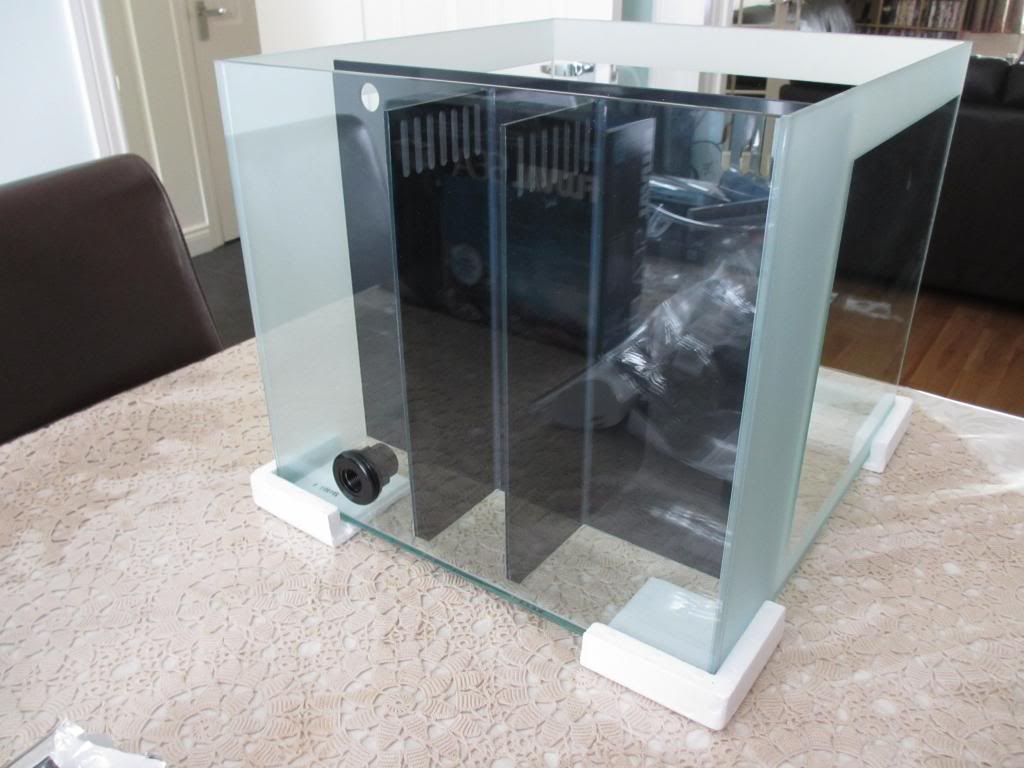
Now putting the components of the tank together was fairly straight forward although the instructions provided were terrible. You think Fluval could at least provide a sheet were the instructions pictures were just a mass of black ink. Anyway after a quick search I managed to get them in pdf and all was good with the world.
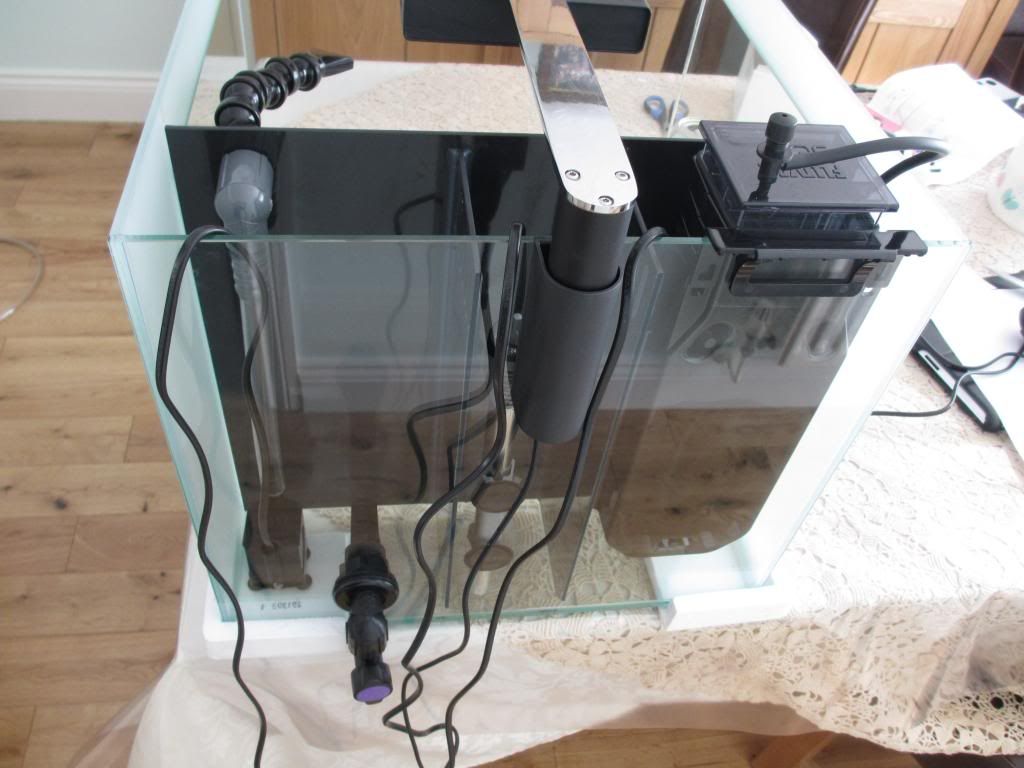
The pipe provided to connect to the pump appeared way to long, wondering if it just a standard one provided for the M60 and M90 as well. No instructions for it, but I ended up cutting it down to size so it could fit onto the pump and inlet value into display tank. Getting the pipe onto the grey inlet value to the display tank takes some doing as well. However, the hardest part was attaching the threaded suction strainer. You have next to no grip and the plastic does not just thread in, so I ended up having to use a spanner doing a little at a time. Right pain in the backside! Both pump and strainer shown below.
When attaching the rear outlet value they state you should use plumbers tape and based on what I have seen on youtube, if you don’t expect it to leak. It’s simple to do and easy to attach, just remember once on that it sticks out below the tank by a few inches.
The skimmer was easy to install, used the back clip rather than suction cups. The reason been that if I need to take it out to clean in the future, sucking cups can be a pain to get off the glass. I also had to cut the air piping of the skimmer down by half. Hope I don’t regret all this cutting later!
The LED attachment has to be done and left for 24hours before you can attached the LED. Make sure you happy were you put it, as once stuck on it goes nowhere! It’s pretty good when on and you can easily move the lights to the side to get access to the tank.
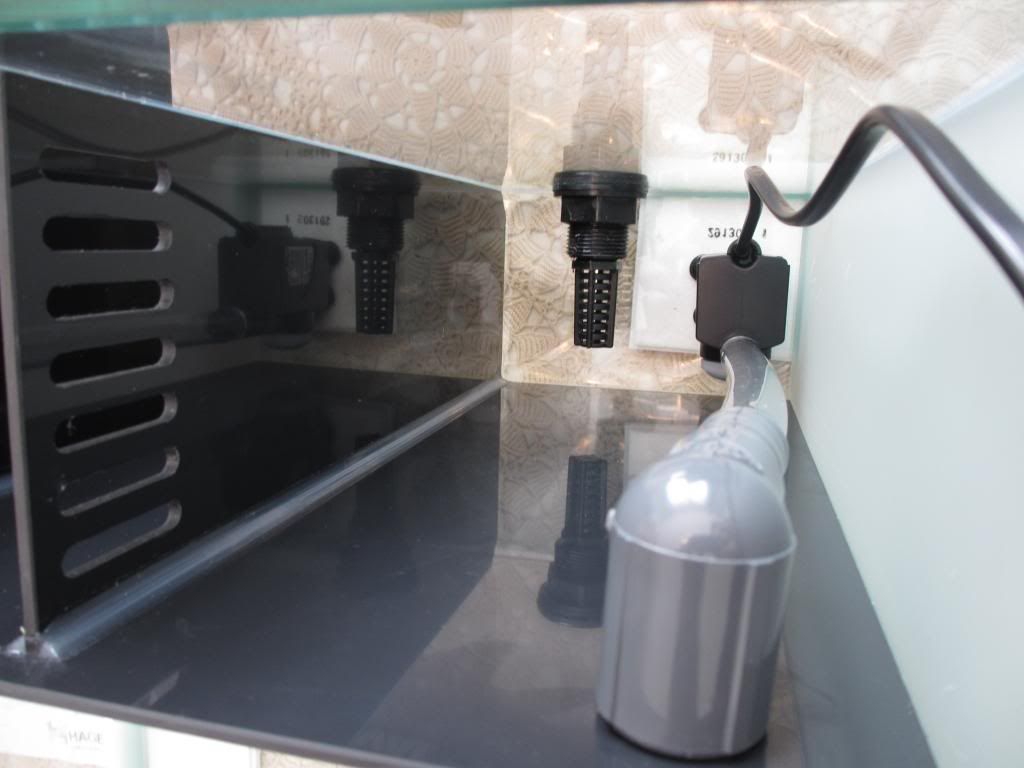
The picture below shows the back of the tank with the equipment in. I have put the heater in the second compartment as if it was in the third during water changes it would be exposed to air and likely break. I am told these tanks don’t take any media in the back like sponges so if anyone knows different please yell.
Biggest disappointment to date is the lighting, it only has an on day, on night or off mode. No timer and no way you can simply plug the LED into a timer as you need to manually switch between day and night. I can see this getting to be real fun! Silly question but do you all leave your lights on 24/7? The next moan about the lights is the size of the plug, double standard size so will take up two of my plug sockets.
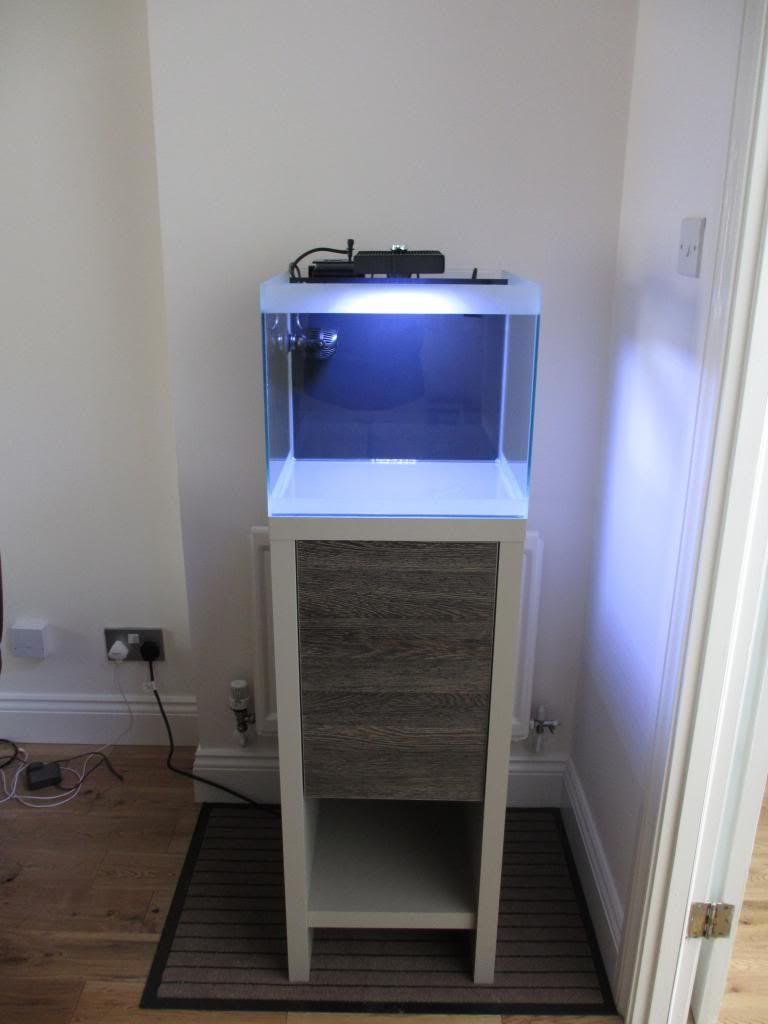
Well here it is, tank on the stand for the first time.
Progress :snowski:
Time for the fun to start, I have the day off and can’t wait to get started. Started with the cabinet which I thought would be fast. The instructions were very straight forward and the whole job was done in a couple of hours. I did need to use a hammer a couple of times to get some of the items into place. Also the door hinge screws are far bigger than the holes provided in the wood, therefore when you try screw them in the wood started to get damaged. Therefore I used a drill to expand the holes slighting and the screws went it easily.
The completed cabinet is really steady and feels like a quality build. I am wondering why the door simply did not cover both shelves rather than one, but assume it has something to do with the tank size and risk that a taller door would not be stable.

The tank itself looked good. The M40 has a front display section and then three rear compartments which act as the sump to store the pump, skimmer and heater. It also has the unique feature of a valve which is designed so you can empty the one rear compartment without the water in the main section of the tank getting impacted.

Now putting the components of the tank together was fairly straight forward although the instructions provided were terrible. You think Fluval could at least provide a sheet were the instructions pictures were just a mass of black ink. Anyway after a quick search I managed to get them in pdf and all was good with the world.
The pipe provided to connect to the pump appeared way to long, wondering if it just a standard one provided for the M60 and M90 as well. No instructions for it, but I ended up cutting it down to size so it could fit onto the pump and inlet value into display tank. Getting the pipe onto the grey inlet value to the display tank takes some doing as well. However, the hardest part was attaching the threaded suction strainer. You have next to no grip and the plastic does not just thread in, so I ended up having to use a spanner doing a little at a time. Right pain in the backside! Both pump and strainer shown below.

When attaching the rear outlet value they state you should use plumbers tape and based on what I have seen on youtube, if you don’t expect it to leak. It’s simple to do and easy to attach, just remember once on that it sticks out below the tank by a few inches.
The skimmer was easy to install, used the back clip rather than suction cups. The reason been that if I need to take it out to clean in the future, sucking cups can be a pain to get off the glass. I also had to cut the air piping of the skimmer down by half. Hope I don’t regret all this cutting later!
The LED attachment has to be done and left for 24hours before you can attached the LED. Make sure you happy were you put it, as once stuck on it goes nowhere! It’s pretty good when on and you can easily move the lights to the side to get access to the tank.
The picture below shows the back of the tank with the equipment in. I have put the heater in the second compartment as if it was in the third during water changes it would be exposed to air and likely break. I am told these tanks don’t take any media in the back like sponges so if anyone knows different please yell.
Biggest disappointment to date is the lighting, it only has an on day, on night or off mode. No timer and no way you can simply plug the LED into a timer as you need to manually switch between day and night. I can see this getting to be real fun! Silly question but do you all leave your lights on 24/7? The next moan about the lights is the size of the plug, double standard size so will take up two of my plug sockets.
Well here it is, tank on the stand for the first time.

Progress :snowski:
Very pretty - great start ! Nice pics !
First issues
Well I was hoping that I was going to wake up and start to fill the tank with sand, live rock and water. In my rush to get things going I had overlooked the obvious. I needed somewhere to plug all the items in, 5 plugs are needed with the standard kit of the Fluval M40. Now to add to the joy, the cable length of the pump and circulation pump are crazy short.
Therefore I could either attached something to the side of the tank which was probably not a good idea with the water able to splash down, but more importantly my wife was very keen that nobody could see anything related to the tank. So Lego blocks of plugs was going to be an issue. That means they had to go in the cabinet, which with no holes meant it was time to take the tank off and do some DIY to the cabinet.
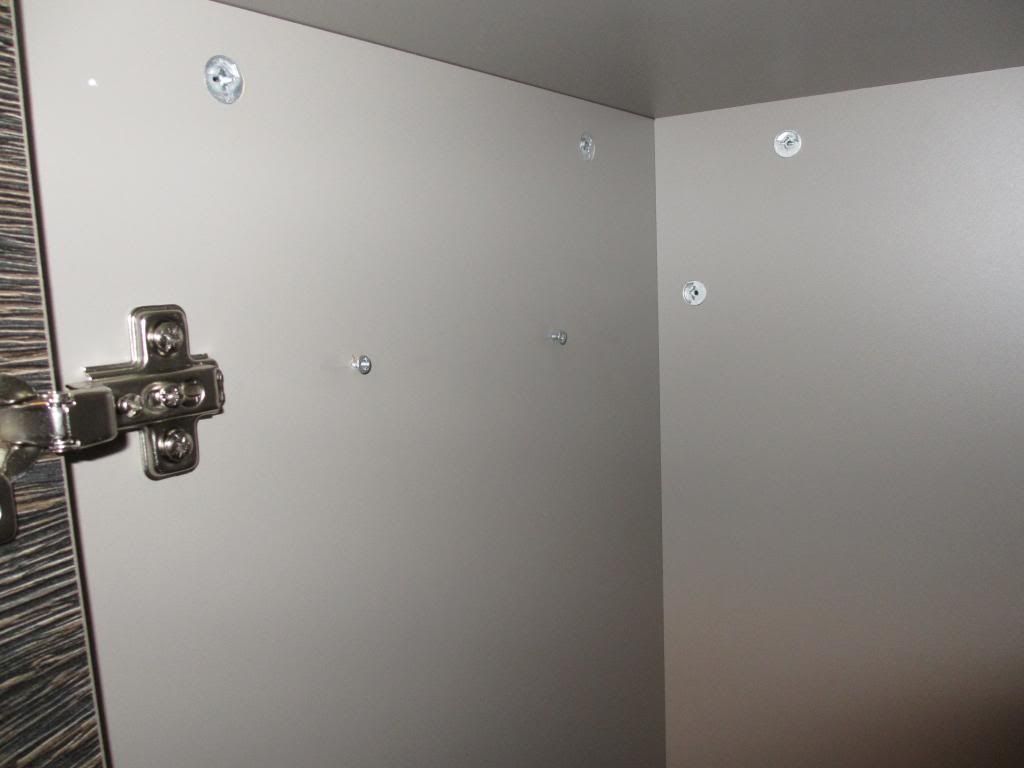
So tank on its side and me armed with a drill the work started, the sight of wood chips flying all over the lounge was enough for my wife to go out shopping for the afternoon. I decided to put the whole for the plugs as high as possible in order to be able to make a loop with the short cables. It also had to be large enough to get a plug through it.
I then needed to put a power adapter inside, I put it to the side in order to allow me to create more loops in the wires in case the one outside the case did not work. Started but putting the two screws in place to hold the adaptor, easy in theory but this took me a little while. Must have measured about a hundred times before I drilled the pilot holes for the screws.
I then simply clipped the power adaptor on the screws and ready to go. What got to me was spending 3 hours going to five different shops to get one the correct length with surge protection and individual on/off switches.
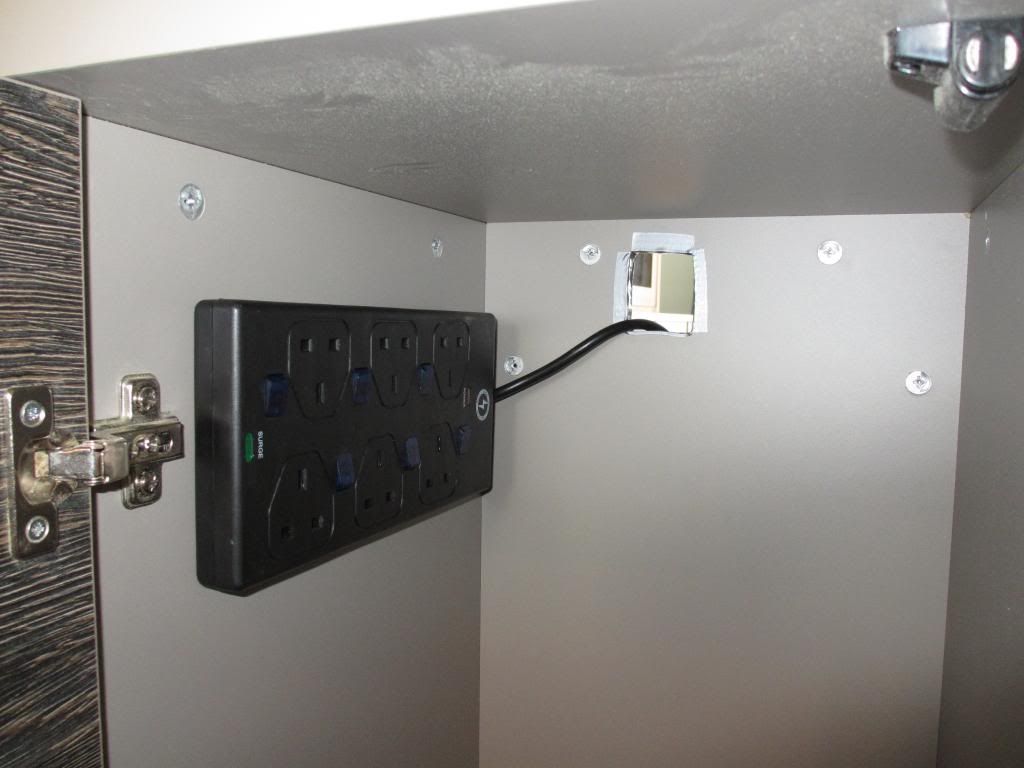
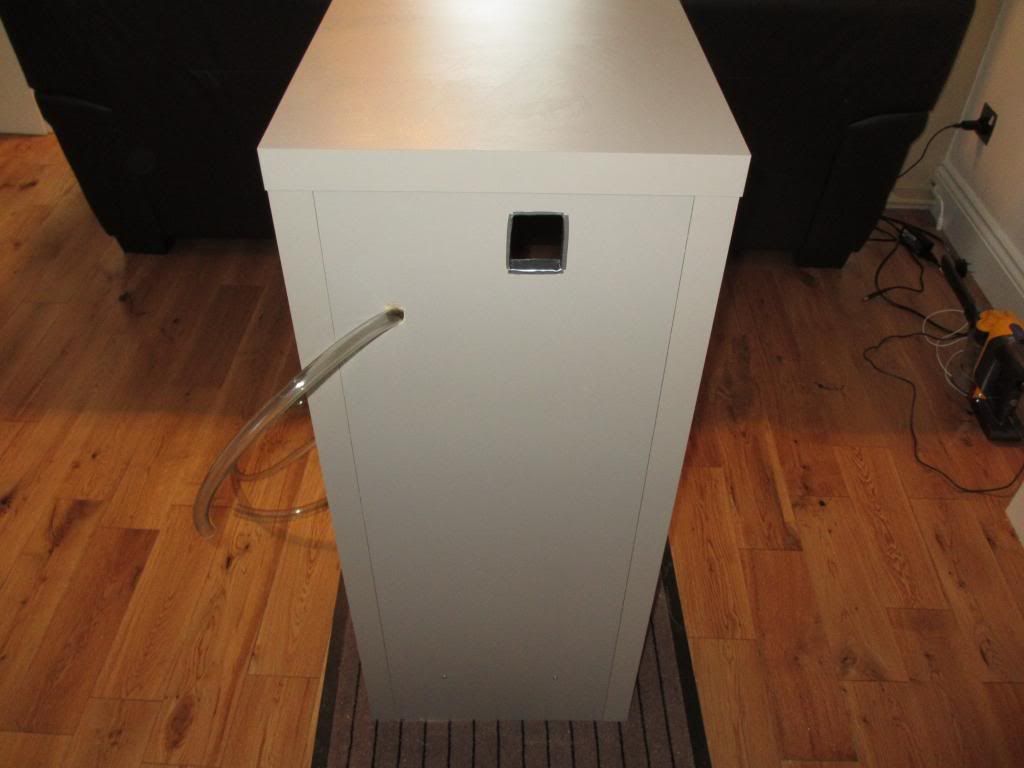
While doing the hole for the plugs, another thought came to me. The valve for the water changes will need a pipe attached and if I attach it only during the changes it will be a pain to reach round. If I permanently attached it now I would have a pipe sticking out from the back of the tank. So took the idea of the other Fluval M models and thought might as well go through the cabinet as well. Therefore I drilled a hole big enough for the pipe at an angle downwards. Fed the pipe through so all setup and ready to go while been out of sight.
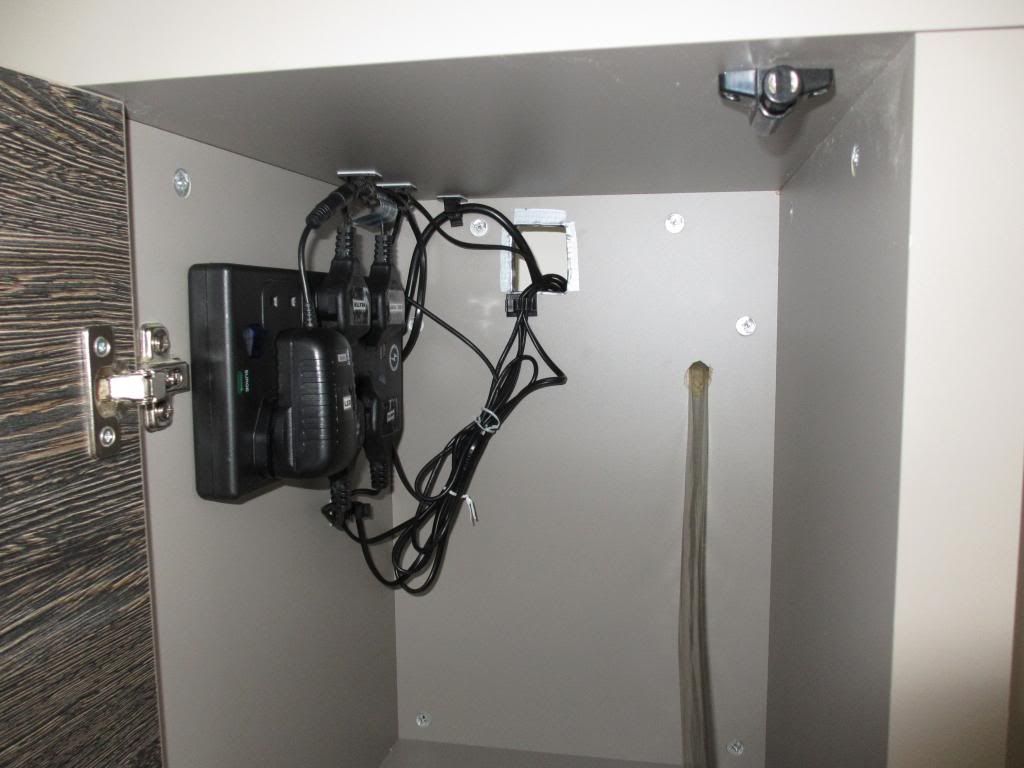
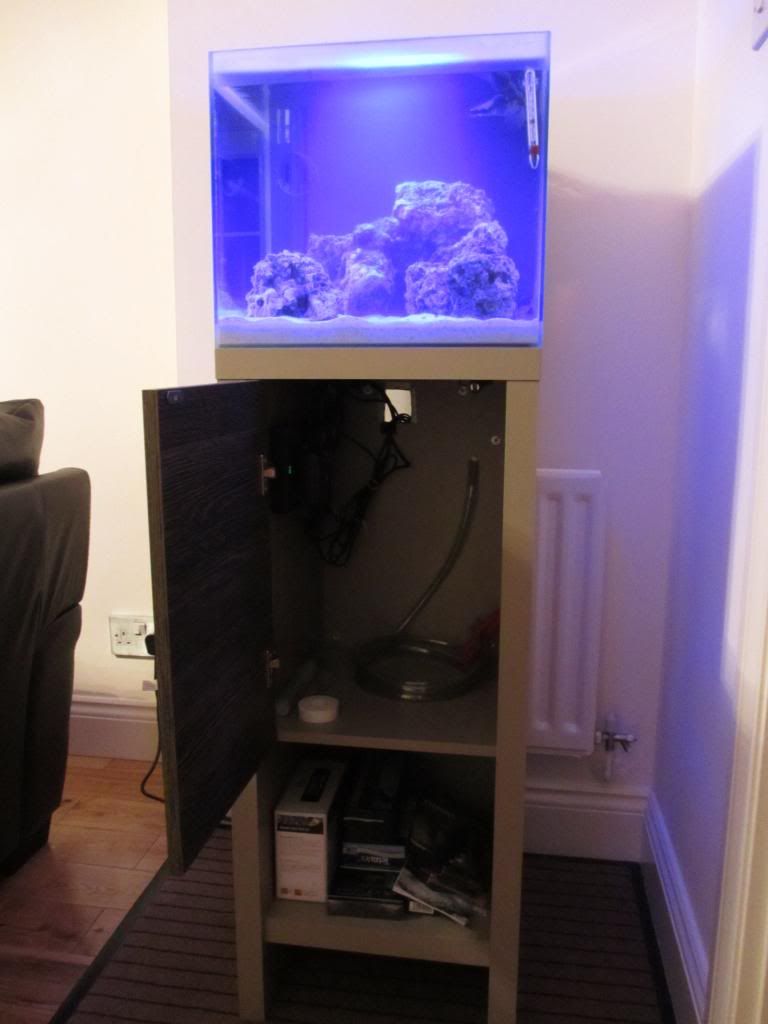
Final internal view can be seen below. The neat labels on the plugs I have to credit to my wife. It would be great if each piece of equipment had a different colour wire. Like red for heater, blue for pump as when trying to just move one of them I ended up pulling the skimmer rather than heater, lol.
The back cables had to be secured as best I could, managed to create a loop before the wires went in the cabinet and all seems well. View of the back of the tank below, I have tried to ensure I can remove anything if needed without too much hassle.
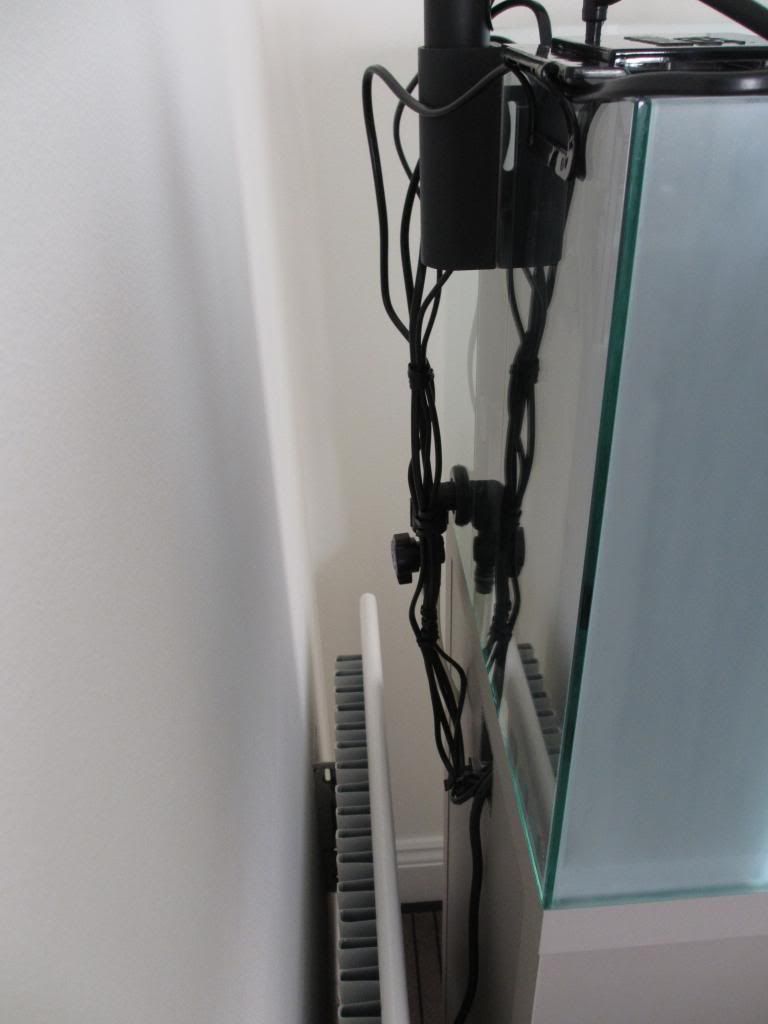
Here is a clear view of the alterations done to the back, granted my hole could have been smoother.
All in place now, time to add the good stuff next.
Well I was hoping that I was going to wake up and start to fill the tank with sand, live rock and water. In my rush to get things going I had overlooked the obvious. I needed somewhere to plug all the items in, 5 plugs are needed with the standard kit of the Fluval M40. Now to add to the joy, the cable length of the pump and circulation pump are crazy short.
Therefore I could either attached something to the side of the tank which was probably not a good idea with the water able to splash down, but more importantly my wife was very keen that nobody could see anything related to the tank. So Lego blocks of plugs was going to be an issue. That means they had to go in the cabinet, which with no holes meant it was time to take the tank off and do some DIY to the cabinet.
So tank on its side and me armed with a drill the work started, the sight of wood chips flying all over the lounge was enough for my wife to go out shopping for the afternoon. I decided to put the whole for the plugs as high as possible in order to be able to make a loop with the short cables. It also had to be large enough to get a plug through it.
I then needed to put a power adapter inside, I put it to the side in order to allow me to create more loops in the wires in case the one outside the case did not work. Started but putting the two screws in place to hold the adaptor, easy in theory but this took me a little while. Must have measured about a hundred times before I drilled the pilot holes for the screws.

I then simply clipped the power adaptor on the screws and ready to go. What got to me was spending 3 hours going to five different shops to get one the correct length with surge protection and individual on/off switches.

While doing the hole for the plugs, another thought came to me. The valve for the water changes will need a pipe attached and if I attach it only during the changes it will be a pain to reach round. If I permanently attached it now I would have a pipe sticking out from the back of the tank. So took the idea of the other Fluval M models and thought might as well go through the cabinet as well. Therefore I drilled a hole big enough for the pipe at an angle downwards. Fed the pipe through so all setup and ready to go while been out of sight.
Final internal view can be seen below. The neat labels on the plugs I have to credit to my wife. It would be great if each piece of equipment had a different colour wire. Like red for heater, blue for pump as when trying to just move one of them I ended up pulling the skimmer rather than heater, lol.

The back cables had to be secured as best I could, managed to create a loop before the wires went in the cabinet and all seems well. View of the back of the tank below, I have tried to ensure I can remove anything if needed without too much hassle.

Here is a clear view of the alterations done to the back, granted my hole could have been smoother.

All in place now, time to add the good stuff next.
Time for sand and rocks
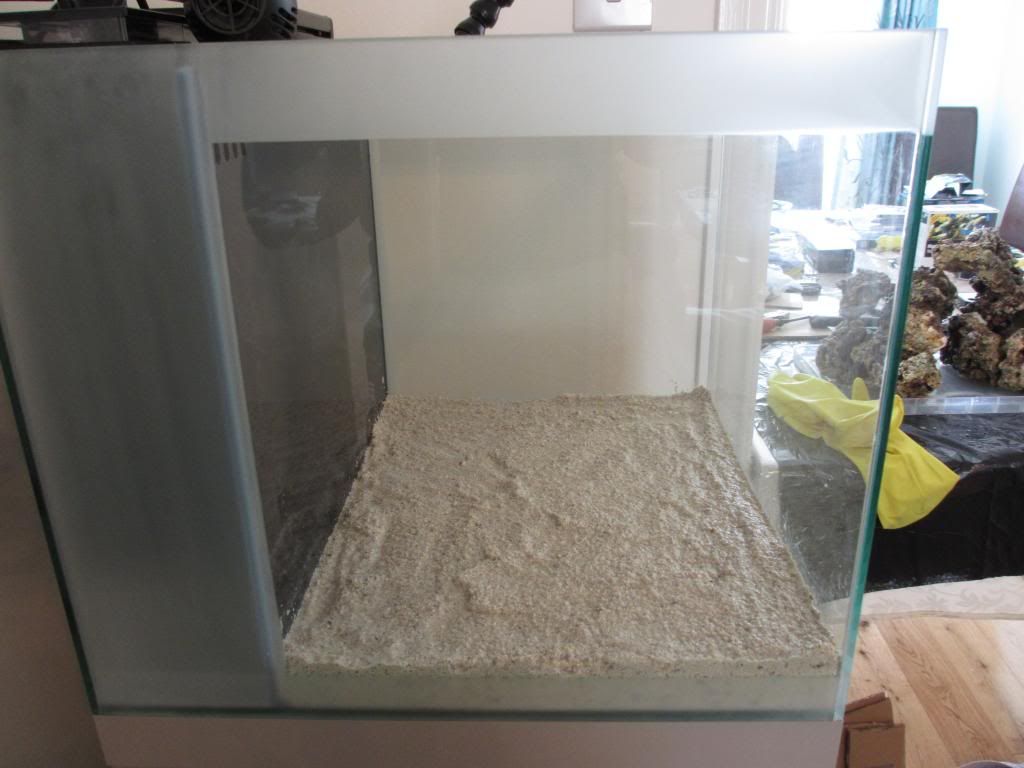
Super excited now as its time to put everything in and take a step closer to having inhabitants. So the first step was checking the tank was level, was slightly out which was resolved by 6 sheets of A4 paper under the right leg of the cabinet.
First to go in was the Red Sea Reef Pink Live Aragonite sand, of the 10kg bag I put just over half however I am worried it’s a little too much. Seems to be about 2 inches at the moment so may take some out in the future.
With the sand in place, time for the live rock. Same as last time I took over the dining table, covered it with plastic and ready to roll. Now I had a planned scape as mentioned before, however once the rocks hit the table it was start again time. I went through a few options and ended on pretty much the same.
Front view
Side view
Top view
I again had to use the epoxy, but purchased one which would appear like algae when set, I am sure you see it in the photo’s. The nice bright purple spots! I did poke them with a toothpick to try give it a more natural look rather just a bunch of epoxy.
Next comes the water!
Super excited now as its time to put everything in and take a step closer to having inhabitants. So the first step was checking the tank was level, was slightly out which was resolved by 6 sheets of A4 paper under the right leg of the cabinet.
First to go in was the Red Sea Reef Pink Live Aragonite sand, of the 10kg bag I put just over half however I am worried it’s a little too much. Seems to be about 2 inches at the moment so may take some out in the future.

With the sand in place, time for the live rock. Same as last time I took over the dining table, covered it with plastic and ready to roll. Now I had a planned scape as mentioned before, however once the rocks hit the table it was start again time. I went through a few options and ended on pretty much the same.
Front view
Side view
Top view
I again had to use the epoxy, but purchased one which would appear like algae when set, I am sure you see it in the photo’s. The nice bright purple spots! I did poke them with a toothpick to try give it a more natural look rather just a bunch of epoxy.
Next comes the water!
Let’s get wet
Time for the water, the part of the exercise I had to ensure there were plenty of towels around so the lounge did not get flooded. Once the surrounding area was ready I went to get the water, Nutri Sea Water for the reasons given earlier. Now while filling I noticed the label said no need to wait just add fish! Wondering if this will speed the cycle up or not….
Well time to get the water in there, used the standard syphon method.
Although, for this I did have to ensure the water was higher than the tank to get my flow going. This caused a little alarm in the house, but I thought it was perfectly stable!
During the filling the water was getting nice and cloudy!
So now I left it to settle for a few hours.
Time for the water, the part of the exercise I had to ensure there were plenty of towels around so the lounge did not get flooded. Once the surrounding area was ready I went to get the water, Nutri Sea Water for the reasons given earlier. Now while filling I noticed the label said no need to wait just add fish! Wondering if this will speed the cycle up or not….

Well time to get the water in there, used the standard syphon method.

Although, for this I did have to ensure the water was higher than the tank to get my flow going. This caused a little alarm in the house, but I thought it was perfectly stable!

During the filling the water was getting nice and cloudy!


So now I left it to settle for a few hours.
Topline Marines
Member
Its great when things start turning up if you're like me you get excited about putting it in and setting it up. Im Excited too and its not even my tank haha, The Fluval range is good quality and should be a good first tank. All the best of luck.
if you're like me you get excited about putting it in and setting it up. Im Excited too and its not even my tank haha, The Fluval range is good quality and should be a good first tank. All the best of luck.Oh No!
Well the tank had sat for an hour or so now while I had some much needed food and drink. It is now I should confess that I totally ignored the advice of filling the tank before doing anything to check for leaks! I trusted Fluval would not let me down and lucky me they did not, it was my stupidity which I have to own up to. I did a classic beginner error when placing the rocks, I put them too close to the glass so there was no chance the magnetic scrapper could get in to clean it! So I had to remove a rock, do some manual chipping away and then replace it. Let’s just say trying to use the epoxy under the water was a lot harder!
Well after an hour or so of fun, I felt ready to start turning everything on. I have to admit I was a little nervous something would go but luckily it all started perfectly. I have to say the noise level off the tank is fine, only the skimmer makes any sort of real output and pretty sure I will get used it in no time. I am not sure I have the circulation pump and inlet values in the right place, how would you know this! Ended up putting them in the position I saw the Fluval demo tank in.
So here is the tank after sitting for an hour after my handy work. The temperature is 18 degrees C so my heater has some work to do.

After 4 hours since water added
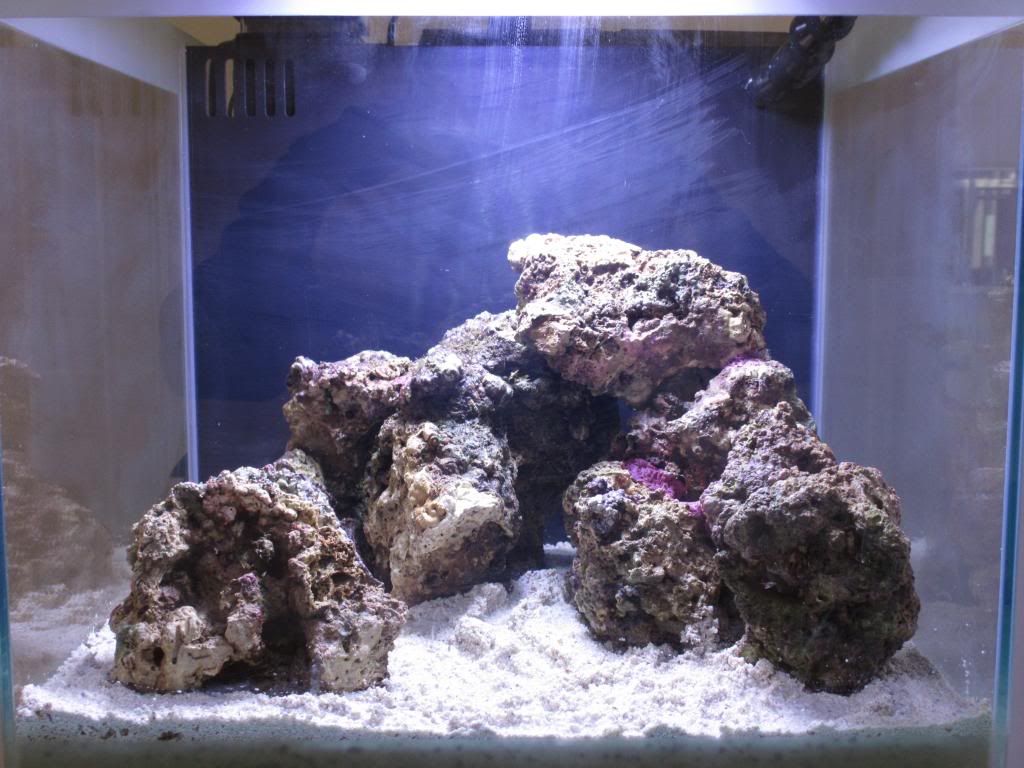
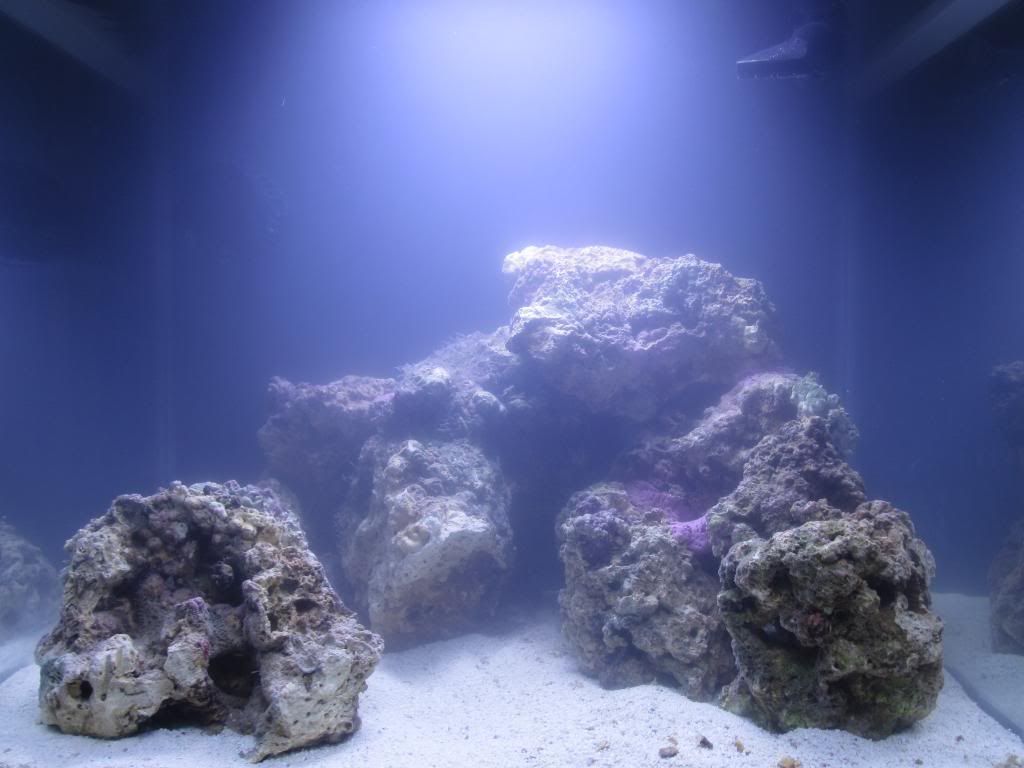
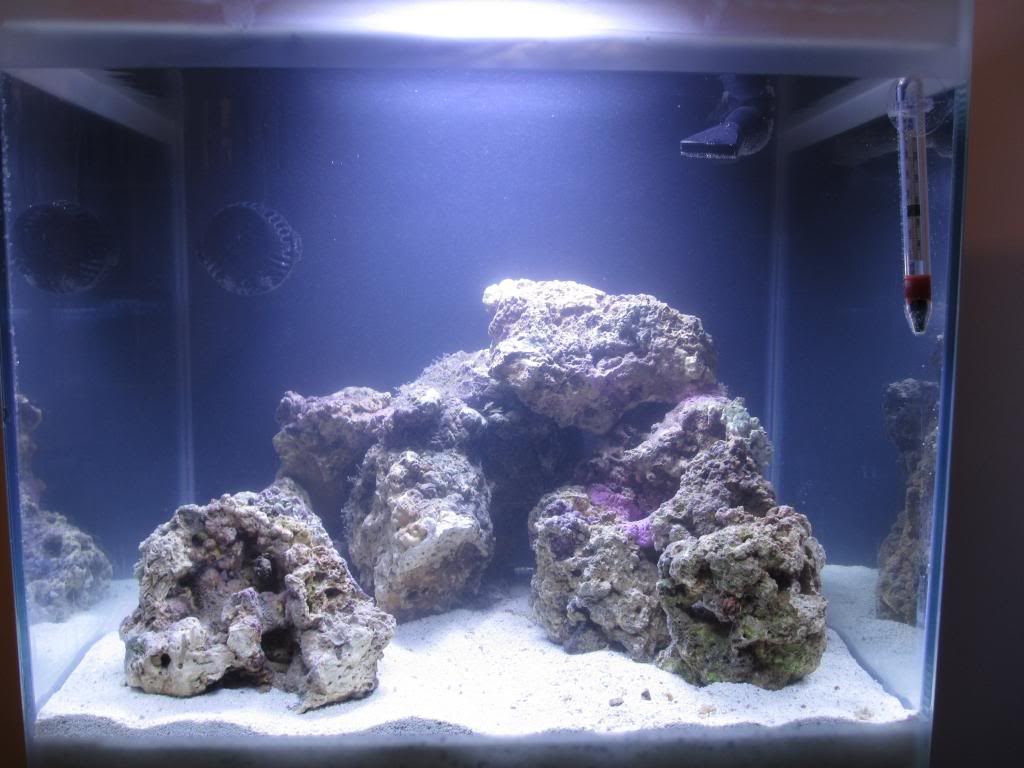
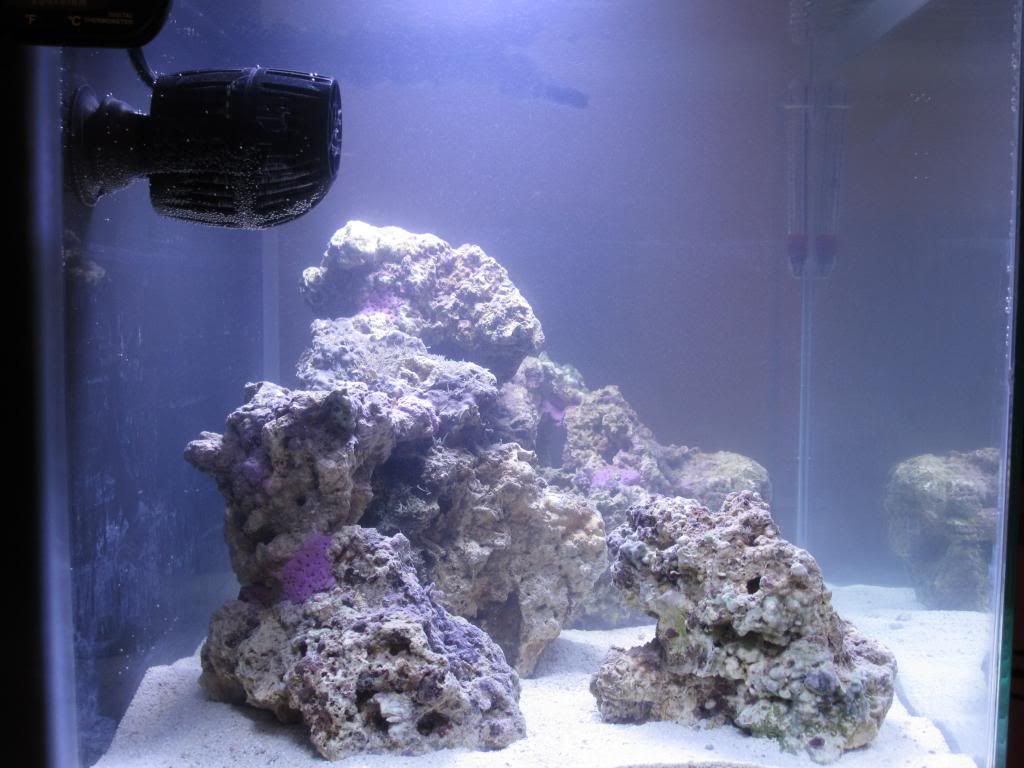
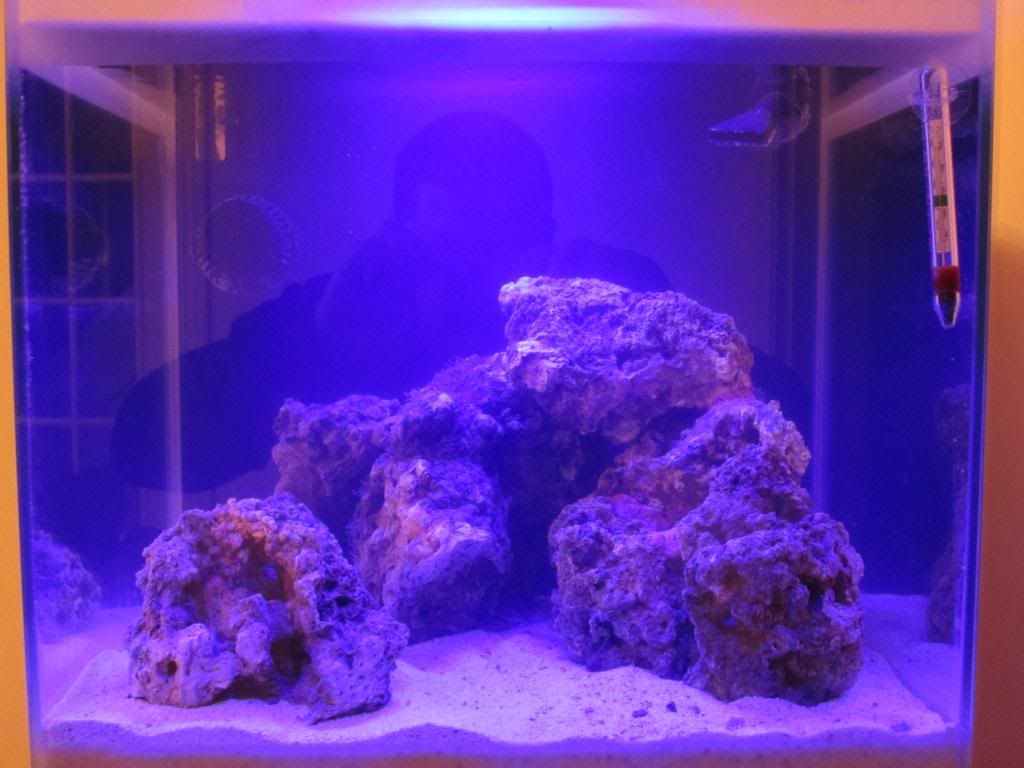
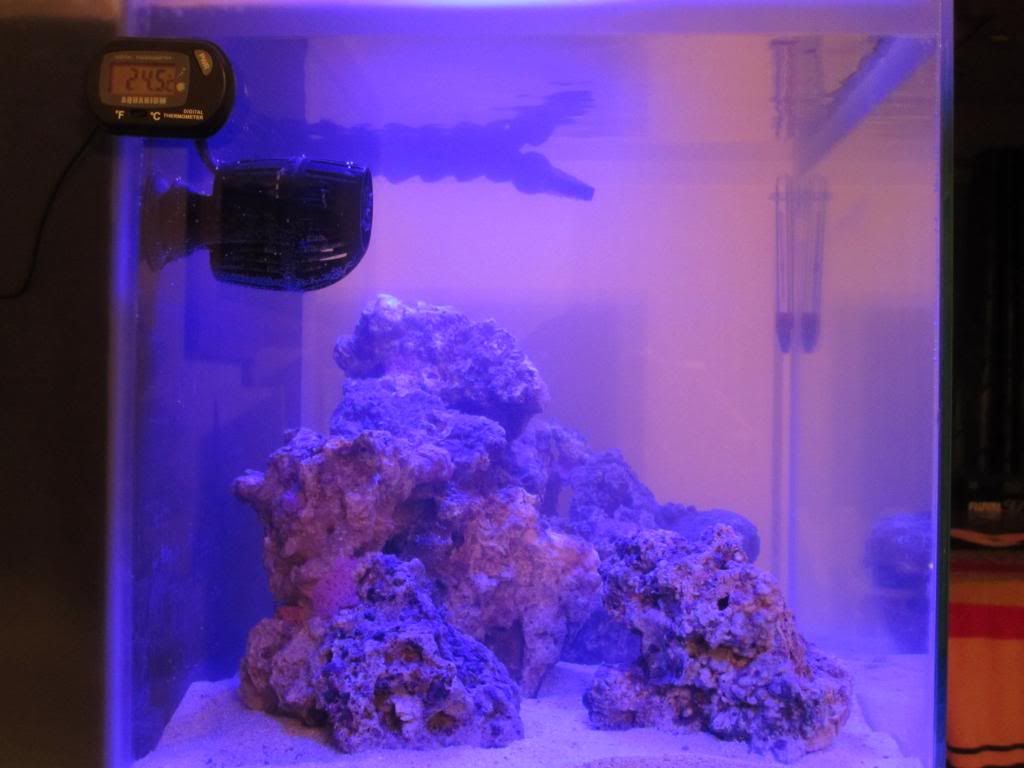
It’s been four hours since everything was turned on and the system was left running. Temperature is now 24 degrees C and the water appears to be clearing nicely. Here some images with day and night lights on.
Front Day lights
Side Day lights
Front Night lights
Side Night Lights
Full shot
All up to date now as posting this literally after uploading the latest images. Well its 2am now in the UK and I need some quality time with the pillow. Tomorrow is the first testing day.
Any comments or tips please fire away.
It’s been four hours since everything was turned on and the system was left running. Temperature is now 24 degrees C and the water appears to be clearing nicely. Here some images with day and night lights on.
Front Day lights

Side Day lights

Front Night lights

Side Night Lights

Full shot

All up to date now as posting this literally after uploading the latest images. Well its 2am now in the UK and I need some quality time with the pillow. Tomorrow is the first testing day.
Any comments or tips please fire away.
roearth
Member
Nice setup. Fluval tank looks well made for the job. To check your circulation I would take a close look at every piece of live rock and you should see some kind of life hopefully moving in the current. Magnifying glass is a great bit of equipment for finding micro life! Keep the updates coming! 
First tests
Well woke up this morning and everything was still running! Time to do the first tests so I have a base to monitor against. I have to admit I found this far from easy, using the Red Sea test kit was easy and sent down chemistry memory lane!
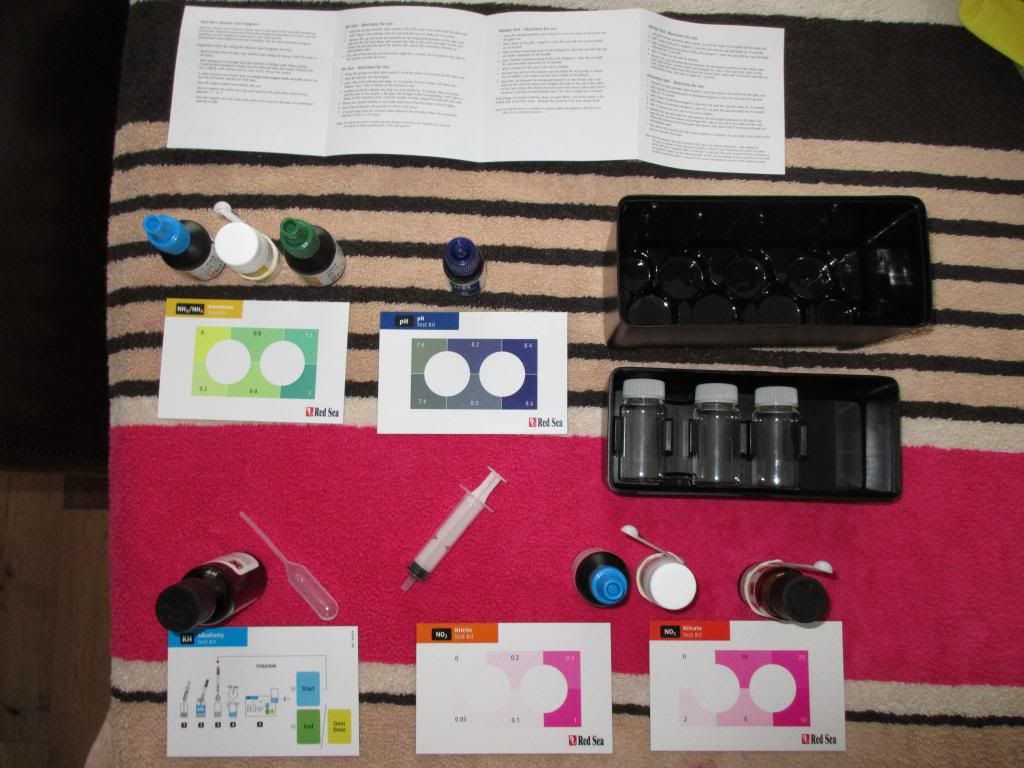
The trouble came in trying to decide which colour it was! The wife and I spend longer debating which shade of colour vs the chart than we did doing the tests. Well here goes, test results after 16hours of filling.
Temperature, 24.4oC in display area using glass thermometer, while 24.9oC using digital thermometer in rear sump.
Refractormeter, Salinity 34 and SG 1,025
PH, 8.2
KH 9
Nitrate between 1and 2
Nitrite between 0.05 and 0.10
Ammonia 0.8
So now the wait :zzz:. There appears to be some debate about whether to keep the skimmer running and how long the lights should be on. My local LFS has told me to switch the skimmer off and lights (Brown Algae). Need to read up more on the lights, but seems a 50/50 split on keeping the skimmer going. Although more say keep it on if its new. As I seem to have some matter on the surface and it’s a new skimmer decided to keep it going.
Also trying the circulation pump in a new position, thanks for the tip Roearth.
Nice tank!
First sign of life!
Well 3 days in and the Ammonia levels are increasing which I hope is a sign that the cycle is off and running. The system seems to be working well, skimmer is a little loud but hope that is just it breaking in so to speak. What does concern me is the temperature fluctuations, it’s going from 24 to 25.7. Not sure if it’s the heater is not good enough.
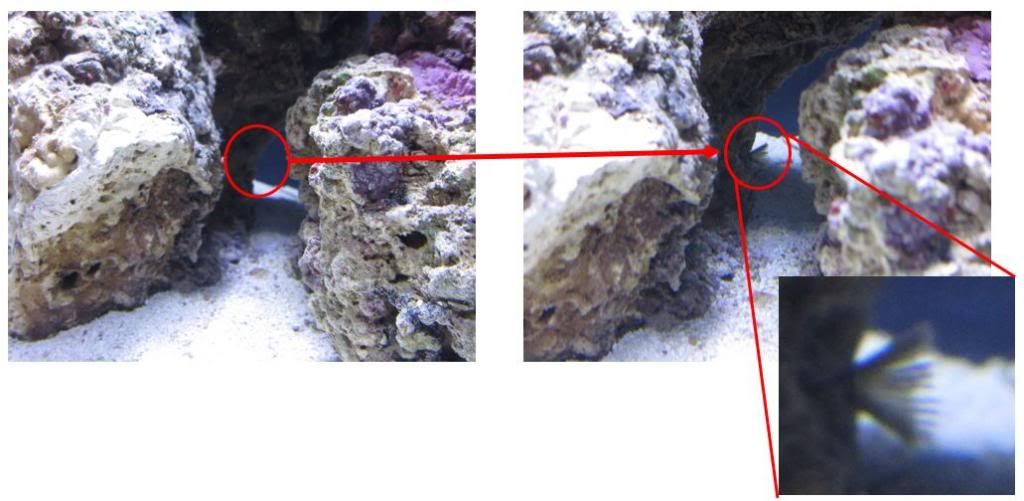
On the positive side, appears I have the first signs of life. A small green “growth” which fans out and then collapses again. It was out and while I was taking pictures it collapsed and then 5 min later it was back. Sorry the picture below is not that clear.
Well 3 days in and the Ammonia levels are increasing which I hope is a sign that the cycle is off and running. The system seems to be working well, skimmer is a little loud but hope that is just it breaking in so to speak. What does concern me is the temperature fluctuations, it’s going from 24 to 25.7. Not sure if it’s the heater is not good enough.
On the positive side, appears I have the first signs of life. A small green “growth” which fans out and then collapses again. It was out and while I was taking pictures it collapsed and then 5 min later it was back. Sorry the picture below is not that clear.
