You are using an out of date browser. It may not display this or other websites correctly.
You should upgrade or use an alternative browser.
You should upgrade or use an alternative browser.
**Brian and Stacy's Reef Experience**
- Thread starter brikeibur
- Start date
brikeibur
Member
Nice Pics! The Tank Stand looks great! Can't wait to see how the doors turn out. I've got a corner tank and wanted to do something like that, but ended up doing a flat front. You can see pics in the thread in my signature. I did a dark stain and love it. Keep up the great work and keep those pics coming!
Thanks JG!!
Yeah, I am hoping for a nice dark black stain...but one that will still show some of the wood grain. I have several pieces of furniture like that, and I love it a lot better than just painting over it. So I will attempt it, hopefully I can get it dark enough. cnfzd:
....checked out your tank btw, great job! It looks awesome...loved the rock work too!!
brikeibur
Member
Wow! This tank has really taken off since I last looked. That stand and canopy came out awesome!
I must say, I love the mermaid your keeping under the stand also. That's a great picture!
Your doing great. The corals are wonderful. Subscribed!
Thanks Frankie!!!
That mermaid was having a pretty good time that afternoon! LOl!! :makefun:
I have to say, it doesn't seem like much when looking at your setup you got going on now days...
 It's amazing, so it really means a lot to hear you saying that!!!
Stacy
brikeibur
Member
I'm impressed with the little nano from Louisiana!
Impressive work on the stand and canopy. Looking forward to that reef coming to fruition!
I'm looking forward to it coming to fruition as well....
I have waited too long, and feel like I am now about to explode with excitement! I can't wait for it to be up and running!!

brikeibur
Member
Stand and Canopy Update!!
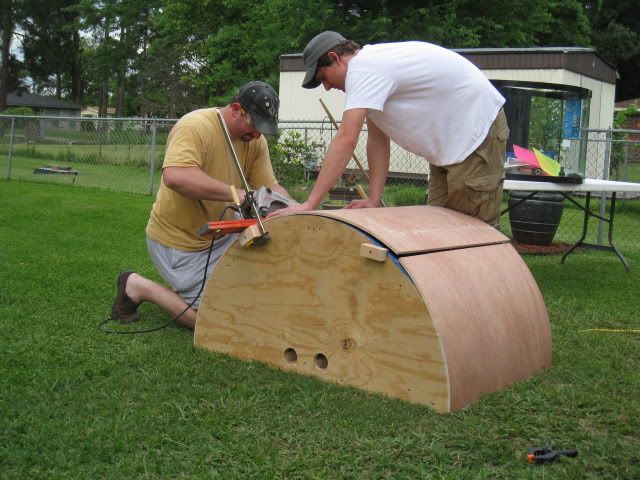
Ok all, so we got to do some work to our stand and canopy yesterday...so I got some pics for you guys!! :bigbounce
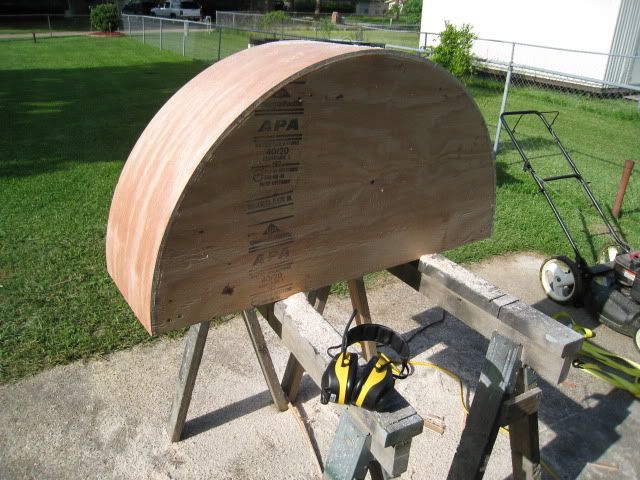
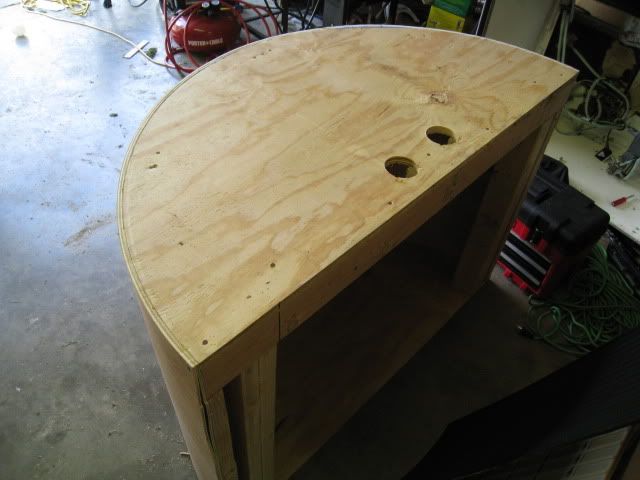
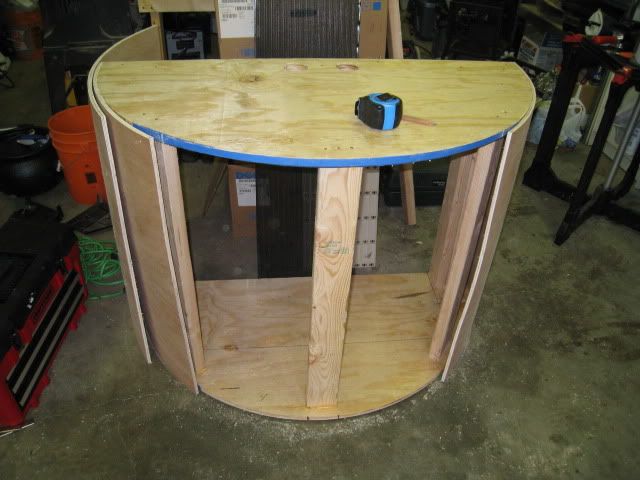
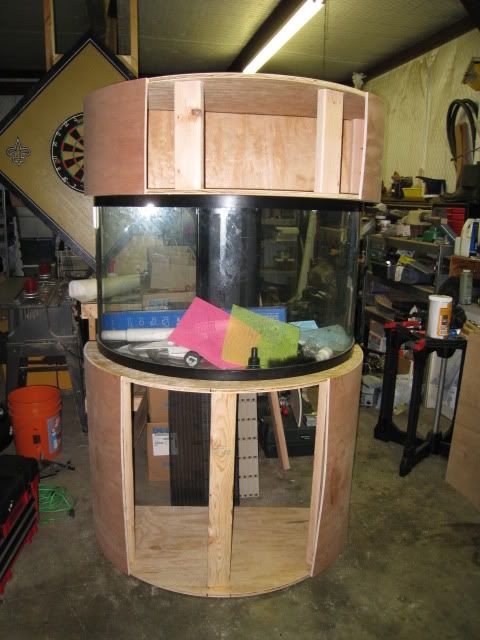
We constructed the frame for the canopy using more plywood and 2x4's.
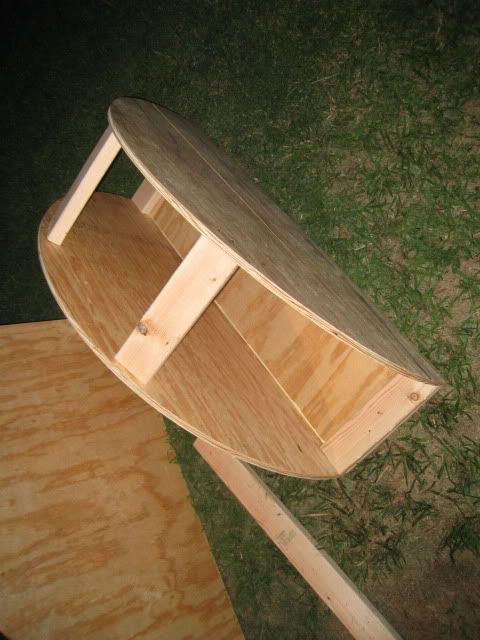
Here we are just checking it out on top of the tank and stand to make sure the overhangs are the same. Looks great to me!!
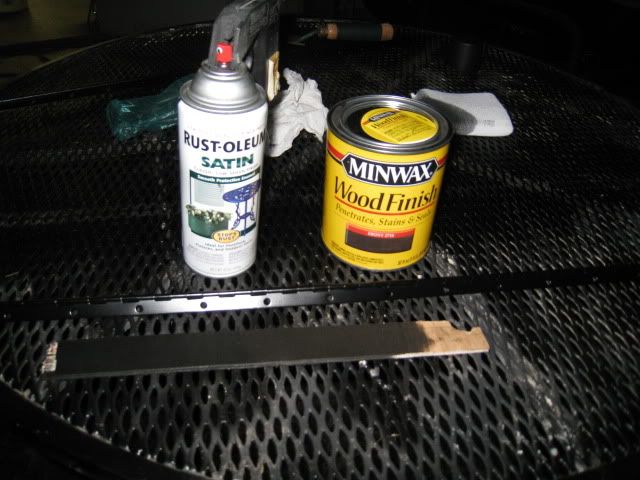
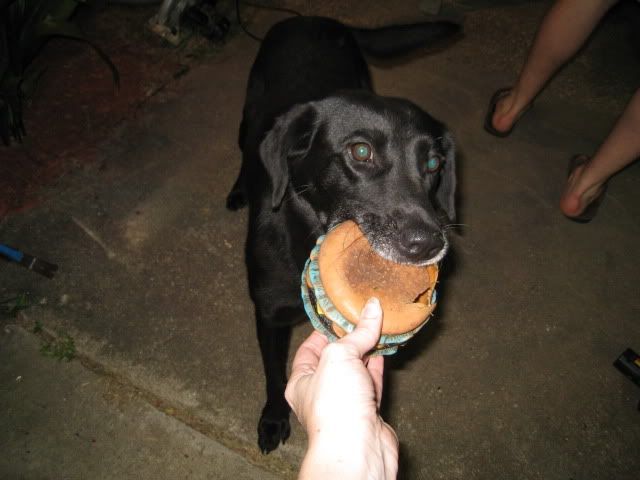
We picked up some 'ebony' stain so I could begin testing how many coats would be needed and if it looked ok. I also had to paint our hinges since Home Depot does not carry piano hinges in black... :rollingey I think it all turned out pretty good though. I liked my sample wood strip, although I think that I will have to paint a clear sealant over the entire thing after staining...UGH, lots more work to do!! Good thing I had Nola aka 'the Hamburglar' to keep me company! She is so funny....she is completely and utterly addicted to fetching...really, she needs therapy for it.
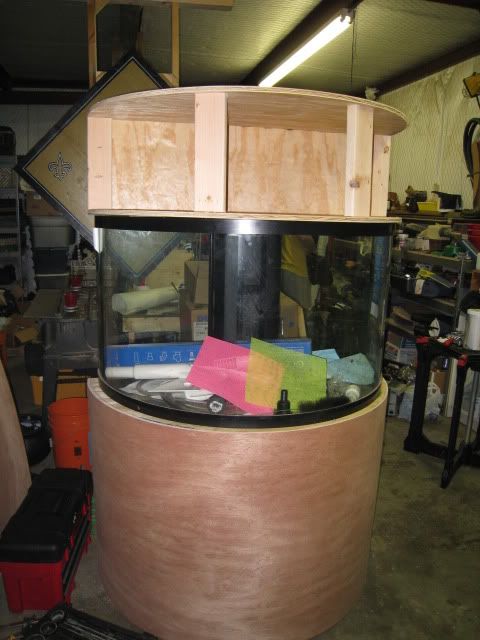
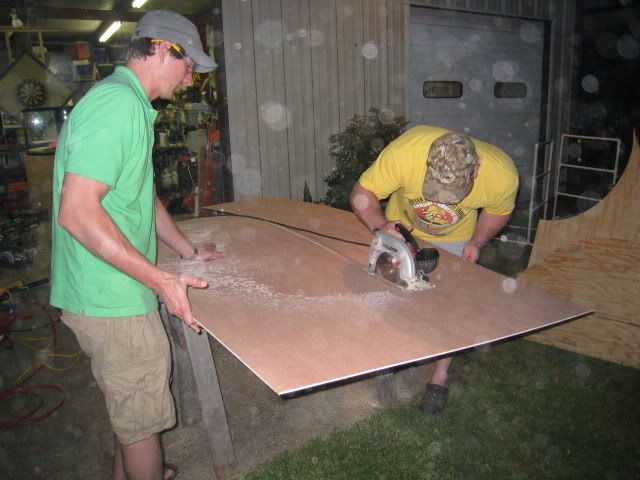
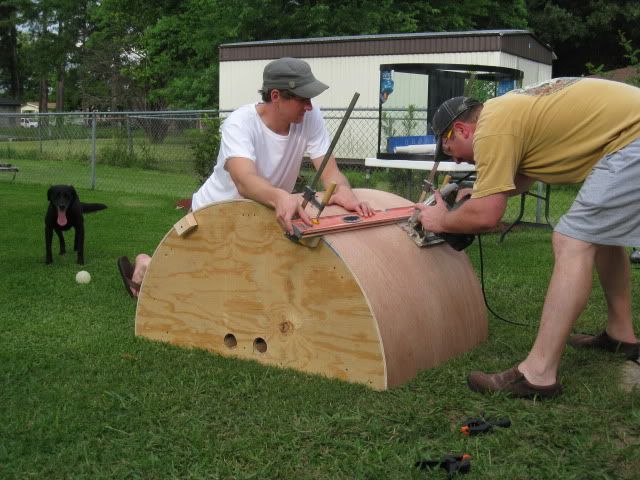
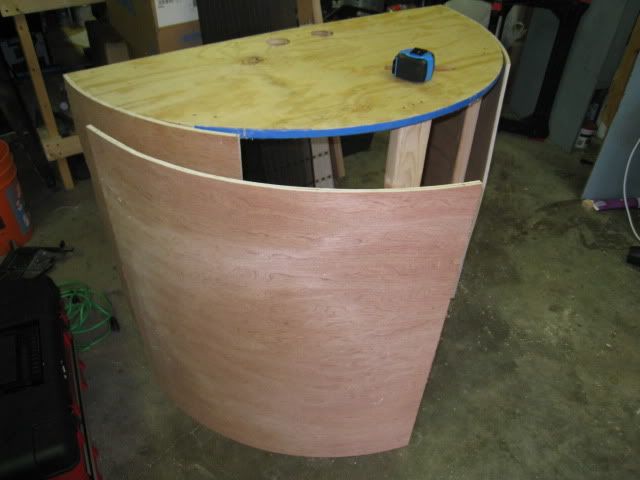
Next we cut out our strips of bendy board to wrap around the canopy and then another to glue over the top of that, in order to make it hold its shape and be more durable (I say we, but really it was the boys doing it while I supervised..hehee). Next, we carefully lined up the strip onto the frame, even though any overhangs will be evened out later...
Just look at the sawdust flying...it's like it's snowing!

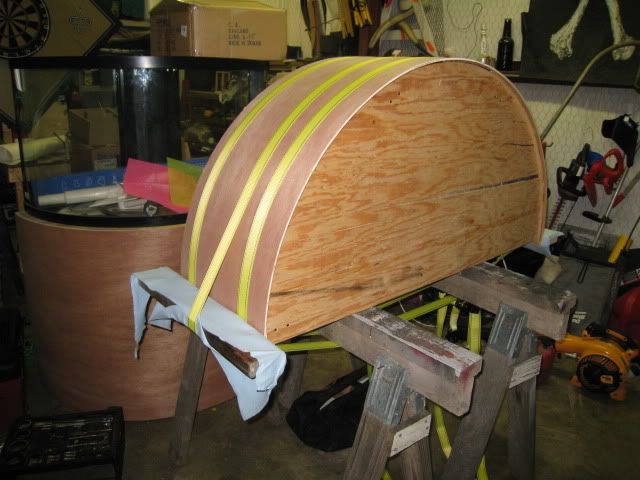
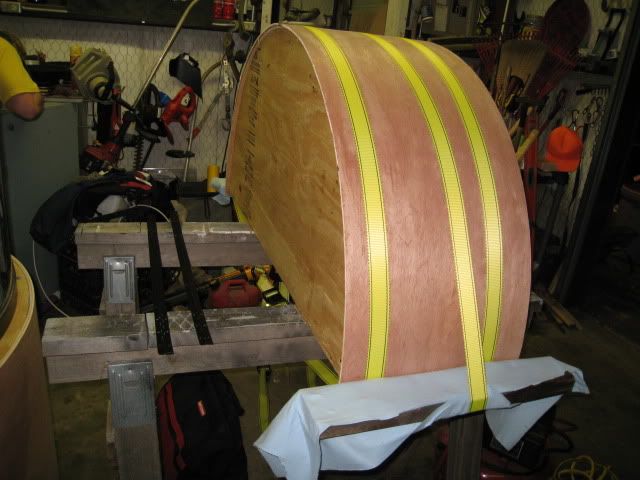
Finally, we put our tension straps on and let the glue do it's work! We put 2x4's along the base to add extra pressure there...we don't want peeling around the edges. Next, we set everything up to dry for a while. Just look how lovely my hinges turned out!
I think that today we are going to be cutting the doors on both the top and bottom! :tongue: I'm so excited!!
I'll be taking some more pics later on to keep you guys posted.
Hope you enjoyed!
Stacy
Ok all, so we got to do some work to our stand and canopy yesterday...so I got some pics for you guys!! :bigbounce
We constructed the frame for the canopy using more plywood and 2x4's.
Here we are just checking it out on top of the tank and stand to make sure the overhangs are the same. Looks great to me!!
We picked up some 'ebony' stain so I could begin testing how many coats would be needed and if it looked ok. I also had to paint our hinges since Home Depot does not carry piano hinges in black... :rollingey I think it all turned out pretty good though. I liked my sample wood strip, although I think that I will have to paint a clear sealant over the entire thing after staining...UGH, lots more work to do!! Good thing I had Nola aka 'the Hamburglar' to keep me company! She is so funny....she is completely and utterly addicted to fetching...really, she needs therapy for it.
Next we cut out our strips of bendy board to wrap around the canopy and then another to glue over the top of that, in order to make it hold its shape and be more durable (I say we, but really it was the boys doing it while I supervised..hehee). Next, we carefully lined up the strip onto the frame, even though any overhangs will be evened out later...
Just look at the sawdust flying...it's like it's snowing!
Finally, we put our tension straps on and let the glue do it's work! We put 2x4's along the base to add extra pressure there...we don't want peeling around the edges. Next, we set everything up to dry for a while. Just look how lovely my hinges turned out!
I think that today we are going to be cutting the doors on both the top and bottom! :tongue: I'm so excited!!
I'll be taking some more pics later on to keep you guys posted.
Hope you enjoyed!
Stacy
brikeibur
Member
Great Progress Pics! It is always nice to see how the work is done. You are going to love this tank with all the hard work you've put into just the set up!
Yeah!! LOL, we are already having to 'rethink' our living room so we can figure out where we are going to put this thing...it is just a tad bigger than the 24g nano!!

brikeibur
Member
I got another Stand and Canopy Update for you guys!!
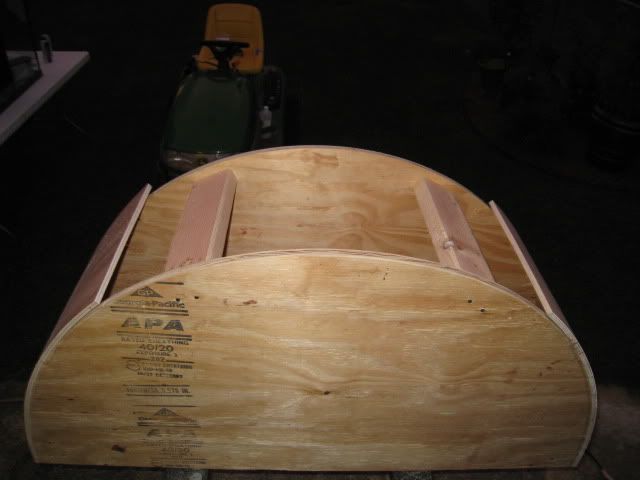
We removed the straps from the canopy, for the moment of truth....and the glue held well!!! :apimp:
Next we decided to cut out the door on the stand and test the if it will hold it's shape...
So, here we go....
We noticed that the back edge needs a few screws because we didn't quite get the glue thick enough there.... Not a big deal though, as long as the center section is glued well.
We clamped a 'straight edge' to the aquarium to make sure the doors were cut smoothly.
The first side went well, so repeat on the other side.
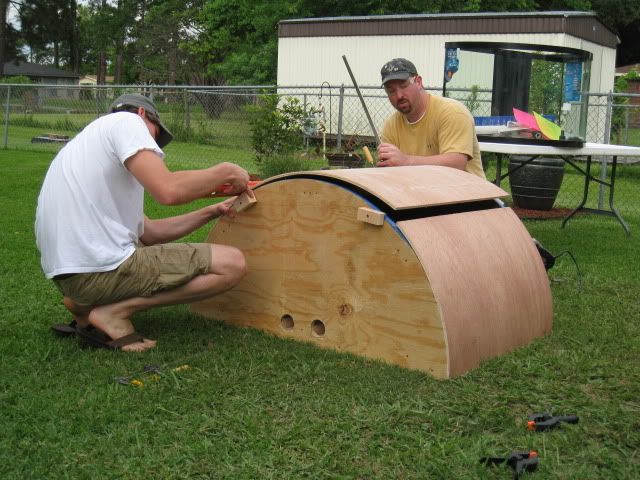
The cuts did good! The door also seemed to be keeping it's shape very well. Our next step will be to place some glue along any seams we see that aren't really tight and then install the piano hinges.
I will post more pics after our next work session!! I know it's a slow process, but at least it's process!!! Wohooo!!!
Later guys!!
We removed the straps from the canopy, for the moment of truth....and the glue held well!!! :apimp:
Next we decided to cut out the door on the stand and test the if it will hold it's shape...
So, here we go....
We noticed that the back edge needs a few screws because we didn't quite get the glue thick enough there.... Not a big deal though, as long as the center section is glued well.
We clamped a 'straight edge' to the aquarium to make sure the doors were cut smoothly.
The first side went well, so repeat on the other side.
The cuts did good! The door also seemed to be keeping it's shape very well. Our next step will be to place some glue along any seams we see that aren't really tight and then install the piano hinges.
I will post more pics after our next work session!! I know it's a slow process, but at least it's process!!! Wohooo!!!
Later guys!!
brikeibur
Member
Way to go! IT looks like you have it all figured out. That was pretty smart cutting the door out later. I am impressed
Thanks Frankie!!
As much as I would like to take credit for the idea, we got it from some cabinet plans I found online, and just beefed the idea up a bit, so it would work as a stand holding a ton of weight! LOL!
We still have to cut out the bottom of the canopy and install mounts for the lighting.
I ordered these last night...won them in an auction on ebay:
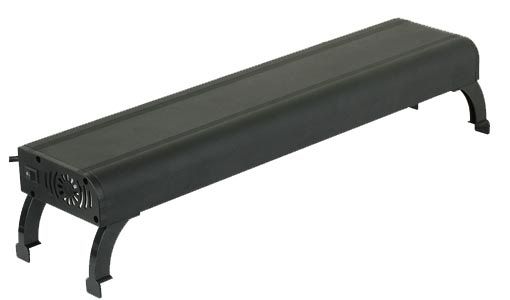

They are the 36" Nova Extreme T5HO Marine Lights. They come with one actinic blue lamp and one 10K daylight, which I will switch out for another blue. It is a brand-new refurbished light (sounds crazy I know). It had a defect so was never sold to anyone. It either came in with one of the bulbs busted or a part that was slightly damaged in shipping, so was repaired and sold as refurbished. We got it for $64 including shipping. I'm not sure if this is a good deal or not, but I thought so after paying $60 for my 24" Coralife Aqualight, which is a normal output dual bulb T5 strip.
These are the lights we already purchased, to use with our 24" and 36" dual T5's:
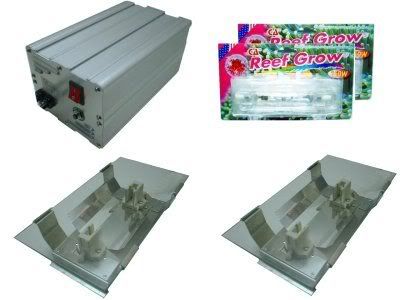
These are two retro fits, two 250w HQI's with 14K bulbs and a dual light ballast.
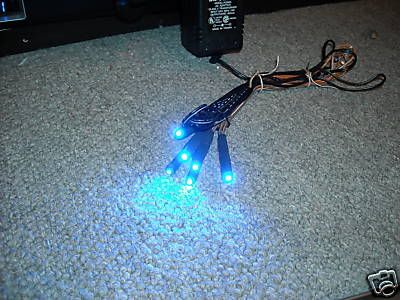
We ordered our moonlighting the other day. They are a 6-Light Wide-Angle Lens Moonlight System with 13,000MCD LEDs, with 170 degree wide angle lenses. I'm not sure if they are good or not, but the 'sample' photo looked pretty decent, hopefully it is accurate. Here are the lights and the sample photo they had so you can see what they are supposed to look like:
Our other recent purchase was a real small RO system that does 24g/day. We still have to work out some details on where to mount it and what to do for a holding tank, but we will figure it out soon enough.
h: 
Hopefully on Wednesday we will work on our stand/canopy some more and I can post you guys some new photos.
Thanks for reading, and if you have any input on lighting or anything else, feel free...we are always open to and happy to get any all advice and suggestions!!
:hallo:
Later!
Stacy
brikeibur
Member
Ok, so I played around in photoshop and did a quick little sketch of what I am hoping to have my lighting look like once it's set up in my hood.
The two large 'titled' yellow looking lights will be 250w 14K HQI's. In the front will be a 24" Coralife Aqualight with two actinic blue T5's and in the back will be a 36" Nova Extreme with two actinic blue T5HO's. The small round blue dots are my 13,000Mcd LED moonlights.

Let me know what you guys think!!
Thanks!
The two large 'titled' yellow looking lights will be 250w 14K HQI's. In the front will be a 24" Coralife Aqualight with two actinic blue T5's and in the back will be a 36" Nova Extreme with two actinic blue T5HO's. The small round blue dots are my 13,000Mcd LED moonlights.
Let me know what you guys think!!
Thanks!
brikeibur
Member
Ok, so we worked on the tank for just a bit last night, so I was able to get some more pics!
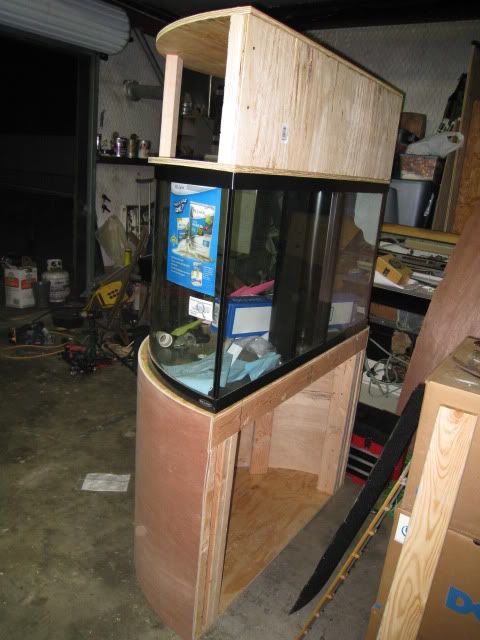
Here is the stand with the door cut. We are going to have to tack the sides of the stand near the door opening and apply a brace to the door (to keep them from bowing or losing shape).
Here is the canopy after cutting the door.
And here is all of it together so far:
I am concerned about my staining though. I really, really want to stain it over painting it, but I am going to have to put some wood putty over the screw holes, so I am concerned the putty is not going to stain the same. It says on the tube it is stainable, but we'll see. It is soooo different than the wood, I just don't know. I may have to end up painting it black...
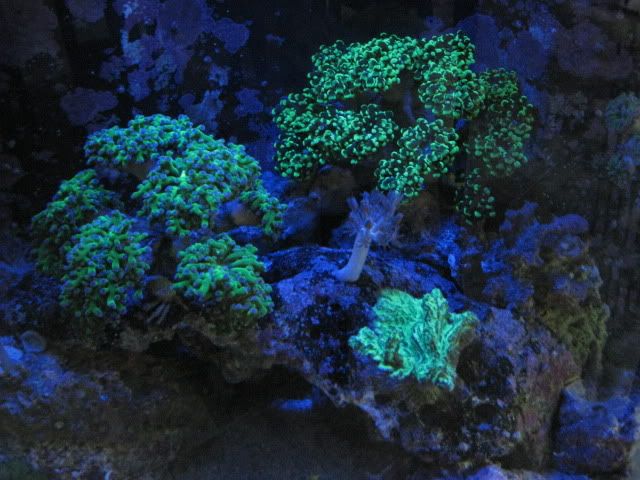
OH, and I almost forgot! Here is a pic of my new led moonlighting. We stuck it on top of the nano just to give us an idea, but I took this on my way out to work this morning, so the daylight is coming in, at night these lights are amazing. They really make the corals pop!
Thanks all...until next time!! :shades:
Stacy
Here is the stand with the door cut. We are going to have to tack the sides of the stand near the door opening and apply a brace to the door (to keep them from bowing or losing shape).
Here is the canopy after cutting the door.
And here is all of it together so far:
I am concerned about my staining though. I really, really want to stain it over painting it, but I am going to have to put some wood putty over the screw holes, so I am concerned the putty is not going to stain the same. It says on the tube it is stainable, but we'll see. It is soooo different than the wood, I just don't know. I may have to end up painting it black...
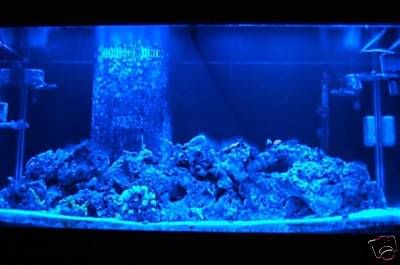
OH, and I almost forgot! Here is a pic of my new led moonlighting. We stuck it on top of the nano just to give us an idea, but I took this on my way out to work this morning, so the daylight is coming in, at night these lights are amazing. They really make the corals pop!
Thanks all...until next time!! :shades:
Stacy
jgking21
Member
Nice! My father used wood putty on my stand and the stain worked over it. He used a Nail Gun, so we were only cover small nail heads. The stain doesn't go over and hide them, but really not noticable when finished. I actually had to get about a foot away to really look at them. Doesn't look like you have many, so I think it will look fine!
Lighting set up looks nice, just make sure you have a way for the hood to breathe, the M/H will get hot! I've been raising mine slowly, tring to keep the tanks temp down.
Lighting set up looks nice, just make sure you have a way for the hood to breathe, the M/H will get hot! I've been raising mine slowly, tring to keep the tanks temp down.
brikeibur
Member
Thanks JgKing!!
We still have to cut out the bottom of the canopy, right now it's completely enclosed except for the door we just cut. We definitely don't want to scorch our fishies.... soooo, we are going to install these:
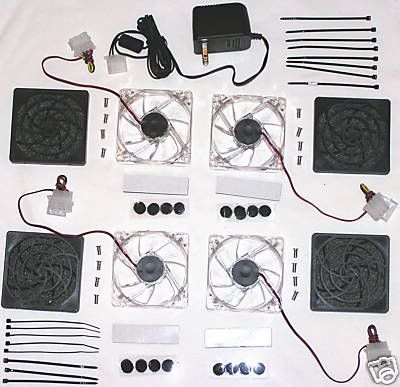
We plan to have two on each side...one set pushing air in and one pulling it out. Do you think that sounds sufficient?
Thanks!!
We still have to cut out the bottom of the canopy, right now it's completely enclosed except for the door we just cut. We definitely don't want to scorch our fishies....
soooo, we are going to install these:
We plan to have two on each side...one set pushing air in and one pulling it out. Do you think that sounds sufficient?
Thanks!!
brikeibur
Member
Awwww...thanks! :
We are going to cut the holes for the four fans, and then have another hole or two (fairly large) to run cords out of. I thought about having a large hole in the back, my only concern is about the light spilling out onto the wall behind the tank. I wanted it to only be seen IN the tank..LOL. So, we were trying to minimize the light by not having it completely open.
Do you guys think this is a bad idea? I definitely will choose some light on a wall over baking my corals/fish. Perhaps we can just see how hot it gets with the back attached and cut more out if needed.
 Here's another question though.... We have our RO set up and going, but my question is how long will RO water keep before it should be replaced. I know you shouldn't hang on to salt water for too long, so is fresh the same? I am just trying to work out how we are going to do our RO set up. I wanted to get a 50g tank or container to hold the water, so we would have it for top off and to mix with salt for our water changes, but I won't get one that large if it has to be used in a week or so or it goes bad....
Thanks all!!!
We are going to cut the holes for the four fans, and then have another hole or two (fairly large) to run cords out of. I thought about having a large hole in the back, my only concern is about the light spilling out onto the wall behind the tank. I wanted it to only be seen IN the tank..LOL. So, we were trying to minimize the light by not having it completely open.
Do you guys think this is a bad idea? I definitely will choose some light on a wall over baking my corals/fish. Perhaps we can just see how hot it gets with the back attached and cut more out if needed.
Here's another question though.... We have our RO set up and going, but my question is how long will RO water keep before it should be replaced. I know you shouldn't hang on to salt water for too long, so is fresh the same? I am just trying to work out how we are going to do our RO set up. I wanted to get a 50g tank or container to hold the water, so we would have it for top off and to mix with salt for our water changes, but I won't get one that large if it has to be used in a week or so or it goes bad....Thanks all!!!
astiesi
Member
Stand and canopy are looking great, this tank is gonna look incredible when you get it done.
I wouldn't worry too much about the wood putty and stain, the putty will take the stain a bit differently but with a dark enough color you shouldn't be able to notice it. Give it a try on some scrap before you decide to go and paint the stand...stain always looks better IMO.
I wouldn't worry too much about the wood putty and stain, the putty will take the stain a bit differently but with a dark enough color you shouldn't be able to notice it. Give it a try on some scrap before you decide to go and paint the stand...stain always looks better IMO.
brikeibur
Member
Stand and canopy are looking great, this tank is gonna look incredible when you get it done.
I wouldn't worry too much about the wood putty and stain, the putty will take the stain a bit differently but with a dark enough color you shouldn't be able to notice it. Give it a try on some scrap before you decide to go and paint the stand...stain always looks better IMO.
I sure hope it does, especially after all the work we have put in...LOL.
I completely agree with you also...I really prefer the look of stain over painting. I want to be able to see the wood grain still. We will think of something and make it work... I don't know what yet, but something...

Thanks!!!
brikeibur
Member
Ok, so I have a question....
We had a 2 head torch coral, it started out somewhat small and then became pretty full in a 6g nano. After quite a while though it started to look bad, and one head of the coral died.
At this point we brought it home and put it in our 24g tank, where we have 2 huge frogspawns (started out small and are now doing great - have grown by like 10+ heads each), and two torches (are a little different than the one we added, but torches none the less).
At first the torch was retracted most of the time, but slowly started to expand, never full, but it did expand and stretch out some. At this point I got placed a magnetic frag rack in the tank to add some new frags that I recently purchased. To give the new torch more room to expand, I placed in the rack (which now made it closer to the light - but we recently had a 70w HQI which is messed up and we replaced it with a 24" coralife dual bulb t5 fixture (two normal output bulbs, one 10k and one actinic blue)). I figured moving the torch closer to the top wouldn't hurt since the lighting was not as intense, since there was no longer an HQI above it.
The torch didn't do very well there. It shrunk up and didn't want to ever expand....so... I moved it back to the bottom of the tank. I just moved it yesterday, and when I did I noticed a white sponge-like appearance in part of the skeleton where the head of the torch was. The sponge was on one side of the skeletal head and the shrived up coral was on the other. I do not know if this was some sort of sponge, growth, dying torch or what. I figured I would watch it here and see if it did better. Today I noticed a hermit crab digging in the skeletal head of the torch, the coral itself looked even more shrunken than previously. I figured this was just because the crab was annoying it. Later on I noticed two crabs digging in the same spot on the torch. I was like...OK, either they are eating the coral, or there is some type of growth around it and they are eating that. We came back home tonight and guess what....a crab is STILL in the coral, digging. I was finally able to see inside the 'skeletal head' and the coral is gone. It had appeared even more shrunken previously, but now it is completely gone....WTH!!!
So, my question is.....Do hermit crabs eat torch corals??? Did they eat it because it was sick or had some type of 'growth' on it? I just don't understand as they have never messed with my other torches and are supposed to be 'reef-safe'. I know they can be nuisances by moving corals and knocking stuff over, but will they actually eat your corals?
I am not sure what kind of hermits we have. They are just your average small hermits with brown legs and red antennas. Has anyone else had this happen? I just am shocked and if they are 'eating my corals' then I want them out, and I will just buy some dern snails to replace them. I have snails already, but these guys really help keep the hair algae out of the tank, so I like to keep them around.
Anyway, sorry for the long post...I just wanted to find out if anyone else has ran into this before.
Thanks!!