A simple sump with one bubble trap.

Hello all.
I hope this post finds you well.

Someone asked me me how to make a sump.

This is by no means an original plan for a sump. I'm afraid it escapes me who's it is exactly, Melev probably from his website melevsreef.com
(Thanks Melev.) His stuff is acrylic the concept is the same.

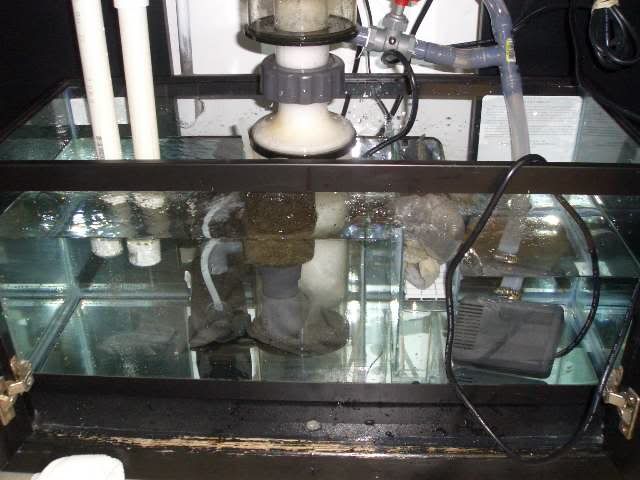
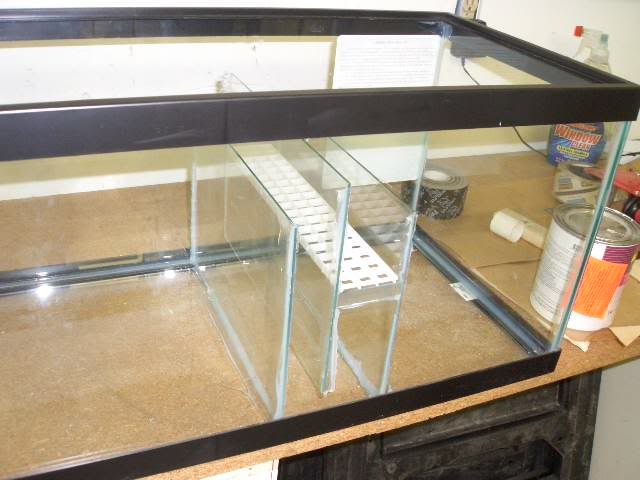
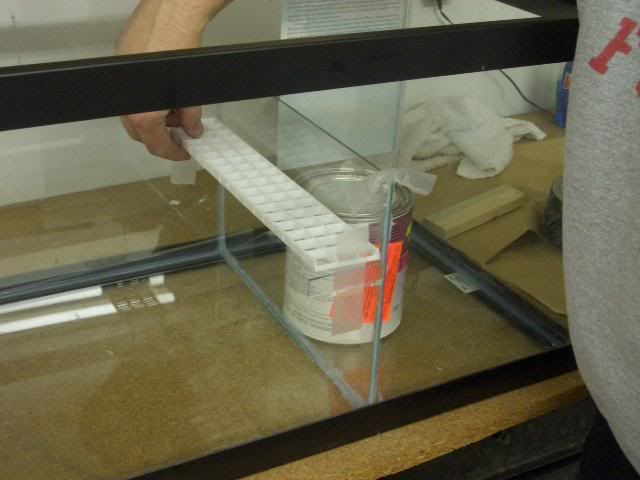
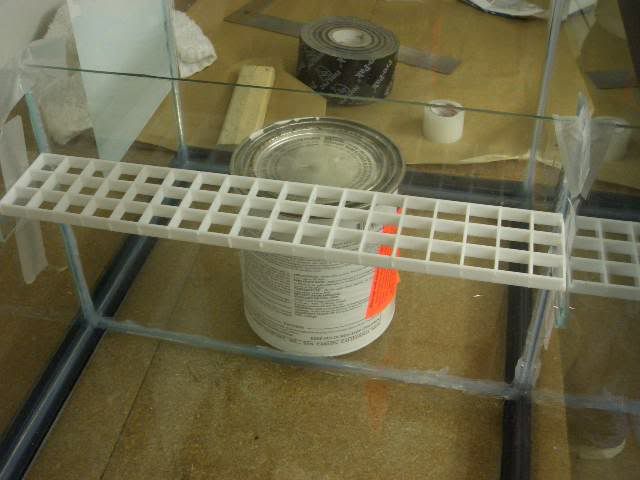
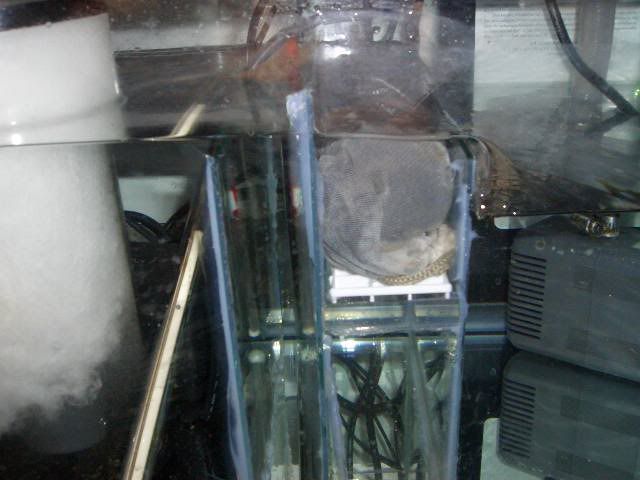
There are two features to this sump. One is a bubble trap and the other is a carbon bag basket.

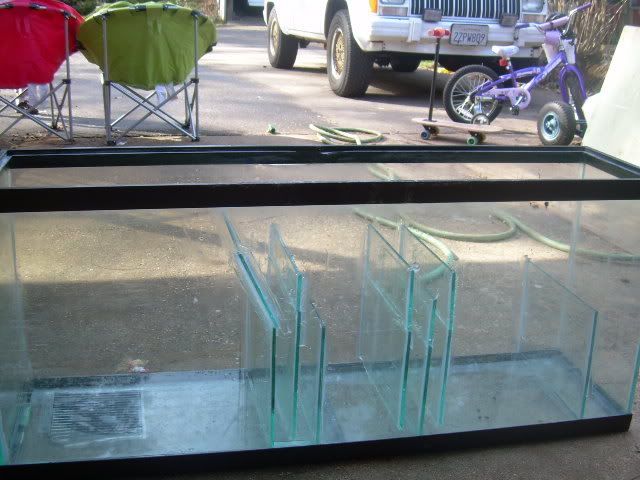
The build starts with a ten or twenty gallon tank.

CIMG0480.jpg


Here's a ten gallon but later I'll switch to a twenty gallon tank for my larger system.

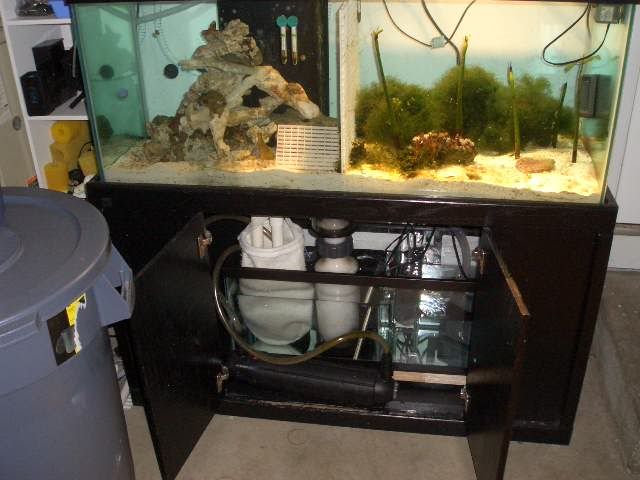
The size of the sump depends on space available and the size of the equipment you want to put in it.

There are two rules.
You will never have enough space for the sump you want.
You will always have more equipment than your sump can handle.
Deal with it.
 
Measure the inside of your tank from front to back. This number = x

Now figure out how deep you want the main chamber to be.
My Euroreef skimmer needs between 6 and 8 inches of water so I decided on 8 inches.

Now go to OSH or other hardware store not named Home Depot and ask someone to cut you three pieces of glass with the dimensions x x 8 (or other number you've decided.

Remember that when your power goes off some volume of water will drain into your sump. You want enough empty sump tank to hold this amount comfortably to avoid a flood. If you make the main sump too deep there will not be enough room for back flow into the sump when the pump goes down.

If you make the sump too shallow, you are missing out on the benifits of added water volume that makes your sytem more stable.

Now you have three pieces of glass.

You should gently sand the sides of the glass that you may come in contact with during maintanence. This is the tops of all three pieces and the bottom of one (the middle one).

Here's a pic of my 20 gallon sump. It is a common sump to two tanks.

CIMG1298.jpg
 
Here's the sump showing the bubble trap.

CIMG1296.jpg


A bubble trap is simply three pieces of glass.

All three pieces are the same size.

The first piece goes all the way to the bottom.

The second piece stops an inch from the bottom.

The third piece goes all the way to the bottom.

The water has to go over the first piece, under the second then back over the third. Bubbles have a hard time doing this except for micro bubbles which can go anywhere.
 
So how do you actually install the glass?

Not easily I'm afraid.

Here patience, planning, and cursing will help you but not much.

You need enough space in the last chamber or pump chamber to fit your pump in of course. The water level in your tank will fluctuate here first.

The water level in your tank is controlled by your overflow highth so it's constant. The water level in the main part of the sump is determined by the level of the first piece of glass so it's constant too.

The pump chamber has the variables of the pump and the water that feeds it so any evaporation will show up here first. The larger this area is the longer time you can go without putting water in. The smaller the area is the more frequently you will have to put water in and this will keep your parameters more stable.

In the end I decided on about 8 inches for this area. You can choose more or less.

If you are going to put an automatic top off system in, this is where it will go.

Here I'm using GE silcone I and a paint can to put a piece of glass in.

CIMG1276.jpg


I used some small slivers of glass to act as a shelf for the carbon bag. Here you see the shelf taped in place.

I found the carbon bag should sit more toward the bottom than I made it here.
 
Here I'm testing the shelf for fit.

The shelf is a piece of eggcrate. Eggcrate is sold in the lighting department. It usually covers flourescent light fixtures.

CIMG1277.jpg
 
In my last build I placed the shelf in the first leg of the bubble trap instead of the second. I dont think it matters where you put it but it should definately be lower than this.

CIMG1310.jpg
 
This is a sump so it's not for growing stuff in.
The ER skimmer would suck up macro algae and choke.

If you want a refugium you will have to wall off the skimmer in a third compartment.

Here's the whole thing. The big tank is actually a refugium. The display tank is inside the house behind this tank. This is the garage.

CIMG1314.jpg
 

zimboy

Member
The pump chamber has the variables of the pump and the water that feeds it so any evaporation will show up here first. The larger this area is the longer time you can go without putting water in. The smaller the area is the more frequently you will have to put water in and this will keep your parameters more stable.

so the return area for your pump should be as small as possible? I'm designing a sump/fuge and wanted to maximise space in the fuge, if you do have a small return area, will your heaters be able to cope with keeping the water heated as it will have a quicker turn over time?
thx for your answers
 

BigAl07

Administrator
RS STAFF
Excellent work Again my friend! You don't do it HALF way that's for sure! So when are you coming over to NC to start working on My system? :)

Allen
 
so the return area for your pump should be as small as possible? I'm designing a sump/fuge and wanted to maximise space in the fuge, if you do have a small return area, will your heaters be able to cope with keeping the water heated as it will have a quicker turn over time?
thx for your answers

Thanks for your reply, Zimboy.

I think you would want the heater in the fuge part or the skimmer part. Anyways, somewhere that does not get empty if you forget to put water in and the system goes dry. The heater does not care how fast water moves past it. It will heat the faster moving water all the same as long as it's enough heater for the VOLUME.
 

kinghokus420

Active Member
heres the sump/fuge i made this weekend. left is the fuge about 14g
the middle is the return. and the right is the inlet/skimmer. the glass was super cheap(free) and i cut it myself. hope this helps anyone. i do like the carbon shelf and plan on adding one to this setup before i plumb it in. total cost 5.47$
DSCN1002.jpg
 
EmergencyDpt & kinghokus420 nice looking sumps! I plan on building an sump from an 29G I have. Just wanted to know for the baffels Is that glass or plexiglass or acrylic? 1 more thing where did you get the glass from? Thanks
 
heres the sump/fuge i made this weekend. left is the fuge about 14g
the middle is the return. and the right is the inlet/skimmer. the glass was super cheap(free) and i cut it myself. hope this helps anyone. i do like the carbon shelf and plan on adding one to this setup before i plumb it in. total cost 5.47$
DSCN1002.jpg
Good job on cutting the glass. I bought a glass cutter and quickly ruined several pieces of glass. It was easier to have OSH cut it for me. Hats off to you my friend.
 
EmergencyDpt & kinghokus420 nice looking sumps! I plan on building an sump from an 29G I have. Just wanted to know for the baffels Is that glass or plexiglass or acrylic? 1 more thing where did you get the glass from? Thanks

Glass for a glass tank, acrylic for acrylic.
Acrylic expands and is not thermally inert as glass is. Putting an acrylic baffle in would beg for it to expand and break the glass.
 

kinghokus420

Active Member
the glass was actually shelves from the bar at the mexican restaurant my wife manages. they couldnt support all of the tequila bottles (about 30 kinds:apint:) so they just gave me them. i just bought a el cheapo glass cutter at ace. 3.99$ i think. one score on one side and then i just broke it on the edge of my workbench. it fractures perfectly along the score mark. i only used the heavy ball end on smaller pieces and yeah i screwed up more than one. if you look close each baffle is 2 pieces. the shelves were only 8 or so inches wide and the baffles are around 11.that night(while the wife was working) i set a kiddie table in front of the couch and with my pile of glass pieces, frothy beverages, a tube of cheapo silicone, and a 45 gallon tank, i went to town. took about 2 hrs and about 4 beers.
 
Top