planning phase of a new 180 tank ???

cracker

Well-Known Member
So I got some cardboard today I think I have enough room.

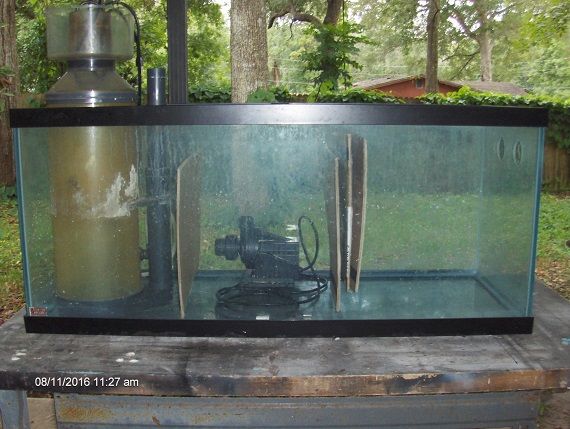
I have just a wall between the skimmer and return section. I'll be using a herbie /bean type overflow so expect very little bubbles. If I can get away with just a wall between the ref and return that's a couple more inches. I'm concerned about debris(chaeto) getting into the return section. maybe some type of screen. After all I can't see a 3 panel baffle keeping debris out of the return section anyway. If I keep the drop from the ref to return I can avoid many bubbles. Think it's doable ?
So I have 15 inches for the skim section return 14 and refugium 15 "or 16 " depending on baffles. Thes are close but still rough dimensions.
 

cracker

Well-Known Member
Good Evening Folks, Hope everybody had a good weekend, After reading Paul B's post some had weekends more exciting than others !
Anyway I siliconed in the "walls" no baffles. I can if I absolutely have to. Skimmer is 15 1/4 return 14 1/2 refugium 16 3/4 all 17 wide. That's plenty of room even for me. I got a couple of bulkheads for the holes on the ref side. I can cap them off or add another tank in the future. I can imagine all kinds of cool specialty tanks but have enough going already. The skimmer section is big enough for this old ASM skimmer I have. I can't imagine a newer better designed skimmer would have a larger foot print. the center brace runs right down the middle of the return section and kinda conflicts with the return pipe but can be worked with. I want to encase the back corner of the refugium with something like a corner overflow with the bottom cut out. this way water entering the ref will flow out at the bottom creating an
upwell instead of water just flowing across the top. Any op's on this?
This project is moving a lot faster than I expected. I have all my old rock cooking in barrels since July 4th.
I strongly suspect this "old" rock was a source of my probs last round. I have a little over 100lbs of really nice Haitian lettuce coral rock that I find very difficult to part with. I want to cook this stuff for a long time ! How long do You think I should cook it? I have some but not a lot of mulm coming off this stuff. there is no stink to it just an ocean smell. Also just a few sad looking bubble algae . I've read a couple of months up to 3 or more months! I'd think after there is no more stuff coming off it. Also I could test this water for phosphates. That sounds like a good idea to me.This is going to hold up the project so please send me some patience as I'm losing what I have !
 
Last edited:

cracker

Well-Known Member
As for the stand ,it's only 6 inches taller than the last one. I built it taller because the old tank was 30"tall.this 180 is 24 . I just made the stand taller so I could still walk up and look into the tank. I can't tell if it's too tall with out setting the new tank on it. So tomorrow I think I will pay a deposit on the 180. I might could get it by Friday ! I think I'll put some differing sized cardboard boxs/fake Lr in there to see how it will look. If it's too tall, I can easily dismantle and shorten the legs. while it's there,I will put the sump in position and get a good look at where to place the overflow.Then the tank goes outside for drilling. That's a lot to do !
I haven't even thought about the plumbing Yet ! That is something I want to get just right.
 

cracker

Well-Known Member
Good evening Folks, I had to burn some time while I wait for the tank so today I played electrician. I installed a 20 amp gfi breaker in the main box. I had to pay the 13yr old neighbor to do the attic work. I'm far too fat and unpliable for that sort of work anymore. it ends in a 4 plug box mounted high in the fish room. No worries folks. My neighbor is a retired Navy electrician. He oversees my work . This guy is a good friend he has taught me a lot about the sparks !

I can run the lighting ,the controller for the power heads and a pump for the mixing barrel. I changed out the receptacles. They were pretty beat up from yanking out power chords and salt stuff . The stand doesn't want to sit nice and flat. I think once it has a little weight, it will sit flat. We shall see. I'm running out of stuff to do until Saturday when I pickup the tank ! Thanks again for following please feel free to give Op's or suggestions.
Oh Ya what do You think would make good shims for the stand. I'm sureI'll need some to for a final leveling of the corners. I used cedar shims last round they were still intact when I removed the old stand.
 
Last edited:

cracker

Well-Known Member
good idea stir. For real thin shims I have used old gift cards, stacked.
Folks I'm so anxious, I was actually trying to get my old door bell to work !
Believe me, it's a PITA when You don't have anyone to push the button for You . :tantrum:
 

Oxylebius

Well-Known Member
As for the stand ,it's only 6 inches taller than the last one. I built it taller because the old tank was 30"tall.this 180 is 24 . I just made the stand taller so I could still walk up and look into the tank.

It is so much better to just walk up to it to look in... but cleaning becomes a new hassle. You can stand on a chair.
 

cracker

Well-Known Member
No way Stir! All this new technology is going to bring the entire human civilization to a ruinous end !:ofr:
Not to mention a big headache trying to figure it out !
As for the stand, I feel the ladder work is worth the curb appeal. Just now I tested the rock cooking barrels for trates. Both were around 10. I have to get both No3 and Po4 to zero. I get a new po4 kit tomorrow when I pick up my new 180 tank !:celebrate:
 

Blue Space

Well-Known Member
Do you really think the stand is too tall? Are you thinking of anchoring the stand to the wall just in case?
 

cracker

Well-Known Member
Hello Blue space, I really won't know until I set the tank on it and get a good visual. The stand will be set length wise across the room the 2 ends will be attached to studs in the walls for added stability. It will look similar to this.
 

cracker

Well-Known Member
So I got the tank today ! I think the height is perfect. Now I need to figure where the sump and overflow will go in relation with each other. I have issues with the top braces and the upright braces in the stand

I'll have some more a little later.
 

cracker

Well-Known Member
I setup a dry fit for the return today. I used 1 inch instead or 1 1/4 pipe. There will be a conflict with placing the overflow in the center. I can move the sump a bit or place the overflow a little left . If I move the overflow the drains can drop straight down into the sump. But the lid on the overflow will be right under one of the top braces. Also I want to add another tee and valve to feed a low flow reactor like carbon or such. I mine as well seeing how I have killed the flow with all these fitting ! Looks Like You low turnover rate people will get your way. I A scrubber or bio pellets will need another pump. I will wait until I get the overflow box plumbed before making a decision. :ponder2:
 

cracker

Well-Known Member
Evening , I'm going to have to offset the overflow to the left for straight drops to the skim section. Also I will need to put a dog leg of sorts on the drains to go around the horizontal part of the return line.
Now, I'm waiting on a gate valve so plumbing is on hold. Also this rock i'm cooking is gonna take a while. So while I'm twiddling my thumbs ,I was thinking about how to lift the base rock off the SB. I thought I could make some manmade liverock. I think it's called "agrocrete" portland cement and argonite sand. I could build some rounded custom slabs about 2 inches thick. In a while, it will turn into liverock.
That will require some research !
 

cracker

Well-Known Member
Good morning I understand that the agrocrete rock requires a very long cure and soak time to rid it of ph issues. Maybe months ! Any suggestions? Have a Great Day ! :)
 

cracker

Well-Known Member
Hello, I have been checking out diy Lr today. Lot's of info and how to's out there. I did get a general consensus on the steps. Most of it is about making attractive larger rock. I just want a custom 2 or 3 inch thick cement patio stone ! Here is what I want to do , Make a frame of sorts round the edges etc. place wax paper or saran wrap maybe on the bottom. put about 3 inches of the mix in there. I want the bottom flat. then put my really big base pieces on top pressing it down a little. the weight of the rock will probably be enough.This will make an indentation of the rock. I can set it down in such a way to make it sit just how " I " want it to not how the rock wants to. let the mix setup and cure per the directions. this way I have a solid molded pedestal for the base rock to sit . There is always a catch however.
The cure times can be quite long, week if not months. You need to let the stones cure in air for 28 days maybe ? Then it goes into a barrel with fresh water for an undetermined time to leach out high ph. This is only based on what I read . I have no idea or experience . I heard a little on this from Paul B. He's made rock so I'm interested in what his take is. I'm hoping since my rock will be relatively thin the leaching won't take so long. How dense the rock will affect cure times. I'm having a hard time with patience !
Ok I'm done rambling . What do You think of my plan?
 
Top